1. Welcome to FileWorks
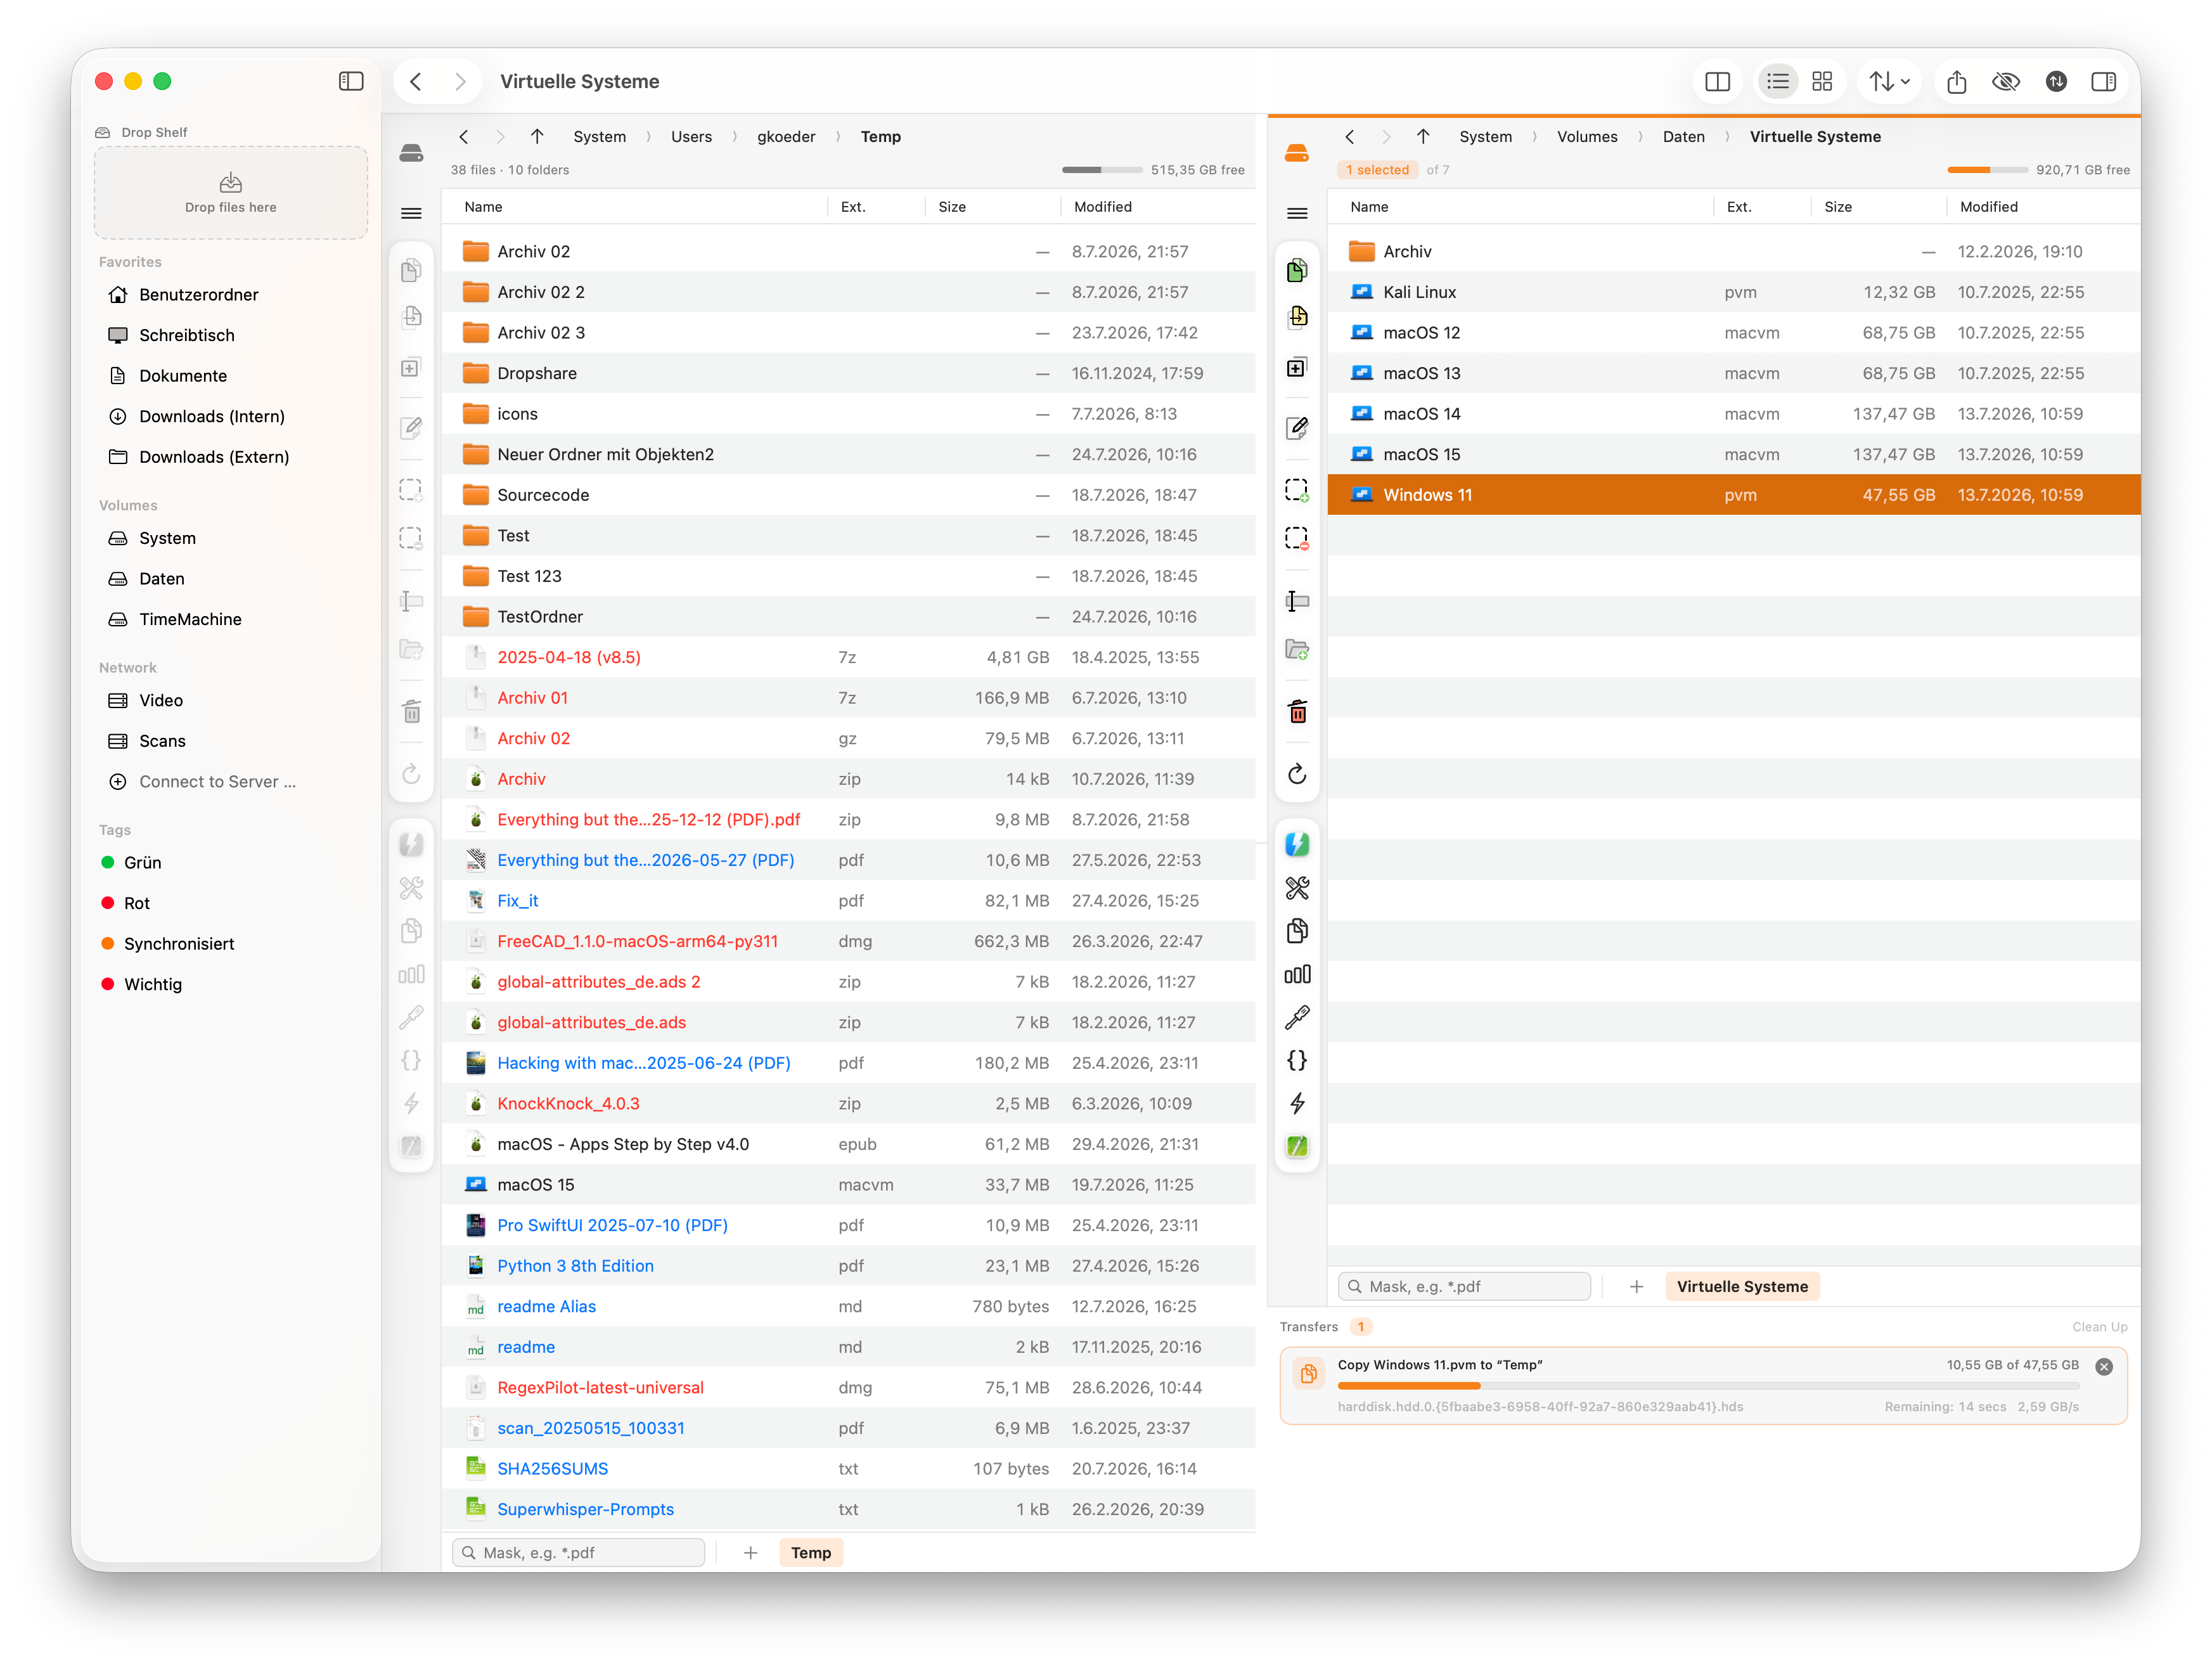
FileWorks is a fast, lean dual-pane file manager for macOS, in the tradition of classic "commander" applications. It shows two folders side by side: one panel is the source, the other is the destination. This makes it quick to copy, move and compare files.
At the same time, FileWorks remains at home on the Mac. It uses the system’s Quick Look, Finder icons, Finder comments and Finder tags, so it feels familiar from the outset.
FileWorks complements Finder with a transfer queue, browsable archives, batch renaming, colour rules, selection by pattern, custom tools, new files from your own templates and full keyboard control.
Would you rather work with a single folder? Hide the second panel at any time (⌥ + ⌘ + 2). FileWorks becomes a tidy single-pane manager without losing any features.
| Term | What it means |
|---|---|
|
Panel |
One of the two file lists. Each panel works on its own and has its own tabs. |
|
Active panel |
The panel you last clicked in. A coloured bar along the top shows which one it is. Almost every command acts on the active panel; "the other panel" is the target for copying and moving. |
|
Tab |
A folder open inside a panel. Each panel keeps as many tabs open as you like; they sit in a bar along the bottom edge. |
|
Queue |
The list of running and pending jobs. It appears at the bottom of the panel and shows progress, speed and errors. |
|
Drop Shelf |
A small collecting area at the top of the sidebar, where you can park files from different folders. |
1.1. Quick Start: Copying and Moving Files
Your first transfer takes just four steps:
-
Open the folder containing the files in the left panel and the destination folder in the right panel.
-
Select the files. To build a set that remains intact while you navigate, mark the files with ⇧ + Space.
-
Press F5 to copy or F6 to move them.
-
If an item with the same name already exists at the destination, choose the appropriate action in the conflict dialog. The transfer queue shows the progress.
When the job finishes, the files are in the destination folder. When moving files, FileWorks removes the originals only after the copies have arrived safely.
| In single-pane mode, FileWorks asks you to choose the destination folder. See Single-Pane Mode to learn how to switch between single- and dual-pane mode. |
|
About other apps mentioned in this manual |
2. The Main Window
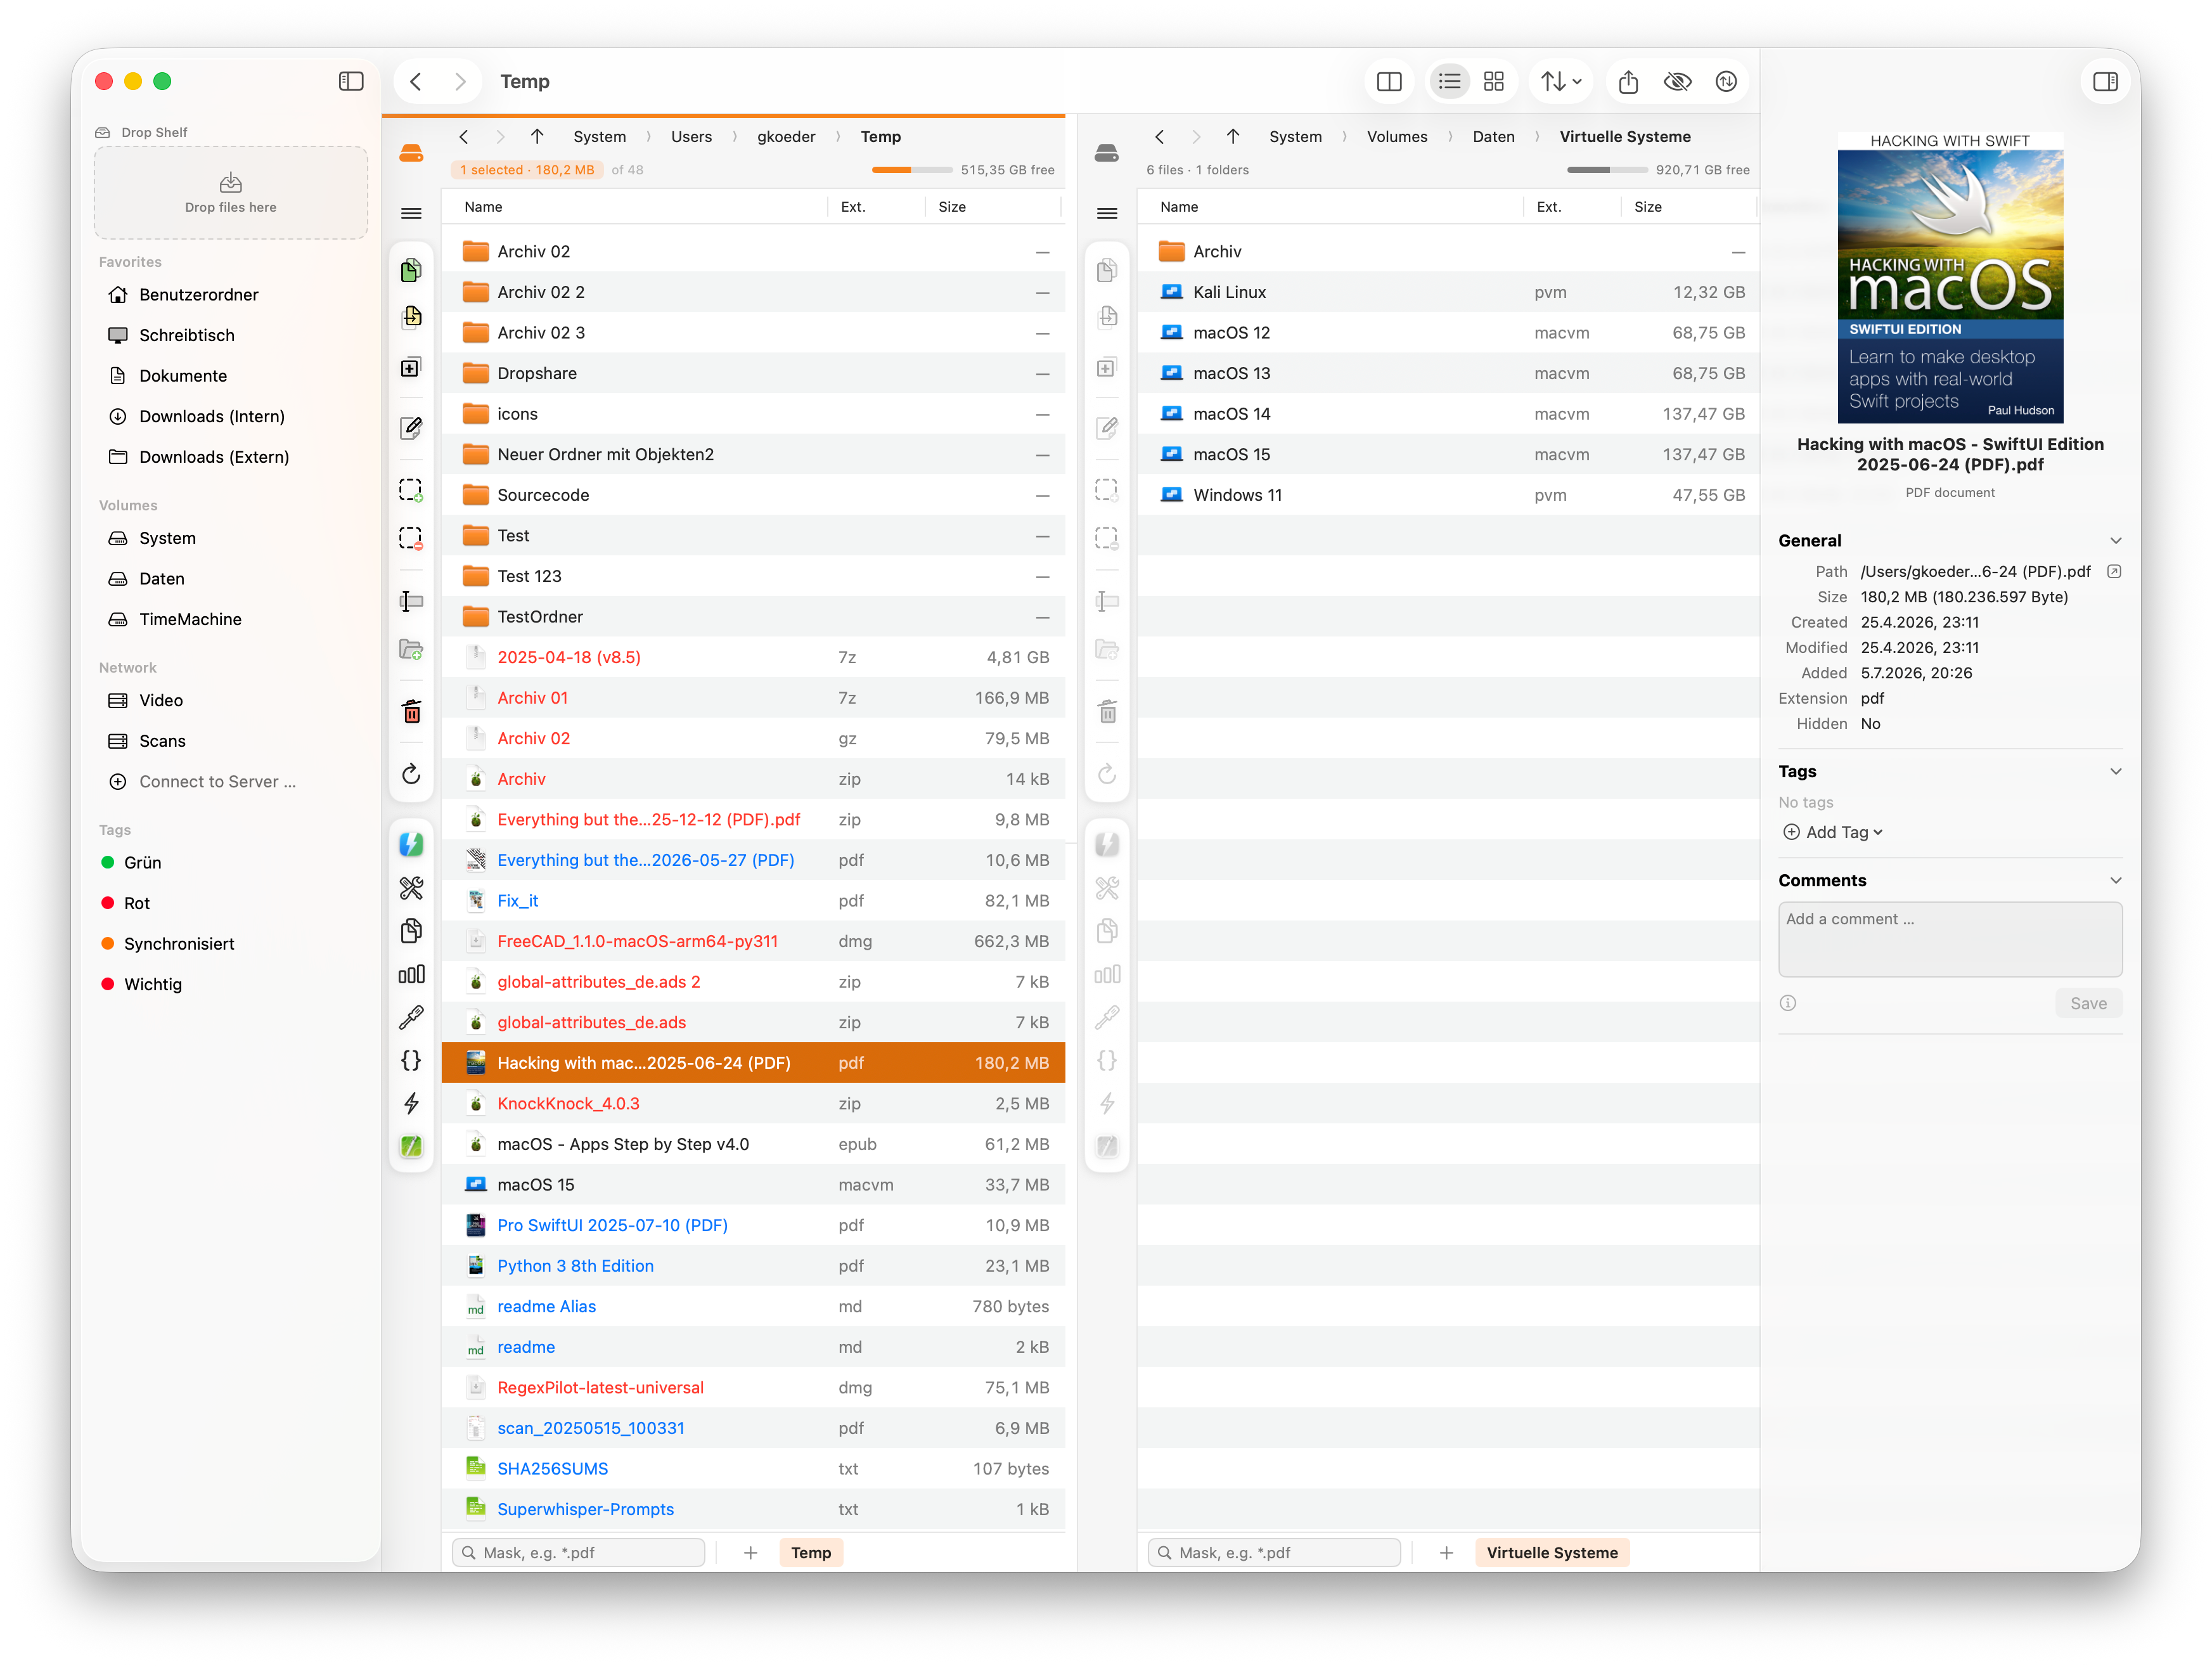
The window is made up of four areas:
-
the sidebar on the left (can be hidden),
-
the left and right panels in the centre,
-
the optional inspector on the right, and
-
the toolbar along the top.
A divider sits between the panels. Drag it and one panel grows while the other shrinks. It snaps at the centre (with a soft click on trackpads); a double-click puts it back there exactly.
2.1. Anatomy of a Panel
|
|
A panel is built from top to bottom like this:
|
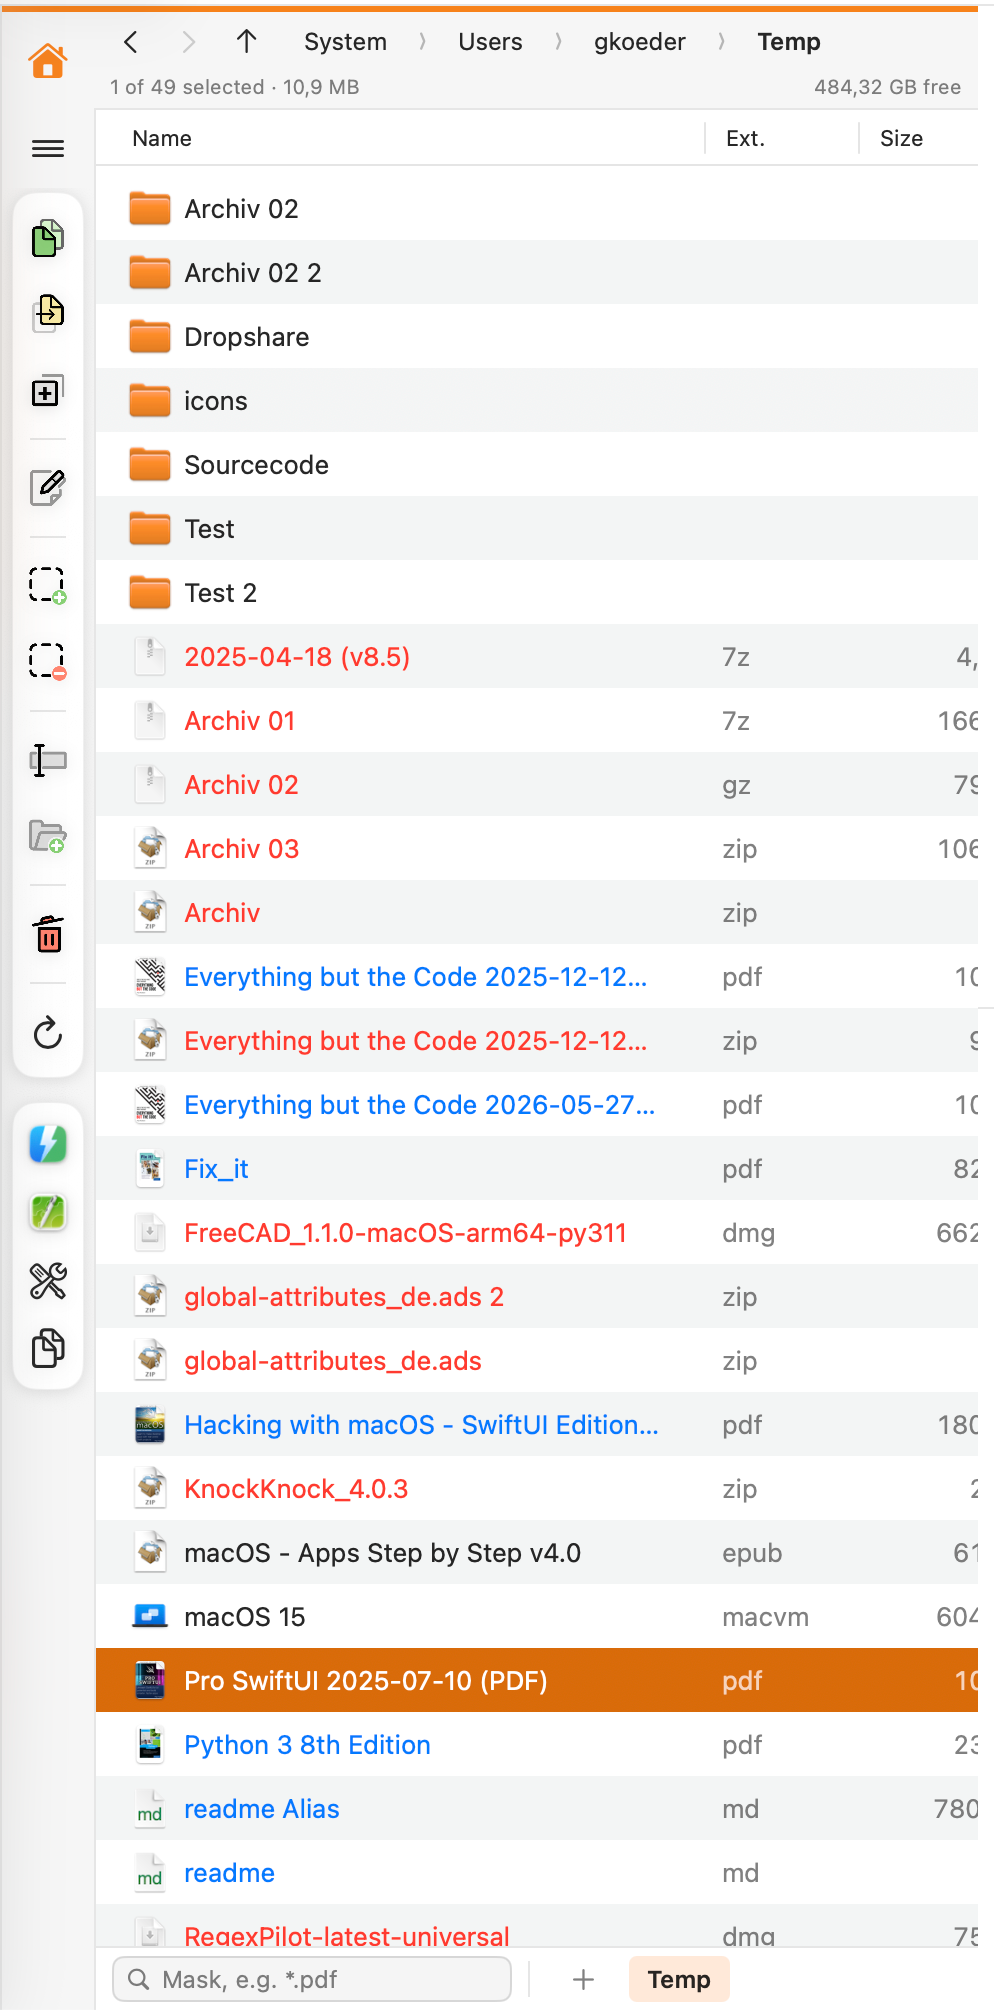
2.1.1. Drive Details
Click the free-space pill to open a window with details about the drive the folder is on. It answers three questions: What kind of drive is this — internal, external, disk image or network drive, along with its format, connection and device or server? How much space is there? And what does that mean for your work?
The last part lists only what applies to this drive. Anything that might get in your way is shown in orange:
-
No Trash: whatever you delete here is gone immediately. FileWorks asks when you delete anyway; this window tells you beforehand.
-
File size limit: on a FAT32 drive, files over 4.29 GB do not fit — a common reason why copying a large file to a USB stick fails.
-
Tags in ._ files: on FAT and exFAT, Finder tags and the quarantine flag live in hidden companion files. If another system deletes those, they are gone.
Shown neutrally: whether access permissions are stored, whether upper and lower case are distinct (a.txt and A.txt are then two files), whether copies on this drive are instant and take no extra space (APFS), and whether it is read-only. At the bottom you find the UUID and the mount point; both can be selected and copied.
If a network drive does not respond, the window says so after a few seconds instead of waiting.
2.2. The Window Toolbar
The toolbar at the very top carries the global commands — the ones that are not tied to a particular panel:
| Button | What it does |
|---|---|
|
Back / Forward |
Step through the recently visited folders of the active tab. |
|
Second Panel |
Show or hide the right panel (⌥ + ⌘ + 2). |
|
View |
Switch the active panel between list and icons. |
|
Sort |
Choose the sort field and direction for the active panel. |
|
Share |
Share the selection via AirDrop, Mail, Messages or a share extension. The button shows the usual macOS panel right below it. It is enabled once real files or folders are selected — inside an archive it stays greyed out, as those entries do not exist as separate files on disk. |
|
Hidden Files |
Show or hide hidden files. |
|
Transfers |
Show or hide the queue manually. |
|
File Info |
Show or hide the inspector (⌥ + ⌘ + I). |
2.3. The Panel Action Toolbar
|
|
The vertical strip beside each list gives you direct access to the most important file commands. A button is dimmed whenever its action is unavailable — New Folder inside a read-only archive, for example. The entire strip is dimmed in the inactive panel. The built-in commands occupy the upper card; your custom tools appear in a separate card below it. Hide the upper card with ⌥ + ⌘ + B if you do not need it.
FileWorks commands
Quick access to your own tools
|

2.4. The Sidebar
|
|
The sidebar (show/hide with ⌥ + ⌘ + S) contains, from top to bottom:
|
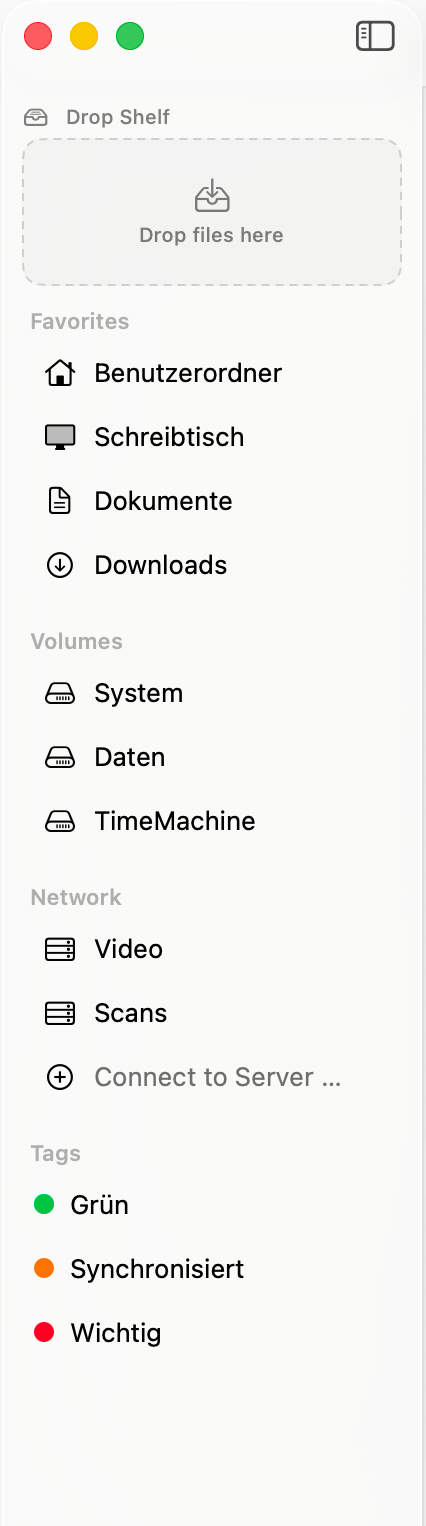
2.5. When the Window Gets Narrow
The panels are what the window is for: each stays wide enough for its list to remain readable. As you make the window narrower, the other areas give way step by step:
-
The inspector gets narrower.
-
The sidebar collapses.
-
The inspector disappears.
When the window gets wider again, everything comes back in reverse order, the inspector at its previous width. Your settings stay as they are: what you have hidden stays hidden. The window cannot be made narrower than the panels themselves. Inside the panels, the list columns adapt as well (see When a Panel Gets Narrow).
If you show the sidebar or the inspector explicitly — with ⌥ + ⌘ + S, ⌥ + ⌘ + I or the toolbar buttons — it appears even when there isn’t really room; the panels get narrower instead. Likewise, the sidebar takes priority when you drag it wider: then the inspector gives way. The next time you resize the window, the order above applies again.
3. Single-Pane Mode
Not every task needs two panels. ⌥ + ⌘ + 2 (or the Second Panel button) hides the right panel. It is hidden, not closed: when you show it again, its tabs, history and selection are unchanged.
In single-pane mode, commands that normally use the other panel ask for a destination folder:
-
Copy to Folder … / Move to Folder … (F5 / F6)
-
Alias / Symbolic Link in Folder …
-
custom tools that need the other panel’s folder — through
{target},FW_TARGET, the "other panel" working directory or the Needs the other panel setting
The folder chooser starts at the destination you used last. Repeated transfers to the same place therefore take a single click. The queue remains docked along the bottom.
| The Drop Shelf is particularly useful in single-pane mode. Collect files as you browse, navigate to the destination, then drag everything out together. You do not need a second panel. |
4. Navigating
4.1. Opening Folders and Moving Around
-
You open a folder with a double-click (or, in the list, with →).
-
⌘ + ↑ goes to the enclosing folder — as does the up-arrow in the path bar.
-
Back and forward: ⌘ + ← / ⌘ + → (alternatively
⌘[/⌘]) step through the recently visited folders. -
⌘ + ⇧ + H jumps to your home folder.
One small detail saves time: when you move up a level, the folder you came from is immediately selected again. You can therefore continue navigating with the arrow keys.
4.2. The Path Bar
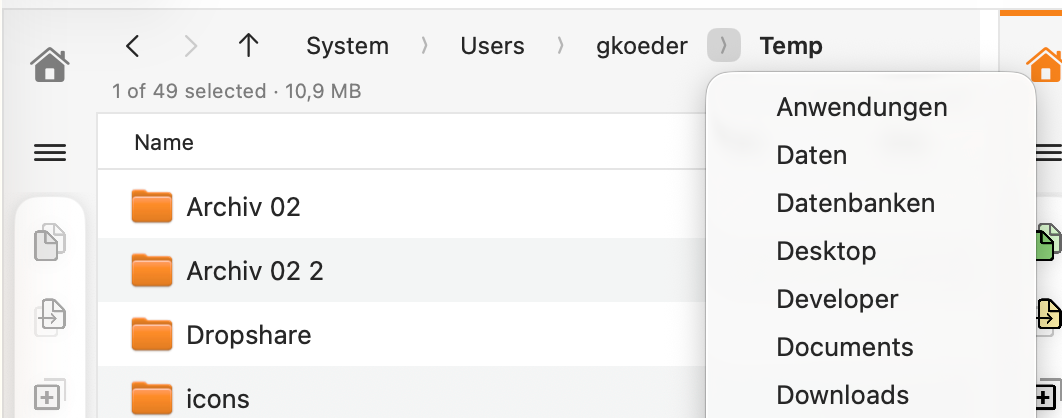
The path bar shows the current location as a row of clickable folders. A click takes you straight into that folder. If the path is longer than the panel, the bar slides so the current folder stays visible.
Between two folders you see a small chevron. Click it and a menu of the neighbouring folders at that level opens. From there you jump straight into a folder alongside, without going up and back down.
4.3. Go to Folder
Press ⌘ + ⇧ + G to enter a path directly. You can use an absolute path, ~ for your home folder or a path relative to the current folder.
As you type, the field suggests matching subfolders. Use ↑ / ↓ to select a suggestion, ⇥ to complete the path, ⏎ to open the folder and esc to cancel.
4.4. Favorites and Volumes: The Jump List
The drive icon at the top left of a panel opens the jump list — or press ⌘ + 1 for the left panel and ⌘ + 2 for the right one. It holds your favourites, with every attached drive below them. The location you are in right now carries a tick.
At the very top, under Other panel, you see the folder shown in the opposite panel, with its path beneath it. Click it to show the same folder in both panels. The entry is hidden in single-pane mode and whenever both panels already show that folder.
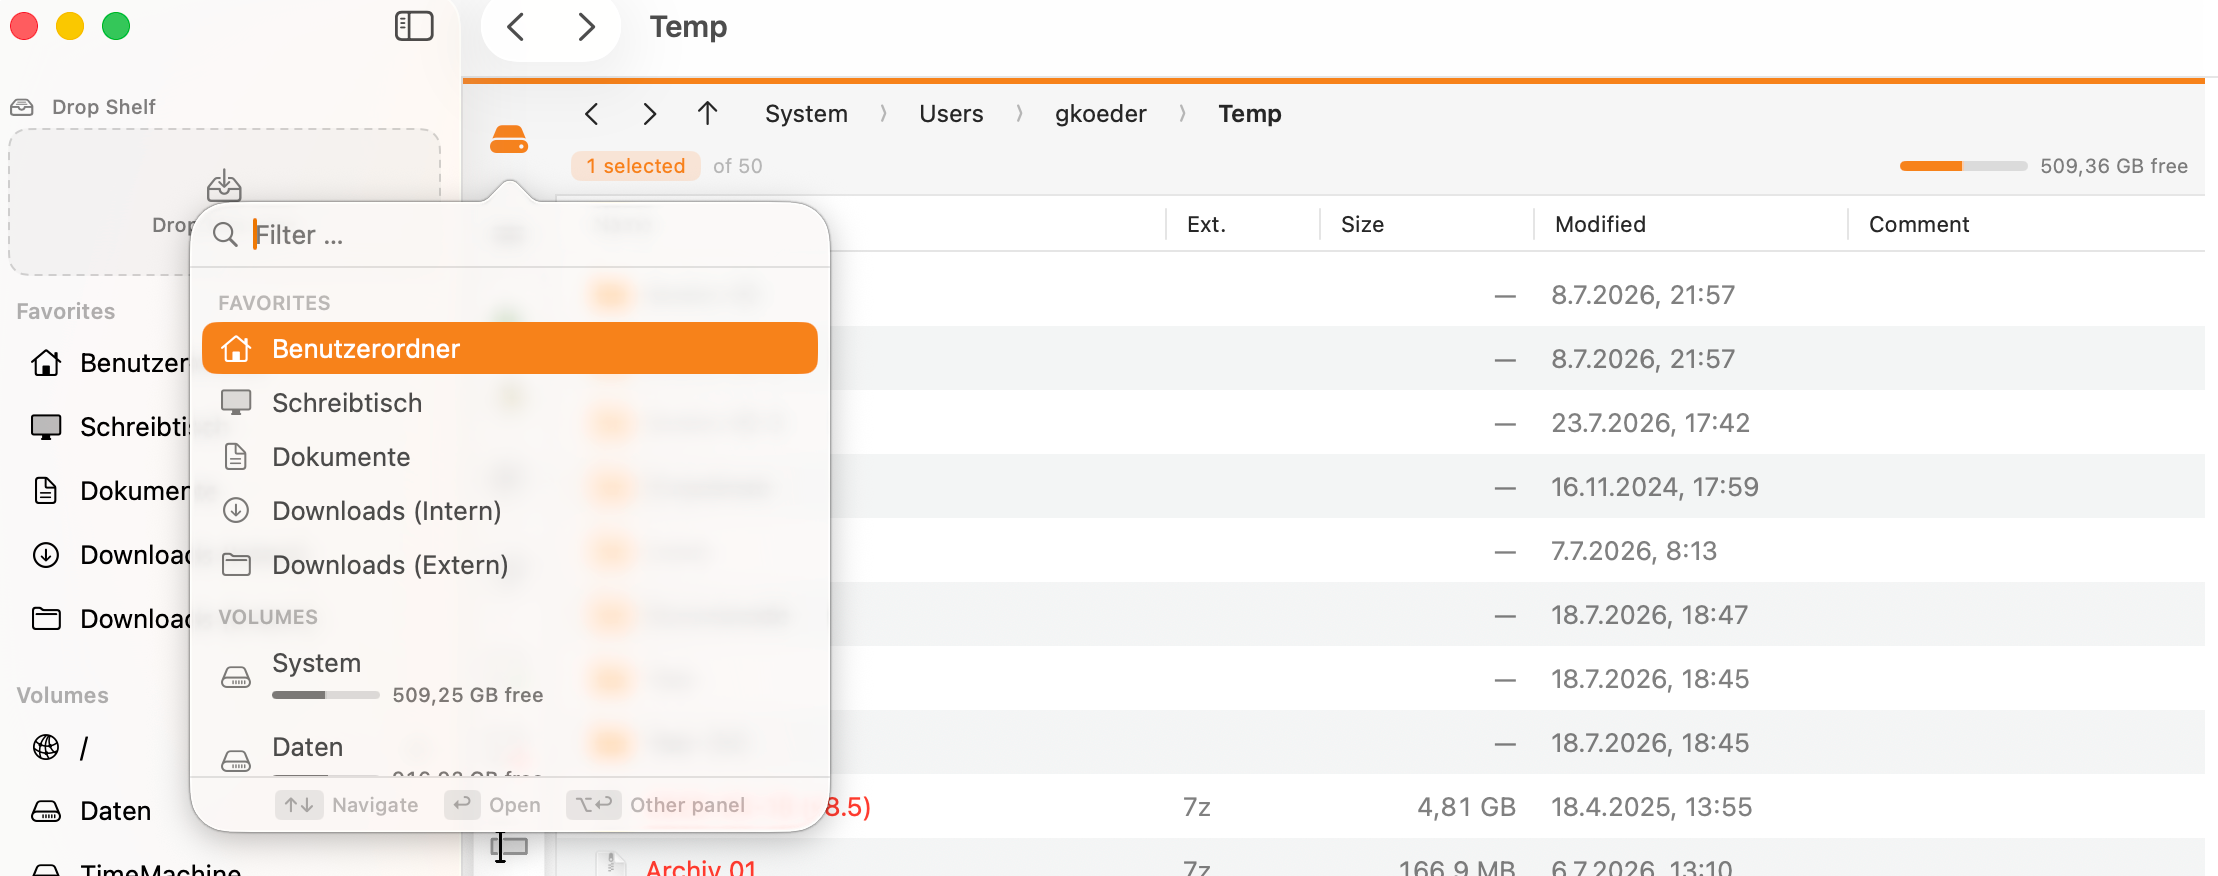
The quickest way to use the list is to start typing. Each character narrows the list, and the first match is selected automatically. For example:
⌘ + 1 · dow · ⏎ — and the left panel sits in your Downloads folder.
Capitalisation and accents make no difference: grosse finds a folder called Größe, and doc is enough for Documents.
4.4.1. Holding Option: everything goes to the other panel
Hold ⌥ while the jump list is open to target the opposite panel. Every row gains an arrow pointing across. Whatever you click or open with ⏎ now opens in that panel.
The top section changes too: instead of the other panel’s folder, it shows the folder in the current panel. This lets you send the current location to the other panel from the same list.
This is especially useful in single-pane mode: without ⌥ the section is missing, because there is no other side. With ⌥ it appears — and the click brings out the second panel and puts it straight into your folder.
Release ⌥ to return to the normal behaviour.
| Key | What it does |
|---|---|
|
↑ / ↓ |
Move through the list. |
|
Home / End |
Jump to the first or last entry. |
|
⏎ |
Open the selected place in this panel. |
|
⌥ + ⏎ |
Open the selected location in the opposite panel. If that panel is hidden, FileWorks brings it out for you. A ⌥-click does the same. |
|
esc |
Clears the filter first; a second press closes the list. |
For drives, a slim bar shows how full they are; the free space is displayed beside it. When things get tight the bar turns orange, and red on an almost full drive. So you see whether anything still fits before you even jump there.
| ⌥ + ⏎ is the quickest way to line up a destination: you stay on the left with your files, and ⌘ + 1 followed by ⌥ + ⏎ sends the backup drive to the right — without taking your hands off the keyboard. |
The same overview — plus eject buttons — is in the Volumes section of the sidebar. You also choose which folders appear as favourites there (a folder’s context menu: Add to Favorites).
4.5. Tabs
Each panel has its own row of tabs along the bottom edge.
-
⌘ + T opens a new tab (the
+button does the same). -
⌘ + W closes the current tab.
-
⌃ + ⇥ and ⌃ + ⇧ + ⇥ step through the tabs — the same keys as in Safari or Terminal.
-
A tab’s context menu offers Duplicate Tab, Close Tab and Close Other Tabs.
By default your tabs are back the next time you launch. If you prefer a fresh start, turn that off under .
5. Viewing Files
5.1. List and Icon Views
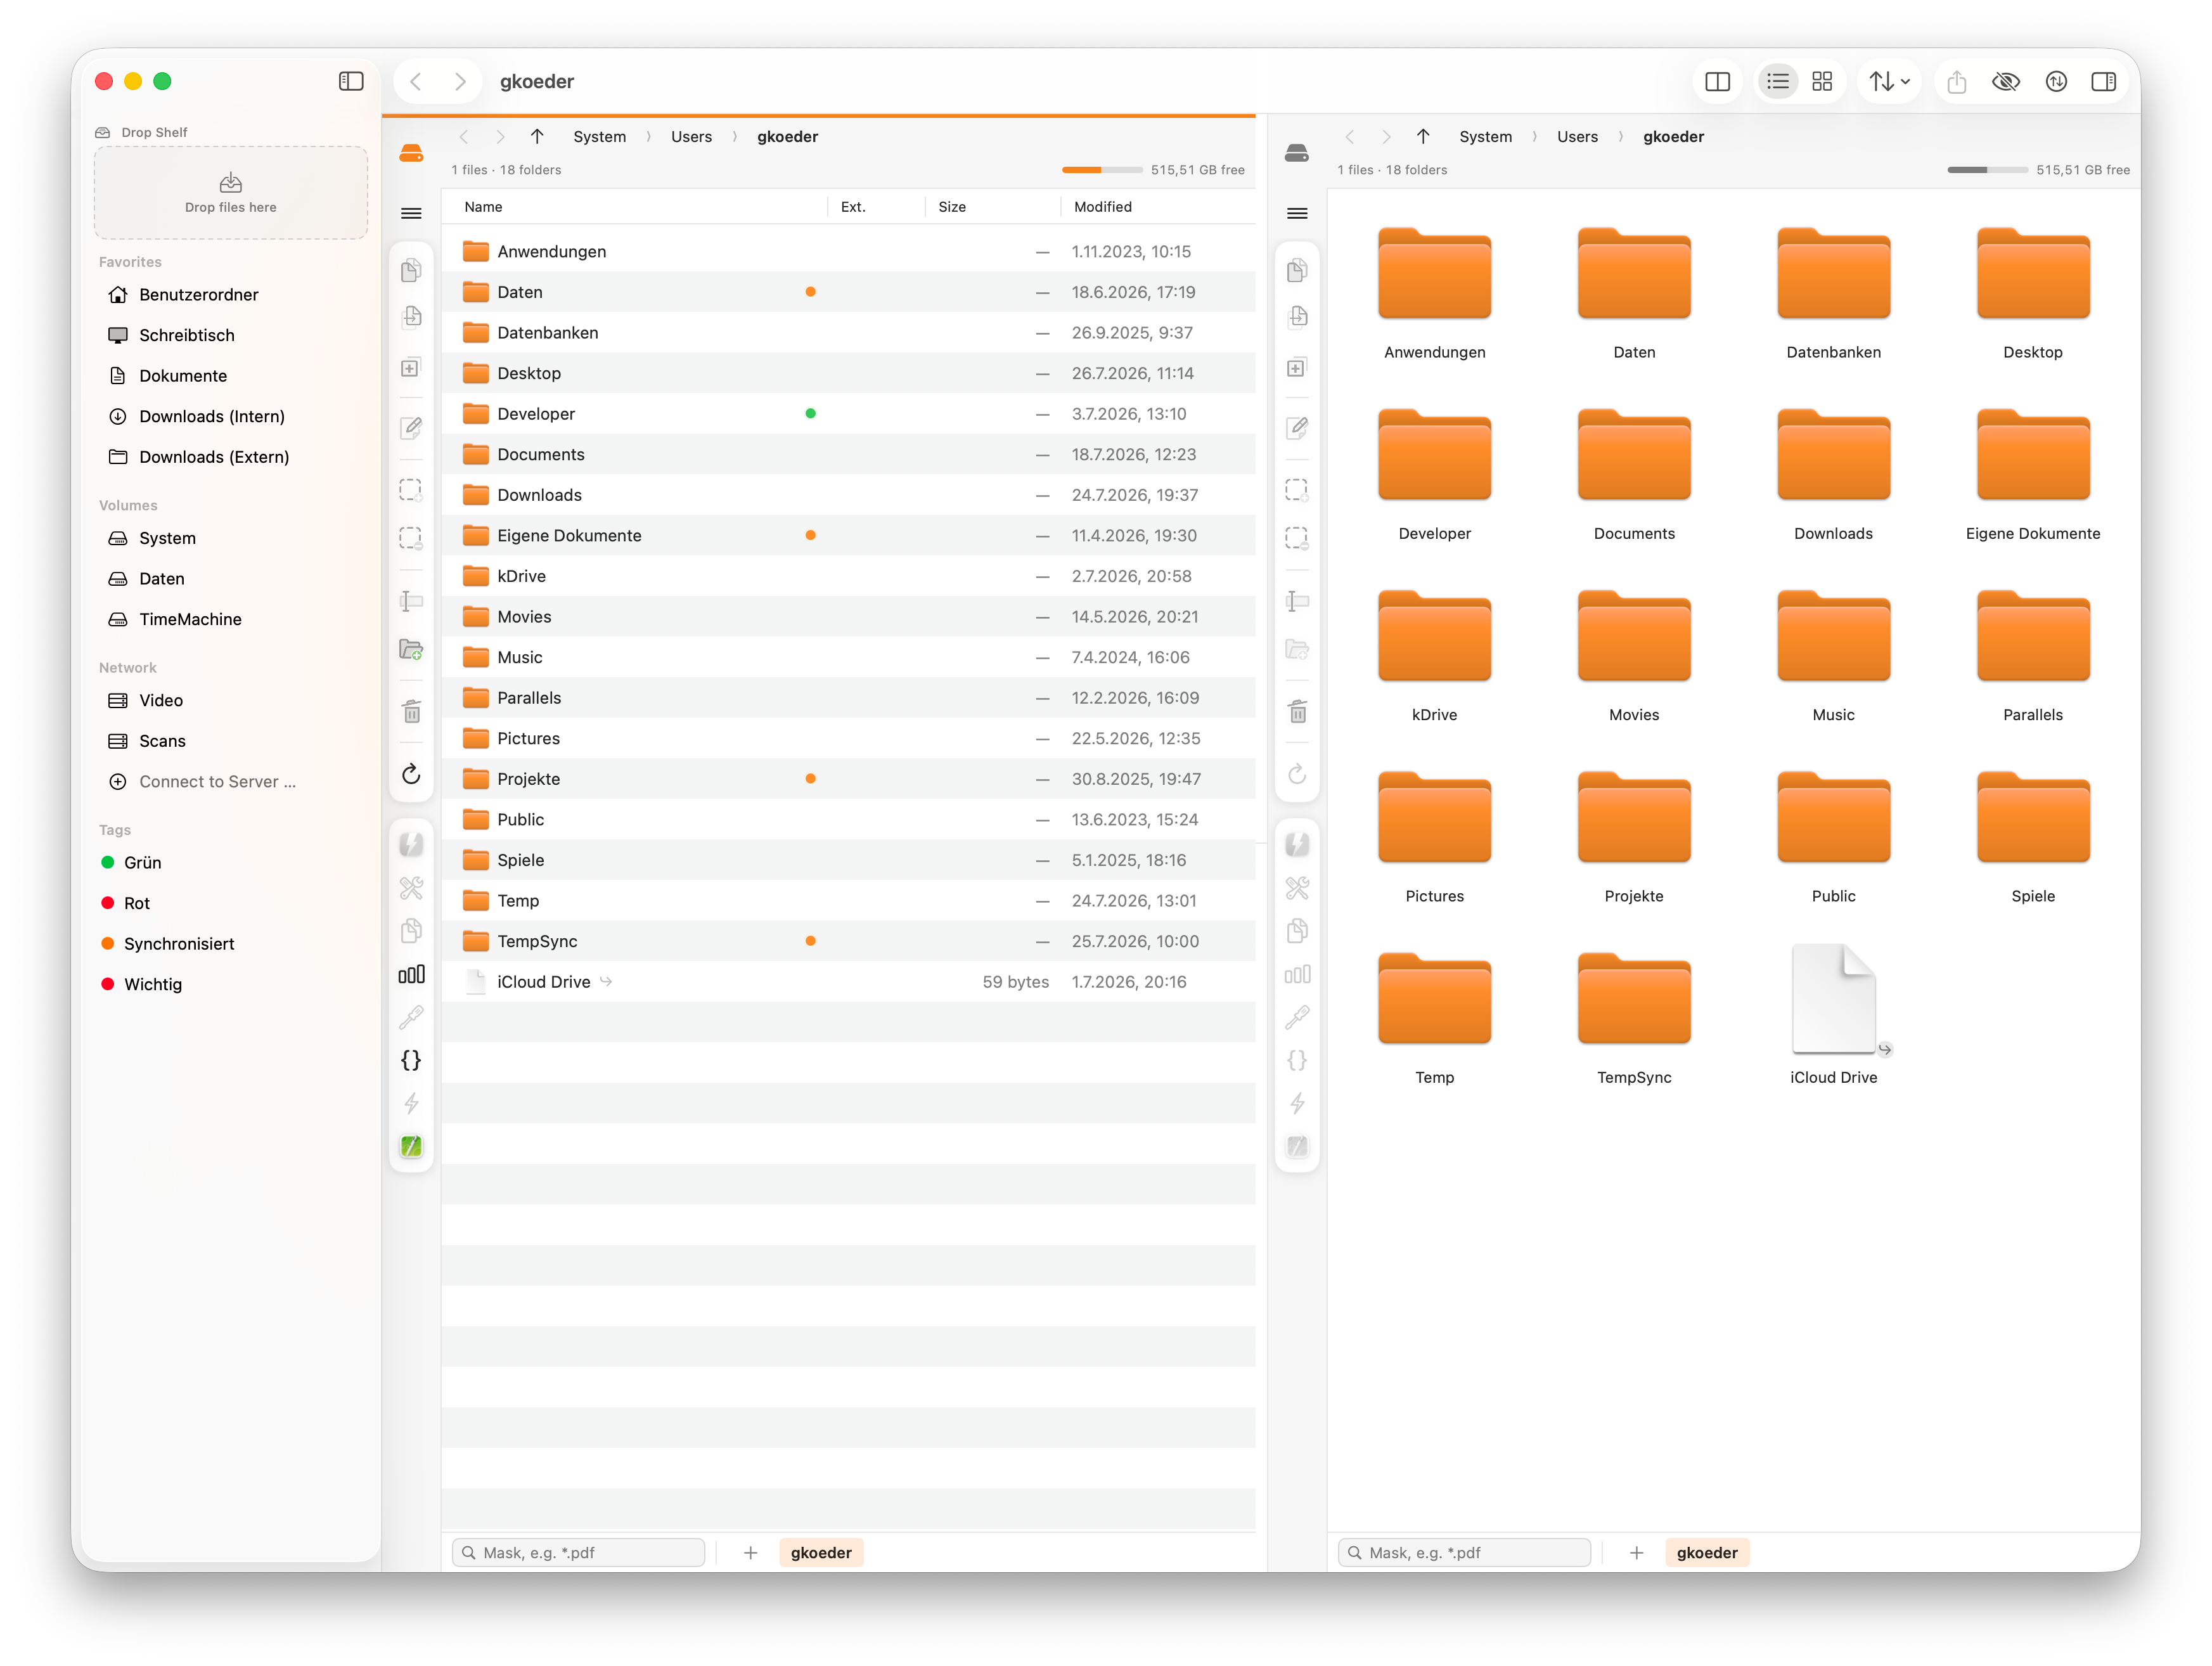
Each panel shows its contents either as a list (⌘ + ⇧ + 1) or as an icon grid (⌘ + ⇧ + 2). FileWorks remembers the choice per panel.
The list is a table; sort it from the column headers. In the icon grid everything familiar works: drag a selection rectangle, ⌘-click and ⇧-click, ⌥-click to mark, type to jump. The arrow keys take you in all four directions.
5.2. Sorting Files and Choosing Columns
Click a column header to sort by that column; click it again to reverse the direction. The same fields sit in the Sort menu: Name, Extension, Size, Modified and Kind. With Sort folders first switched on (the default), folders always come before files — whatever you sort by.
Choose which columns to display under → Columns: Extension (as its own column — FileWorks then shows the name without it), Size, Modified, Kind and Finder Comment. The Name column is always there.
For an application or another package (.app, .bundle …) FileWorks calculates the total size of its contents, just as Finder does. That runs in the background, so the value appears shortly after loading. Plain folders show "—" until then. |
5.2.1. When a Panel Gets Narrow
Only the Name column grows and shrinks with the panel. The other columns are as wide as their content needs. When the name runs out of room, the list gives way step by step:
-
First Comment, Kind and the extension column (Ext.) disappear. Without it, the name shows the extension itself again.
-
Then the date gets shorter: first with a two-digit year, then without the time.
-
Finally Modified, Size and, during a search, Location disappear.
The column you sort by is the last to go. When the panel gets wider again, the columns come back in reverse order. A column that would only half fit is hidden completely: a cut-off value is of no use.
How much room the name needs depends on the names in the folder. In a folder with short names the columns therefore stay longer.
To change the width of a column, drag the right edge of its header; the Name column makes up the difference. The order of the columns is fixed.
5.3. Thumbnails, Colours and Hidden Files
-
Thumbnails — images, videos and PDFs show a small preview instead of a generic icon (toggle under ).
-
Colours — FileWorks tints file names by their extension. You decide which extension gets which colour (see Colours).
-
Hidden files — show and hide with ⌘ + ⇧ + ..
5.4. Previewing Files with Quick Look
Space shows the selection in Quick Look, exactly as in Finder. The arrow keys page through the selected items inside the preview window; Space or esc closes it again.
If an item is inside an archive, FileWorks first extracts it into a temporary cache. If that takes a moment (large archives), a progress bar with a Cancel button appears.
5.5. Viewing File Information in the Inspector
You turn the inspector on with ⌥ + ⌘ + I. With exactly one item selected in the active panel, it shows that item’s details:
-
a large preview — the real content for images, PDFs and videos, otherwise the file or app icon,
-
the general details: path (with a Show in Finder button), size, the dates it was created, modified and added, the extension, and whether the file is hidden,
-
for images, additional details: dimensions, resolution, colour model, colour profile, bit depth and alpha channel,
-
the file’s Tags, which you add or remove here (see The Inspector Tag Editor),
-
the Finder comment, which you edit here (see below).
If several items are selected, the inspector shows a summary with the total size instead.
The inspector sits as a column at the right edge of the window. To change its width, drag its left edge; FileWorks remembers it. In a narrow window it gets narrower and, if need be, disappears (see When the Window Gets Narrow).
5.5.1. Editing Finder Comments
The comment field writes the Finder comment directly to the same location Finder uses — without any detour through AppleScript. Type your text and press Save. In FileWorks (and in the Comment column) it is there immediately; Finder itself shows it once Spotlight has re-indexed the file, usually after a few seconds.
6. Selecting Files
FileWorks gives you two ways to gather files. Once you understand the difference, you will work with them noticeably faster.
6.1. Selection and Marks
The selection is the familiar macOS highlight — the row (or rows) under the cursor. It follows the arrow keys and a single click. The cursor-related commands act on the selection: Rename, Quick Look, the inspector and opening a folder.
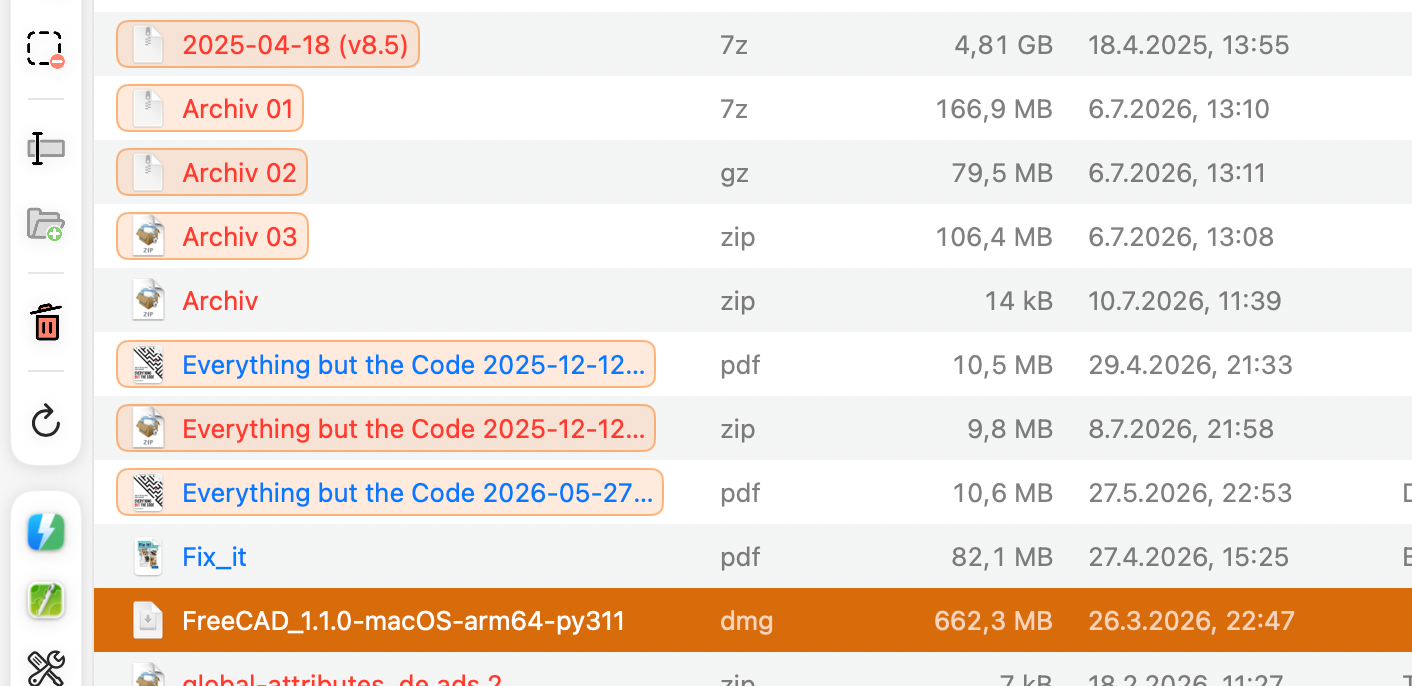
Marks are a second layer on top — the classic commander trick. A marked item wears a coloured pill around its icon and name (in the icon grid, around the whole tile). The key difference: marks stay. You can move the cursor, click elsewhere, filter — the marks hold until you clear them or leave the folder.
That is what makes them so useful. Almost every file command acts on the marks when there are any, and on the selection otherwise — Copy, Move, Duplicate, Delete, Edit, Pack, Multi-Rename, Create Link, Add to Drop Shelf and your own tools. So you can put a batch together at your own pace and then work on it. A stray click no longer clears your marks. The status bar shows it: "N of M marked".
| If you never mark anything, FileWorks simply behaves like Finder — then the selection is your working set. The marks are there when you need them, and invisible otherwise. |
6.2. With the Mouse
Clicking selects; ⌘-click adds or removes single items; ⇧-click selects a range. Several ⇧-clicks in a row always measure from the same starting point, so you can grow the range and shrink it again.
Drag a rectangle from an empty spot — in the list below the entries, in the icon grid between the tiles. With ⌘ or ⇧ you add to the existing selection. Drag past the edge and the view scrolls along, even if you hold the mouse still there. A plain click on an empty spot clears the selection; marks stay.
If FileWorks is in the background, the very first click already counts: it selects, and you can start dragging right away — just as in Finder.
To mark with the mouse: hold ⌥ and click — in the list on the name, in the grid anywhere on the tile. This toggles the mark without touching the selection. For every modifier key, what counts is what you hold when you press the mouse button — not when you release it. The context menu also has Mark / Unmark.
6.3. With the Keyboard
The arrow keys move the cursor. In the list, ⇧ + ↓ and ⇧ + ↑ extend the selection into a contiguous range. ⌘ + A selects everything. esc clears the marks first, then the selection.
The main keyboard tool for marking is ⇧ + Space. It marks the item under the cursor and moves down one row. Press it repeatedly and you mark a whole run in one go. Plain Space stays Quick Look, as in Finder.
Have you just selected a range, say with ⇧ + ↓? Then ⇧ + Space turns that whole range into marks and frees the cursor again. You can build the next block somewhere else.
| You can reassign both Space commands. Does plain Space or ⇧ + Space clash with another program? Then change the modifier under → Selection & Quick Look. The Space key itself stays. Only the modifier changes; the two commands can never use the same key combination. |
6.4. Smart Select, Smart Deselect and Invert
These commands are in the Actions menu. They all produce marks, so a stray click does not discard their result:
- Smart Select (⌃ + ⌘ + S)
-
Marks every item whose type already occurs in your working set. Example: you have selected one
.zipfile and one.mdfile — Smart Select marks all zip and md files in the folder. - Smart Deselect (⌃ + ⇧ + ⌘ + S)
-
The counterpart — marks every file whose type is not in the working set.
- Invert Selection (⌃ + ⌘ + I)
-
Marks everything that is currently not marked.
- Select None
-
Clears marks and selection in one go.
6.5. Search, Filter, Mark — Three Stages, One Place
The three pattern tools appear in the same place: as a block above the file list. Each works on its own, so FileWorks shows only what you ask for. When several are open, they always keep this order:
| Stage | Shortcut | Effect |
|---|---|---|
|
Search |
⌘ + ⇧ + F |
produces the list (recursively from the current folder) |
|
Filter |
⌘ + F |
narrows the displayed list |
|
Mark |
⌘ + S |
marks within what is displayed |
From top to bottom they form a chain: each stage works on the result of the one above. That is exactly why you can use all three in sequence — search, filter the result, mark what remains by pattern, then press F5.
The order in the block is fixed; it does not depend on which you opened first. Each stage has its own ✕ and its own shortcut, so you can close it independently.
6.6. Selecting by Mask
Marking by mask is a one-off action: you type a pattern, press ⏎, and the matching items are marked. The field then closes again.
⌘ + S unfolds it above the file list — in the same place as filter and search (see Search, Filter, Mark — Three Stages, One Place).
-
*.pdfmarks all PDFs. -
IMG_????.jpgmarks names likeIMG_0421.jpg. -
Separate several patterns with spaces, semicolons or vertical bars:
*.jpg;*.png. -
FileWorks treats text without wildcards as part of a name.
As you type, the field shows how many items the pattern would match if you pressed ⏎. Keep an eye on that number: this marked set is exactly what F5, F6 and F8 then act on.
6.6.1. Marking and Unmarking
At the far left of the mask row sits a plus or a minus. It tells you what pressing ⏎ will do — click the sign to switch modes:
| Sign | Effect of ⏎ |
|---|---|
|
green + |
Sets marks on the matching items — replacing the previous set of marks. |
|
red − |
Removes marks from the matching items. |
esc closes the row without doing anything.
If nothing is marked yet, unmarking turns things round: FileWorks then marks everything except the matches. Unmarking *.tmp therefore means "mark everything but the tmp files" — the same effect as Smart Deselect. Further passes then narrow the marks down.
So there are two routes to the same place:
-
⌘ + ⇧ + S,
*.tmp, ⏎ — in one step. -
⌘ + S,
*, ⏎, then click the sign,*.tmp, ⏎ — in two.
If a pattern matches nothing, nothing is marked afterwards — the previous marks are dropped. That applies to setting marks, not to collecting or unmarking. If you ask to "mark the text files" and there are none, this prevents old marks from remaining. The number beside the field shows the match count in advance; a red 0 means there are no matches. |
6.6.2. Collecting Across Passes
Normally the row closes after ⏎ — one mask, one action, done. The Collect button (the stacked rectangles) keeps it open:
-
The row stays open, and the field clears for the next pass.
-
⏎ adds to the marks instead of replacing them.
-
In − mode, ⏎ still removes marks from the matching items.
That lets the marks grow piece by piece: *.pdf ⏎, then *.docx ⏎, then switch to − and draft* ⏎. Each time, the counter beside the field says how many items would be added or removed.
FileWorks remembers this setting too. You will also find it under → Select by Mask.
Unmarking has a shortcut of its own: ⌘ + ⇧ + S opens the field directly in unmark mode. If you come from Total Commander, + and - on the numeric keypad provide access to both commands as well.
The mask marks items; it does not select them. That is why the matched set survives a click into the list. By default it matches files only — the folder button in the mask row includes folders. FileWorks remembers that; you will find the same setting under → Select by Mask → Include folders.
| The mask acts once, not continuously. If a matching file turns up in the folder later, it is not marked retroactively. That is deliberate: the marked set decides what F8 deletes, and it must not change without your input. |
6.7. Saved Patterns
Patterns you need again and again do not have to be typed every time. Under you store them under a name — say Temporary files for *.tmp;*.temp;*.bak;*~.
Five presets are set up already, in two groups:
| Group | Name | Pattern |
|---|---|---|
|
Cleanup |
Temporary files |
|
|
Cleanup |
macOS metadata |
|
|
Development |
Version control |
|
|
Development |
Generated folders |
|
|
— |
Images |
|
Version control and generated folders are deliberately two presets: when searching you usually want to skip node_modules but keep the repository. |
Every preset also remembers whether it may match folders as well — which is why Version control finds the .git folder while Temporary files means files only. That switch also decides where the preset shows up at all (see below). A group sorts the entry into a submenu of its own; without a group it sits below the groups.
6.7.1. Where to Use Them
| Place | Effect |
|---|---|
|
Mask row |
The list symbol next to the folder button. A click writes the pattern into the field and sets the folder button to match — you can still edit it, then press ⏎. |
|
Search bar, pattern field |
Only when Pattern is selected above. A regular expression follows different rules; putting a mask there could produce results that do not match its intended meaning. |
|
Search bar, exclusions |
Always available — exclusions are always masks, no matter how the comparison above is done. Only patterns that may match folders are offered here: what gets skipped are whole folders, and a file pattern like |
|
Context menu and Actions |
Mark by Pattern and Unmark by Pattern, arranged by group. There is no field here: the entry acts at once and replaces the marks. |
The context menu offers both entries even when nothing is selected — a right-click on the empty area is enough. Patterns act on the marks, after all, not on the selection.
Empty the list and the entries disappear from the context menu. Actions keeps Manage Patterns … though, which takes you straight to the settings page — otherwise the feature would be nowhere to be found.
6.7.2. The Option Key Shows the Alternative
Hold ⌥ and every entry changes its label and tells you what it does instead. So there is nothing to memorise:
| Place | without ⌥ | with ⌥ |
|---|---|---|
|
Mask row |
write into the field |
apply now |
|
Search fields |
write into the field |
search now |
|
Menus, mark |
replaces the marks |
Add Pattern to Marking |
|
Menus, unmark |
empty marks → everything but the matches |
Subtract Pattern from Marking (strict) |
The last case needs a closer look: without ⌥, using "unmark" when nothing is marked marks everything except the matches. With ⌥, it only removes existing marks; if nothing is marked, nothing happens.
7. Searching
FileWorks offers three ways to find items. All three operate on the active panel; choose the one that suits what you want to do next:
- Select by Mask (⌘ + S)
-
Marks matching items in the current folder (see Selecting by Mask). Best when you want to do something with the hits right away — copy, delete …
- Quick Filter (⌘ + F)
-
Hides everything whose name does not contain the typed text — as you type, so the list shrinks to what matters. It shows the match count and applies per tab.
- Find Files (⌘ + ⇧ + F)
-
A recursive search from the current folder. Results stream into the list as they are found, with a Location column. This also works inside archives. For a result, Go to Enclosing Folder opens its actual location.
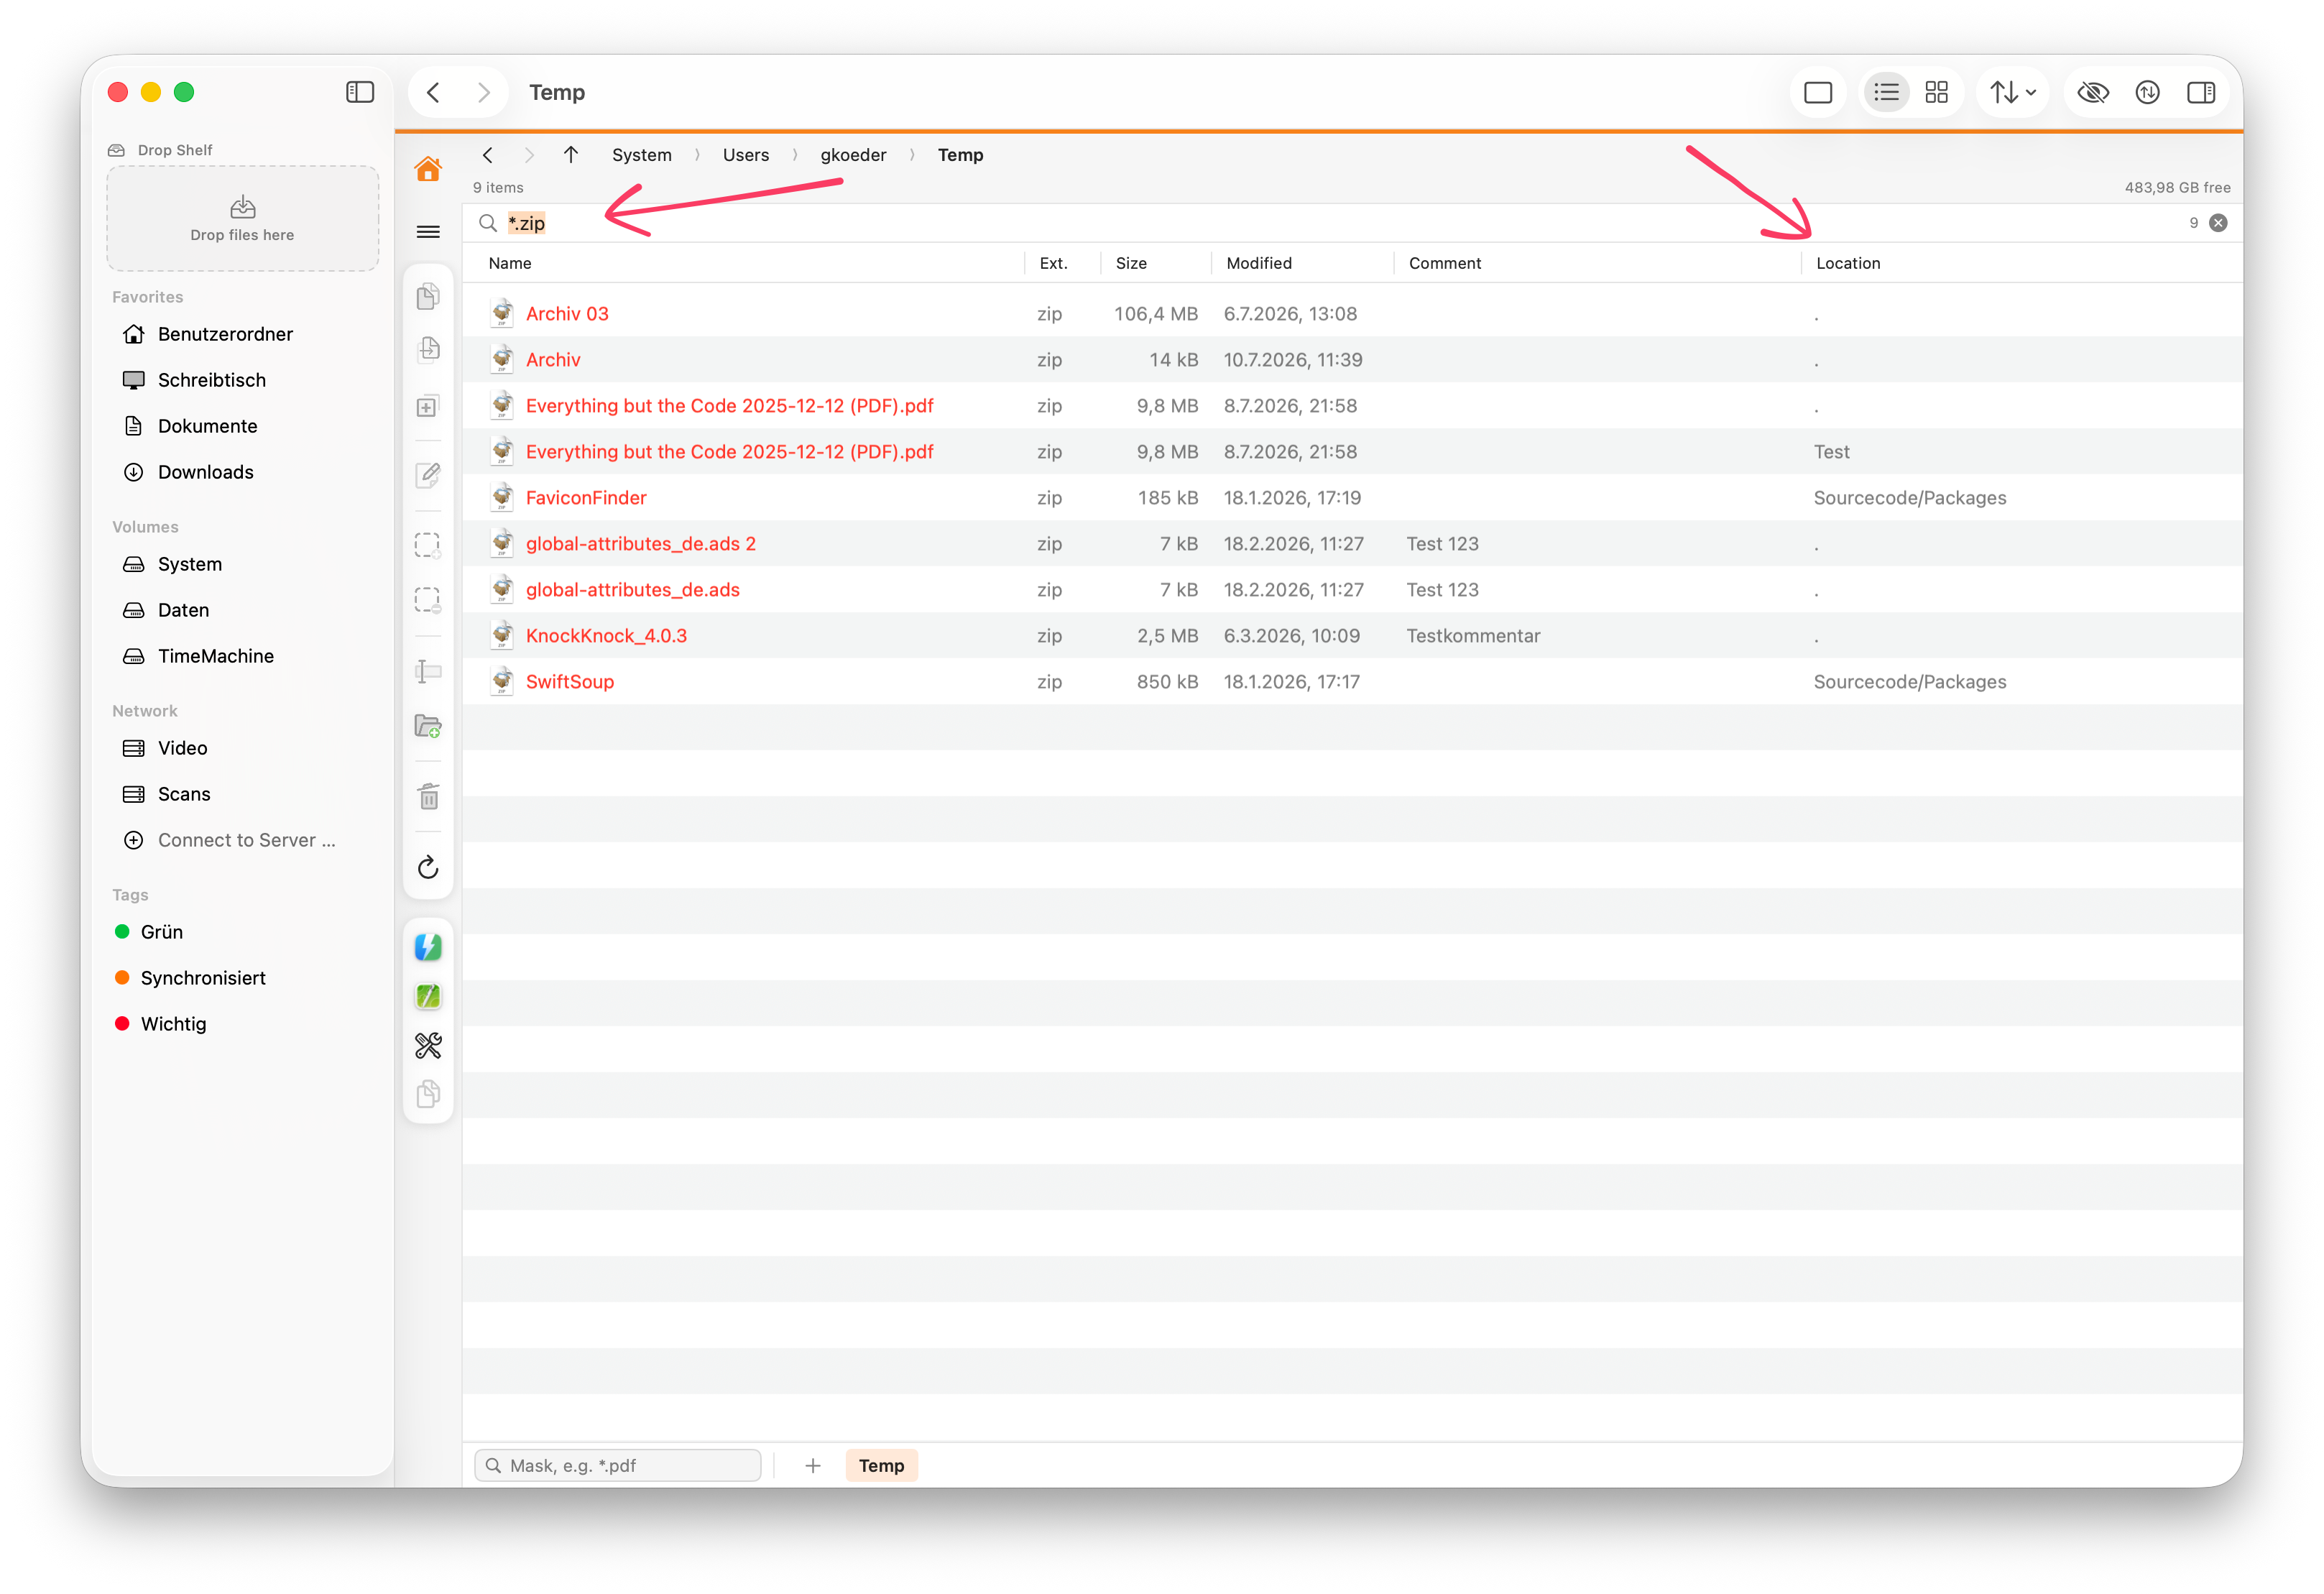
7.1. Reading the Location Column
As soon as the first hits arrive, a Location column slides in right after the name. It names the folder below the search folder; a dot means "directly in it".
It sits well to the front on purpose: after the name, where a hit lives is the next thing you want to know. If you also show the extension column, Location moves behind it — that keeps name and extension together.
Clicking the column header sorts by location — by the containing folder, that is, not by the file name. All hits from the same subfolder therefore end up together. This works while the search is still running, too.
When the search ends, the column disappears again. If you had sorted by it, the sort order jumps back to Name. In an ordinary folder every entry shares the same location — the list would otherwise sit there in seemingly arbitrary order.
7.2. What You Can Type in the Search Field
Without wildcards, part of the name is enough: invoice finds Invoice_2024.pdf as well as FinalInvoice.docx. Accents don’t matter — muller also finds Müller.pdf.
With wildcards the pattern applies to the whole name:
| Pattern | Meaning |
|---|---|
|
|
any number of characters, including none |
|
|
exactly one character |
|
|
exactly one character from the range |
Separate several patterns with a semicolon or a vertical bar: *.pdf;*.docx finds both. A space does not separate patterns here — Invoice March searches for exactly that part of a name. In the mask row (⌘ + S) a space does separate; there you type *.jpg *.png.
7.3. Starting the Search
There are two equivalent ways:
-
⏎ in the search field.
-
The magnifier button at the right-hand end of the bar, just left of the filter and close buttons.
The button is more than a convenience. Changing a filter on its own triggers nothing — otherwise every keystroke in the exclusions field would start a new run. Without the button you would have to click back into the search field after each change and press ⏎.
So that you never have to guess whether what you see is still current, the button shows its state:
| Button | Meaning |
|---|---|
|
Magnifier, pale |
The search field is empty or the regular expression is malformed — there is nothing to start. |
|
Magnifier, coloured |
Ready. A click starts the search. |
|
Square |
The search is running. A click stops it; the hits found so far stay. |
|
Circular arrow |
You have changed something since the last run — the list no longer matches the settings. A click searches again. |
The states differ in shape, not just in colour. The macOS accent colour is freely configurable, so a difference in colour alone would not show under every setting.
7.4. Choosing the Search Scope and Method
Two menus sit to the left of the search field. They always show how the search is configured:
- Name / Name and Path
-
Normally only the file name counts. With Name and Path the pattern applies to the whole path —
invoicesthen finds everything anywhere below a folder of that name. - Pattern / Regular Expression
-
In pattern mode the wildcards above apply. In RegEx mode you write a full regular expression, such as
^IMG_[0-9]{4}\.(jpe?g|png)$.
RegEx mode highlights its menu prominently, and for good reason. Characters like ., ( or + are perfectly normal in file names, yet here they suddenly mean something else.
Is the expression malformed? Then a red warning triangle appears and the search does not start at all. A message beats an empty result list that looks like "nothing found".
The same menu holds Match Case. Without that tick — the normal case — readme also finds README.md.
Both menus remember your choices, even across restarts. The filters in the next section deliberately do not.
7.5. Filters: Size, Date, Kind and Exclusions
The filter button unfolds a second row. It has two areas, and the difference between them matters more than you might expect.
Which hits count — these three filters work on what the search has already found:
- Size
-
at least or at most, with a number and a unit. Folders have no size and are therefore excluded by a size filter.
- Modified
-
last 24 hours, 7 days, 30 days or the last year.
- Kind
-
files and folders, files only, or folders only.
Where not to search at all — the second area acts one stage earlier: folders whose name matches here are never opened. In a development directory node_modules;.git is often the difference between a search that runs into its limit and one that finishes in seconds.
7.5.1. What the Exclusions Compare Against
One rule here works differently from the rule in the search field. It is the key point of this section:
|
Without wildcards the comparison is by equality. |
In the search field it is the other way round: part of the name is enough there. The difference is deliberate. Finding too much is immediately visible, so you can refine your pattern. Skipping too much is not — the files simply never appear. So a broad exclusion has to be spelled out here.
Otherwise the same rules as in the search field apply (see What You Can Type in the Search Field):
| Input | Skips |
|---|---|
|
|
exactly |
|
|
any name containing |
|
|
both; separate several patterns with |
|
|
|
|
|
anything starting with a digit |
Two further rules:
-
Only the folder name is compared, never the path — regardless of whether Name or Name and Path is set above.
-
Case does not matter, even with Match Case switched on. So
node_modulesalso matchesNode_Modules.
This is where the saved patterns earn their keep: the list symbol in the exclusions field drops in Version control or Generated folders with one click instead of you typing node_modules;build;dist;… every time. Hold ⌥ and the search starts right away. |
Fold the row away again and any filters you set stay visible as small chips beside the search field, each removable with its own ✕. That is deliberate: a result shortened by an invisible filter would otherwise look like a complete one. The exclusions carry a different colour because they work differently — they do not discard hits; they exclude whole areas from the search in the first place.
Closing the search resets the filters. So the next search never starts with a restriction you no longer remember setting.
7.6. Closing the Bars Again
Both shortcuts toggle: the same shortcut that shows a bar hides it again. The menu entry tells you which way it will go — it alternates between Filter … and Hide Filter, and between Find Files … and End Search.
Two further ways always work:
-
esc — in the text field as well as in the file list. With both bars open, it closes the search first, then the filter, and only then clears the selection.
-
The ✕ at the right-hand end of the bar.
Closing tidies up as it goes. The filter empties, since the list would otherwise stay inexplicably short. And ending a search discards the results and shows the folder again. Want to empty the field but keep the bar? Use the button to the left of the ✕ in the filter bar.
7.7. Search Progress and Limits
Two pieces of information appear beside the magnifier: how many entries FileWorks has examined so far, and which folder it is reading. Without them you could not tell a slow area from a standstill — the hit count alone stands still as long as nothing matches.
When the search meets a folder whose contents are not kept on this Mac, it asks: include, skip or cancel. That is the same prompt as in the folder comparison (see Large Folders and Items from the Cloud). FileWorks asks once per search.
A warning triangle beside the hit count means the result is incomplete. Either you had folders skipped, or the search reached its limit. That limit is 50,000 hits and 200,000 entries examined. The second limit stops a search that finds nothing and would otherwise run unchecked through the entire tree.
The stop button ends the search. If it is currently reading a cloud folder, the last read may take a moment to finish, but the display reacts at once.
8. Working with Files
8.1. Copying and Moving
Mark items in the active panel and press F5 to copy or F6 to move them to the other panel. The same commands are on the action toolbar, in the context menu and in the Actions menu (⌘ + ⇧ + C / ⌘ + ⇧ + M).
In single-pane mode there is no "other panel" — then FileWorks asks for a destination folder (see Single-Pane Mode).
| If source and destination are on the same APFS drive, it is near-instant: copying uses immediate clones (copy-on-write), while moving only requires a rename. Permissions, timestamps, extended attributes and ACLs are always preserved. |
8.2. The Transfer Queue
Every copy and move job runs through a queue. Packing, deleting and custom tools use it too. FileWorks processes one job at a time while the others wait. The queue appears at the bottom of the right panel — or the only panel in single-pane mode. Each card shows a progress bar, the current item, the transfer speed, the estimated time remaining and a Cancel button.
If a card says Preparing …, FileWorks is still fetching the files from the sender — from the Photos app, for instance. Cancelling stops that, and anything that could not be loaded is named on the card. If it says Reading archive, see Why Some Archives Take Longer.
The queue appears automatically when a job takes more than a moment and disappears after a successful run. Jobs that finish with errors remain until you clear them with Clean Up or the × on the card. The same applies to a cancelled job for which FileWorks had to preserve a previous version: the card remains visible while it shows where that version was saved. Use the Transfers button to show the queue manually.
If the volume fills up during a job, FileWorks stops instead of letting every remaining item fail for the same reason. Whatever was transferred stays; the message names the cause once rather than a hundred times.
8.3. Resolving Conflicts
When the destination already contains an item with the same name, a conflict dialog appears. It shows both items side by side, including their sizes, dates and a "Newer" hint. Below them, you can choose how to proceed:
- Keep Both
-
Copies under an automatically numbered name ("Name 2").
- Skip
-
Leaves the item at the destination untouched.
- Merge
-
Only for conflicts between two folders: FileWorks combines their contents. For files with the same name inside them, it asks again.
- Replace
-
Deletes the existing item at the destination.
- Replace All Older
-
Like an incremental backup: replace when the source is newer, skip the rest, merge folders. Applies to the whole job.
The first row is preselected, so ⏎ keeps both items. Hold ⌘ to display a number beside each option; ⌘ + 1 through ⌘ + 5 select an option directly. The numbers vary because Merge appears only for folder conflicts.
Tick Apply to all further conflicts and your choice holds for the whole job — separately for file and for folder conflicts.
| FileWorks never leaves partially written files behind. It writes each file to a hidden temporary file first, then puts it in place in one go. When it replaces a folder, it sets the old contents aside and deletes them only once the new ones are complete. If anything goes wrong, or you cancel, you get the old state back. |
Your choice applies to the state shown in the dialog. During a large job, another app — a sync service, for example — may change the destination before FileWorks carries out that choice. If this happens, FileWorks does not replace the changed item. Instead, that item fails with a message, and the other app’s version remains untouched. The same protection applies if a new folder appears at the destination after you made your choice: FileWorks does not silently merge your files into it. Both cases appear in the job’s error list.
When moving, FileWorks deletes an original only after confirming two things: the source is unchanged, and the new copy is still at the destination. If another app removes the copy in the meantime, the original remains in place and FileWorks reports the problem.
If FileWorks has to undo a folder replacement, it removes only the folder it placed at the destination. If another item has appeared there in the meantime, that item remains untouched; FileWorks restores the previous folder beside it instead.
8.4. Duplicating, New Folders and Renaming
- Duplicate
-
Copies the selection within the same folder; FileWorks resolves name clashes automatically ("Name 2").
- New Folder (F7, ⌘ + ⇧ + N)
-
Creates a folder and lets you name it right away.
- New Folder with Selection (⌃ + ⌘ + N)
-
Creates a folder and moves the selected items straight into it — handy for gathering loose files in one go. This folder, too, is ready to rename at once. As the items stay on the same drive, it happens instantly, even for large files.
- New File (⇧ + F7, ⌥ + ⌘ + N)
-
Creates a file from one of your templates and lets you name it right away. The keys use the default template; the context menu offers all of them — see New Files from Templates.
- Rename (F2, ⌘ + R)
-
Opens a field with separate inputs for name and extension — so you change one without touching the other. A preview shows the new name and flags conflicts in red. The input field appears right beside the file: at its row in the list, at its tile in the icon view. A click beside it closes it without changing anything; so does esc.
8.5. Renaming with the Slow Double-Click
As in Finder, renaming can also be started with the mouse: click an item, wait a moment, then click it a second time.
"Slow" only describes how it feels. These are two separate clicks in the same spot: the first does not open the input field, but the second does. The gap must exceed the interval set for a double-click in your system settings — otherwise it is a double-click, and that opens the folder. FileWorks reads that interval from the system settings, so a faster double-click setting means a shorter wait here. The upper limit is two and a half seconds: wait longer and the next click starts a new click sequence.
| Two clicks are needed even when the file is already selected. Finder makes do with one — it can, because it renames in the row, where a further click lands in the text field. FileWorks shows the field beside the row, and a second click would close it again straight away. Two clicks are therefore always required, regardless of the previous selection. |
Nothing happens if you move the mouse while doing it — then you are dragging, and dragging is not clicking. Nor does the click that switches to the other panel trigger it: it makes that side active, no more. Otherwise switching sides would repeatedly trigger renaming by accident, since something is usually selected over there already.
In the icon view you need a little more patience than in the list. The grid only decides that a click was a single click once it is certain no second one follows.
8.6. Multi-Rename
To give many files new names at once, select them and open Multi-Rename … (⌘ + ⇧ + R). The dialog continuously previews the resulting names. It also checks for duplicate target names, clashes with existing files and invalid names.
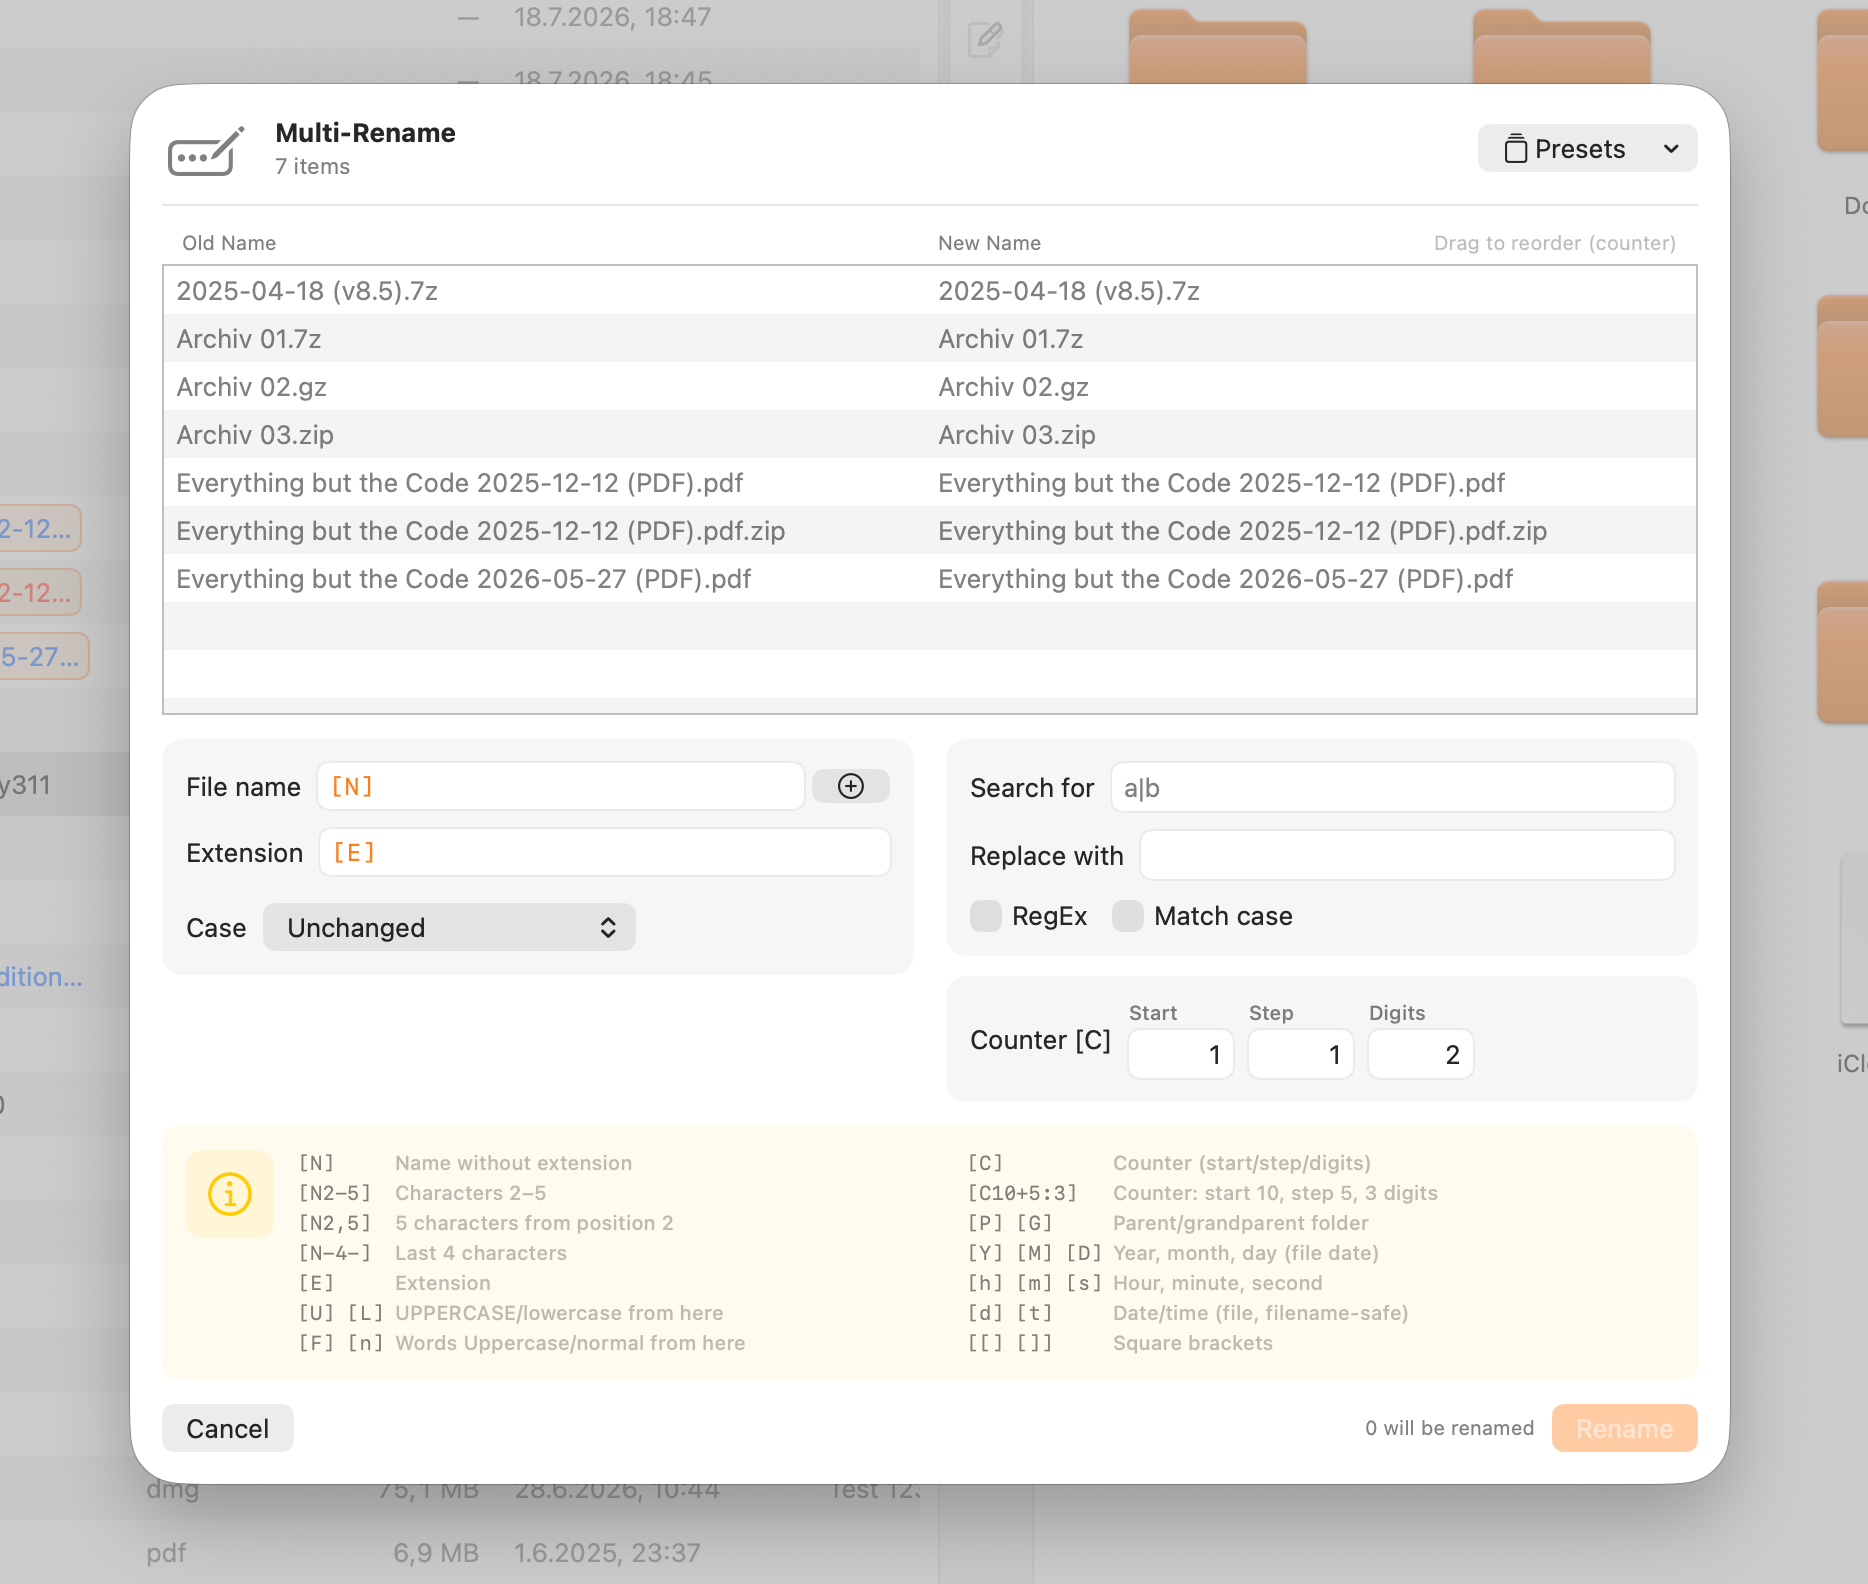
8.6.1. The Dialog Works in Two Steps
First FileWorks builds the new name, then it replaces matching text within that name. That order matters:
| Stage | What it does |
|---|---|
|
① Build |
Assembles the new name from placeholders — name, extension, counter, case. |
|
② Replace |
Replaces matching text in the finished name that stage ① has just built. |
Between the two stages the dialog shows the line applied afterwards to the result. It reminds you that the replacement step never sees the original name at all. It works only on what stage ① made of it.
Below the preview you can follow these steps for the first row: Bild.JPEG → ① 01_Bild.JPEG → ② 01_Bild.jpg.
8.6.2. Building Blocks — The Quick Way In
Above the fields sits a row of building blocks: Number first, Date first, lowercase, Spaces to - and more. One click writes the matching placeholder into the mask, or fills in the fields of stage ②.
So a building block writes into the field once and is then done. It does not stay "switched on": whatever ends up in the field, you can edit or delete by hand straight away.
That has a side effect which helps you learn. After each click you see which placeholder the block inserted. Next time you may well type it yourself.
Using several blocks in succession combines their effects. The name of the block tells you where the text goes: first writes to the beginning, last to the end.
8.6.3. Stage ①: Name and Extension Mask
Stage ① has two fields: one for the name, one for the extension. In them you describe what the new name should look like.
Simply type any fixed characters. For everything that differs from file to file you insert a placeholder — a short code in square brackets. [N] stands for the old name, [C] for a running number. The mask Holiday_[C]_[N] therefore produces Holiday_01_Beach, Holiday_02_Harbour and so on.
You do not have to memorise the placeholders. A button next to each field opens a list of them all. Click a row and the placeholder lands in the field.
That list is more than a crib sheet: next to every placeholder it shows what it would produce for your first selected file. For character ranges, this removes the guesswork — you see at once that [N2-5] turns Archiv 2.zip into rchi.
| Placeholder | Meaning |
|---|---|
|
|
The original name (without extension). |
|
|
Characters 2 to 5 of the name. |
|
|
5 characters starting at position 2. |
|
|
From character 2 to the end. |
|
|
The last 4 characters (negative positions count from the end). |
|
|
The extension (with the same range syntax as |
|
|
Name of the parent / grandparent folder. |
|
|
A counter. You control it with the from, step and digits fields beside it. |
|
|
A counter written inline: start 10, step 5, 3 digits (any part is optional). |
|
|
Year, month, day of the modification date. |
|
|
Hour, minute, second. |
|
|
Date as |
|
|
Make the following characters UPPERCASE / lowercase. |
|
|
Capitalise every word / only the first word in the following text. |
|
|
Back to normal case. |
|
|
Insert a literal |
FileWorks leaves an unknown placeholder unchanged — so a typo stays visible instead of quietly vanishing.
A case placeholder belongs to the mask and applies from its position onwards. [L][N] lowercases the whole name; [U][N1-3][n][N4-] uppercases only the first three characters. A case placeholder in the name mask leaves the extension untouched — unless you also add one to the extension mask. |
To the right of the extension mask are the settings for the counter [C]: its starting value, increment and number of digits. The preview below shows the effect on the actual names.
8.6.4. Stage ②: Replace
-
Search for / Replace with — without RegEx you separate several terms with
|. FileWorks matches them to the replacements in order. Where no replacement is left, the term simply drops out. With RegEx you use one pattern with back-references like$1. -
Applies to — whether FileWorks searches the name only, the extension only, or both. The default is Name only: replacing should not hit the extension by accident. There is still a good reason for Both — it is the only way to swap a whole extension, say
.JPEGfor.jpg. -
Match case — without the tick,
bildalso findsBILD.
8.6.5. The Preview
Every row carries a tick on the left. Take it away and the file stays untouched. It then drops out of the counter as well: FileWorks simply renumbers the rest, so no gap appears.
The order of the rows determines the counter values. Drag the rows to reorder them.
Conflicts appear in the row concerned — a duplicate target name, a name the folder already holds, or a name that would not be valid. While any conflict remains, Rename stays disabled.
| Save a scheme you use often as a preset — the Presets menu sits at the top of the dialog — and recall it next time with one click. Building blocks, by contrast, add a single operation and leave the rest alone; a preset replaces the whole scheme. |
8.7. Deleting Files
F8 (or the Trash button) removes the marked items — or the selection, if you have marked nothing. Whether they go to the Trash or vanish straight away, and whether FileWorks asks first, you set under → Deleting. On drives without a Trash (some SMB servers), FileWorks offers to delete permanently instead.
|
Files deleted permanently cannot be restored from the Trash. Check the marked items and the destination drive before you confirm. |
In the context menu you swap the two: hold ⌥ and the entry changes. If your default is the Trash it now reads Delete Permanently — otherwise the other way round. It happens live, while the menu is open.
| This ⌥ pattern applies to further context-menu entries: Paste becomes Paste (Move) — just like ⌥ + ⌘ + V — and Copy Path becomes Copy Path as File URL. |
8.8. Creating Links
The Create Link submenu (Actions menu or context menu) makes:
-
an alias or a symbolic link,
-
in the other panel (in single-pane mode: a folder of your choice) or here in the same folder. In the same folder, FileWorks appends
AliasorLinkto the name so nothing clashes.
An alias still finds its target after you move or rename it, and it works across drives. FileWorks creates symbolic links within the same folder as relative links, so they survive when the whole folder moves.
8.9. The Clipboard
FileWorks uses the normal clipboard — compatible with Finder in both directions:
-
⌘ + C puts the marked items on the clipboard as file references — or the selection, if you have marked nothing.
-
⌘ + V pastes them into the current folder (copying).
-
⌥ + ⌘ + V pastes them as a move — the originals then disappear.
In the context menu the first command reads Copy to Clipboard, spelled out in full. That clearly distinguishes it from Copy to "…", which sends the files straight to the other panel.
8.10. Drag and Drop
Drag items from a list into Finder or into the other panel. Dropping copies by default; hold ⌥ and it moves instead. Drop something into a panel and it lands in that panel’s current folder. Drop it straight onto a folder row and it lands in that folder.
Drag something out of an open archive and a card appears in the queue — with progress and a Cancel button. Finder picks the target name: if a folder of the same name is already there, it puts yours next to it (“Folder 2”) instead of asking. If you cancel, FileWorks removes the half-extracted folder again — but only as long as the folder FileWorks created is still there. If another program has replaced it with a different one in the meantime, that one is left alone.
8.11. The Drop Shelf
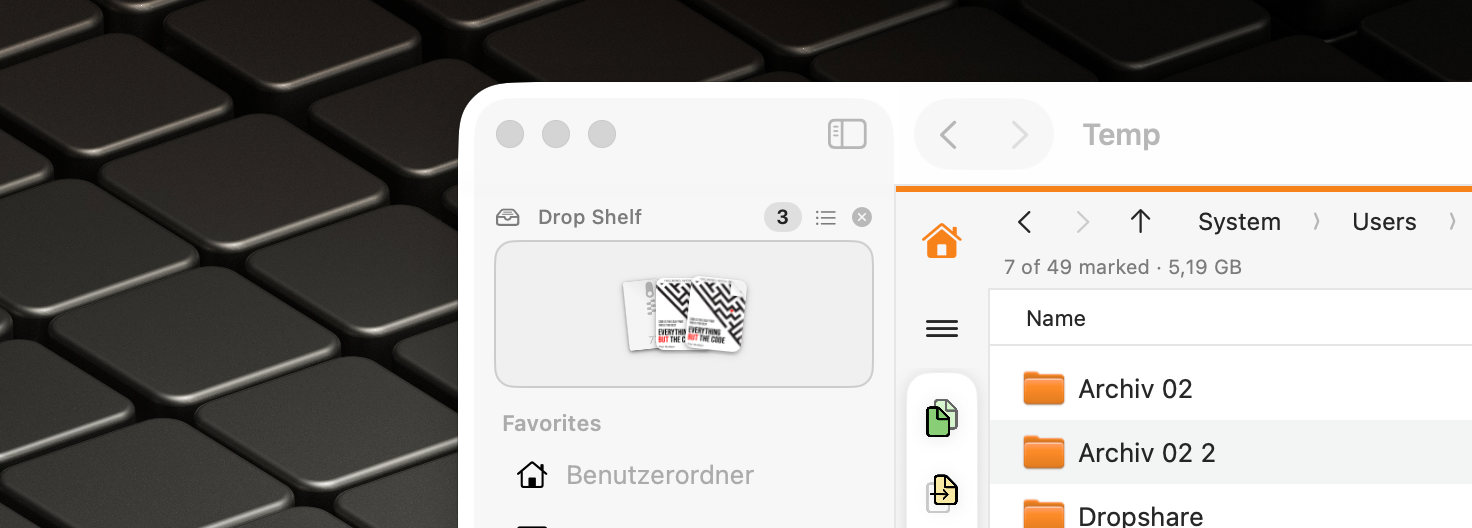
The Drop Shelf at the top of the sidebar is a holding area. Drag files onto it, or select them and press ⌘ + ⇧ + D (Add to Drop Shelf, also in the context menu). That way you collect items across several folders and drag them into a destination together — into Finder or into a panel.
Add something while you have hidden the sidebar and FileWorks shows it, so you see the result. If it is only collapsed because the window is too narrow, it stays collapsed and appears as soon as the window is wide enough (see When the Window Gets Narrow). The list button in the shelf header holds the per-item actions and the option Keep items after dragging out. That one helps when the same collection has to go to several destinations in turn.
8.12. New Files from Templates
Many programs offer a fixed choice for creating a file: an empty text document, a spreadsheet, perhaps a presentation. FileWorks does not come with such a list. Instead you put your templates into a templates folder, and every file in it appears in the New File menu. So you decide what is on offer.
8.12.1. What makes a good template
A template is an ordinary file, and FileWorks creates a copy of it. That brings some advantages:
-
Your own documents. A letter with your letterhead, a Numbers spreadsheet with ready-made formulas, minutes with a fixed outline: the new file contains everything the template contains — text, formatting, layout and embedded images.
-
Any format. A Markdown note, a CSV file with column headers, a shell script with its first line already in place: FileWorks does not need to know the format. Anything that can be saved as a file works as a template. That includes Pages, Numbers and Keynote documents.
-
Whole folder structures. A folder is a template too. Create, say, a folder "Project" with the subfolders "Drafts", "Material" and "Delivery", plus a checklist. One click creates the whole structure with its contents, the same way every time.
-
Maintained where they live. You change a template with the program it belongs to, and the next new file contains the change. You add a template by putting a file into the folder — no script, no further step.
-
The same templates on several Macs. The templates folder may live in iCloud Drive or on a network drive. That way several Macs, or a whole team, use the same templates.
8.12.2. The templates folder
On first launch FileWorks creates a templates folder with an empty text file in it:
~/Library/Application Support/FileWorks/Templates
You find the folder under . Show in Panel opens it in the active panel; copy templates into it as into any other folder. Choose … switches to another folder, for example one in your Documents or in iCloud Drive.
FileWorks skips hidden files and references (aliases, symbolic links). A reference points to a file somewhere else; only the reference would be copied.
| FileWorks creates the empty text file only once. If you delete it, it stays deleted. |
8.12.3. Arranging and describing templates
The list under shows each template with its icon and file name. Drag entries to change the order; the menu uses the same order.
Next to each one you enter a description. The file name is also the name of the new file: a template "Project meeting.pages" gives you a file "Project meeting.pages". The name therefore works as a starting point for the new file, but it does not necessarily say what the template is for. The description, for example "Empty project meeting file", appears in the menu as the title, with the file name in small type below it. Without a description, only the file name is shown.
The list follows the folder on its own:
-
New files in the folder appear at the bottom of the list.
-
Deleted files disappear from the list.
-
If you rename a template in Finder, it keeps its description and its place.
FileWorks compares the list with the folder when it comes back to the front, when the folder changes and when you open the section in Settings. So you do not need a refresh button.
If the folder cannot be reached at the moment — because the disk is not connected, for example — Settings shows a notice and the list stays as it is. Your descriptions and the order are not lost.
If you choose a different templates folder, the list starts afresh. The descriptions belong to the files of the previous folder.
8.12.4. Creating a new file
You find New File in the same places as New Folder:
-
in the context menu, on the empty area as well as on an item,
-
in the panel’s action toolbar; the button next to New Folder opens the menu beside it,
-
in the menu .
FileWorks copies the template into the panel’s current folder. The new file takes the template’s name; if that name is taken, it becomes "Name 2", "Name 3" and so on. Afterwards it is selected and the rename field is already open — just as with New Folder.
The copy is a new file, not a second template:
-
It is created and modified now, not at the template’s date. So when you sort by date, it sits among your new files.
-
It is not locked, even if you locked the template in Finder. You can edit and rename it straight away.
-
The template itself stays unchanged.
| Lock your templates in Finder ( → Locked). Then you cannot overwrite one by accident if you open the template itself. The new files are not affected. |
Inside an archive and in read-only locations, New File is dimmed, like New Folder. The last item in the menu, Edit Templates …, opens Settings at the Templates section.
8.12.5. The default template
You mark one template in the Default column. That one you create without a menu: with ⇧ + F7 — next to F7 for New Folder — or with ⌥ + ⌘
N. The menus show the shortcut next to the default template, so you can see what the key creates. At the start, the empty text file is the default.
Clicking another row moves the mark; clicking the marked row removes it. If there is no default, the key creates nothing; the status bar then tells you where to set one. The same applies if the default template disappears from the folder: FileWorks does not simply take the next one, because the key should only create what you chose yourself.
8.12.6. Limits
-
Copied, not filled in. A template is copied as it is. If the new file should carry today’s date in its name or a title in its first line, build a custom tool for it (see Custom Tools).
-
On a second Mac. The settings export contains the path of the templates folder, the order, the descriptions and the default — not the templates themselves. Take the folder with you, or keep it in iCloud Drive to begin with.
9. Editing and Opening Files
A double-click opens a file with its default app. To specifically edit a file, press F3 (or ⌘ + ⇧ + E, or choose Edit in the context menu).
Under you register editor apps together with the extensions they are responsible for (an empty extension list means "all files"). Then:
-
exactly one matching editor → it starts directly,
-
several match → you choose in a dialog,
-
none match → the file opens with its default app (as with a double-click).
For a folder or archive, FileWorks instead shows its contents in the panel. It extracts an entry from an archive before opening it. If you want to open more than 10 files at once, it asks for confirmation.
9.1. Choosing an Editor App
When several apps match, FileWorks presents them in a chooser. The file type’s default app appears separately at the top, even if you have not registered it as an editor. It is often the app you want.
The dialog works entirely without the mouse:
-
Arrow keys move the selection, ⏎ opens, esc cancels.
-
Type the first letters of a name to jump straight to it.
-
Hold ⌘ and every row shows its number — ⌘ + 1 to ⌘ + 9 open immediately.
The dialog leaves out programs that are no longer on the machine. They could not be launched anyway, and would only shift the numbers of the remaining rows.
9.2. Opening Once With a Different App
Sometimes you want to open a file somewhere else just this once — that HTML document in a text editor rather than the browser. For that, the context menu of a single file offers Open With. It lists every app that can handle this file type:
-
The default app comes first, marked "(Default)" and set off by a separator — it is also the one a double-click uses.
-
Below it, the remaining apps follow alphabetically, each with its icon.
The list comes from macOS itself — the same one the Finder shows. There is nothing to set up: install a new app and it appears on its own.
| Open With only appears for a single, real file — not for folders, multiple selections or entries inside an archive (copy those out first). The permanent "always open this extension with that app" mapping is what is for. |
10. Tags
FileWorks reads and writes Finder tags — the same coloured labels Finder shows. What you set here is a real Finder tag; what you set there appears here.
macOS comes with seven system colours: red, orange, yellow, green, blue, purple and grey. On top of those you can add any number of your own tags, with or without a colour.
Because FileWorks writes tags straight into the file’s metadata, a new tag appears here immediately. Finder and the system-wide tag search catch up once Spotlight has re-indexed the file — usually after a few seconds.
10.1. Assigning Tags
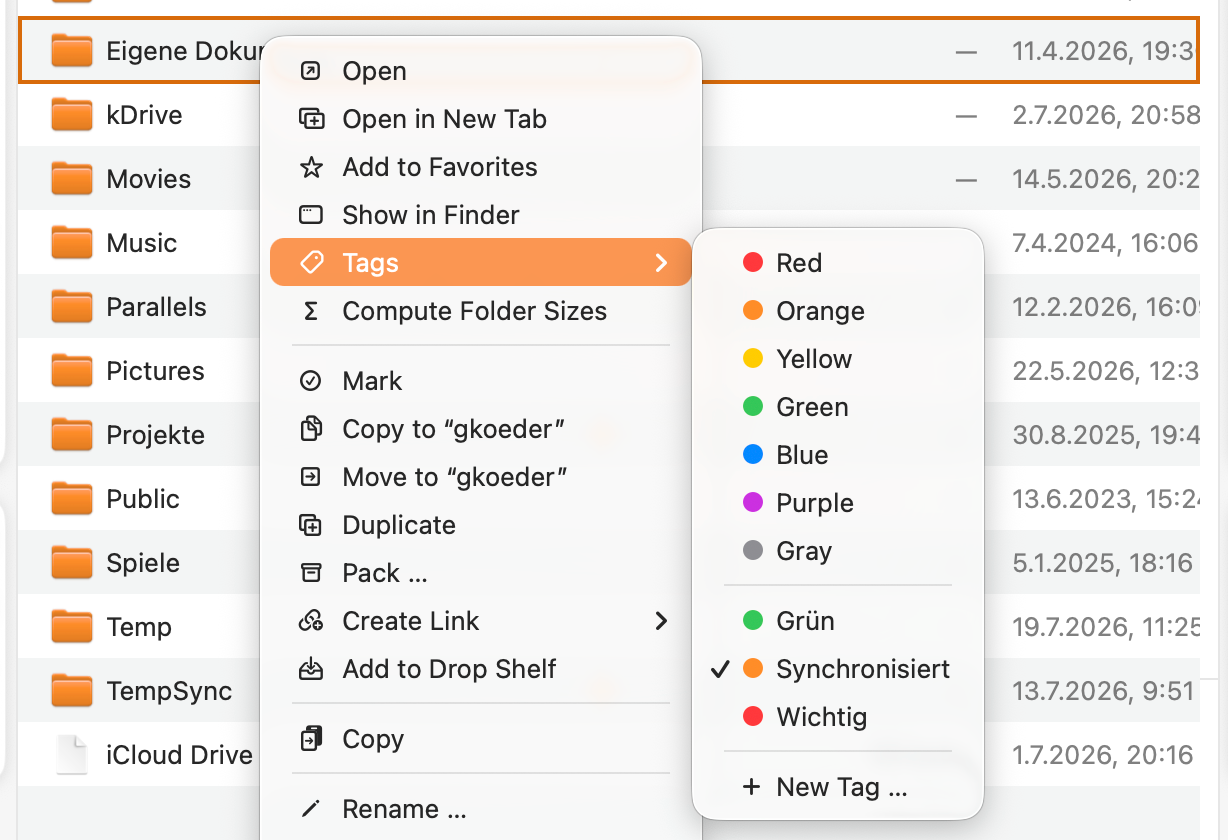
The quickest way is the context menu. Right-click one or more items and open the Tags submenu. It lists the seven system colours and every tag you already use, each with a check mark. A click toggles the tag on the selected items:
-
If any selected item does not have the tag yet, the tag is added to all selected items.
-
If they all carry it already, they all lose it.
Finder behaves exactly the same way. The coloured dot beside each entry shows the colour.
10.2. Removing All Tags
Clicking a checked tag removes that tag from the selected items, but only that one tag. In a folder with many different tags, you would have to find and untick each one separately.
For that, the bottom of the Tags submenu holds Remove Tags. It strips every tag from the selected items at once. Since this cannot be undone, FileWorks asks first and shows the number of selected items.
Only items that actually carry tags are changed — files without tags are skipped. Afterwards the status line says how many items were really cleared, or No tags found if there was nothing to do. Your tag list stays as it is: the tags go from the files, not from the sidebar.
10.3. Creating a New Tag
New Tag … — in the Tags submenu of the context menu or via Add Tag in the inspector — opens a small dialog. Type a name, optionally pick a colour (the first swatch, a crossed-out circle, means "no colour") and press Assign Tag. The tag lands on the selected items and moves into your tag list, so it shows up in the sidebar and in future menus.
10.4. The Inspector Tag Editor
With exactly one item selected, the inspector (⌥ + ⌘ + I) shows that file’s tags in the Tags section. They appear as small chips that you can click to remove. Add Tag attaches a system tag or an existing tag; New Tag … creates a new one. Take the last chip away and the file carries no tags at all. See Viewing File Information in the Inspector.
10.5. Tags in the List
In the list view, small coloured dots sit next to the name of every tagged file — one dot per colour, slightly overlapping, as in Finder. Hover over the file to see the tag names. (The icon grid stays deliberately tidy and shows no dots.)
10.6. The Tags Sidebar
Every tag you use appears in the Tags section of the sidebar (which stays hidden until you have at least one). Each row shows colour and name. The section is collapsible like the others; see The Sidebar.
The list is a convenient index, not the tag itself. Remove from Sidebar (context menu) takes only the entry out of the list. The files keep their tag, and the entry returns as soon as FileWorks encounters the tag again.
10.7. Finding Tagged Files
Click a tag in the sidebar (or Find Tagged Files in its context menu), and FileWorks searches system-wide for every file with that tag — via Spotlight. The hits stream into the active panel, just like a file search (see Searching), with a Location column, and the status bar shows Tag "…": N items. For a search result, Go to Enclosing Folder opens its actual location. Navigate away and the tag search ends.
| FileWorks only finds files on drives that Spotlight has indexed. Files on network shares or in excluded locations do not show up — but FileWorks can still read and write their tags. |
10.8. Keeping in Sync with Finder
Tag changes in FileWorks appear immediately. Changes made elsewhere — in Finder or another app — are picked up by FileWorks the next time you open the folder (navigate away and back). To refresh everything at once, press ⌥ + ⌘ + R (Refresh).
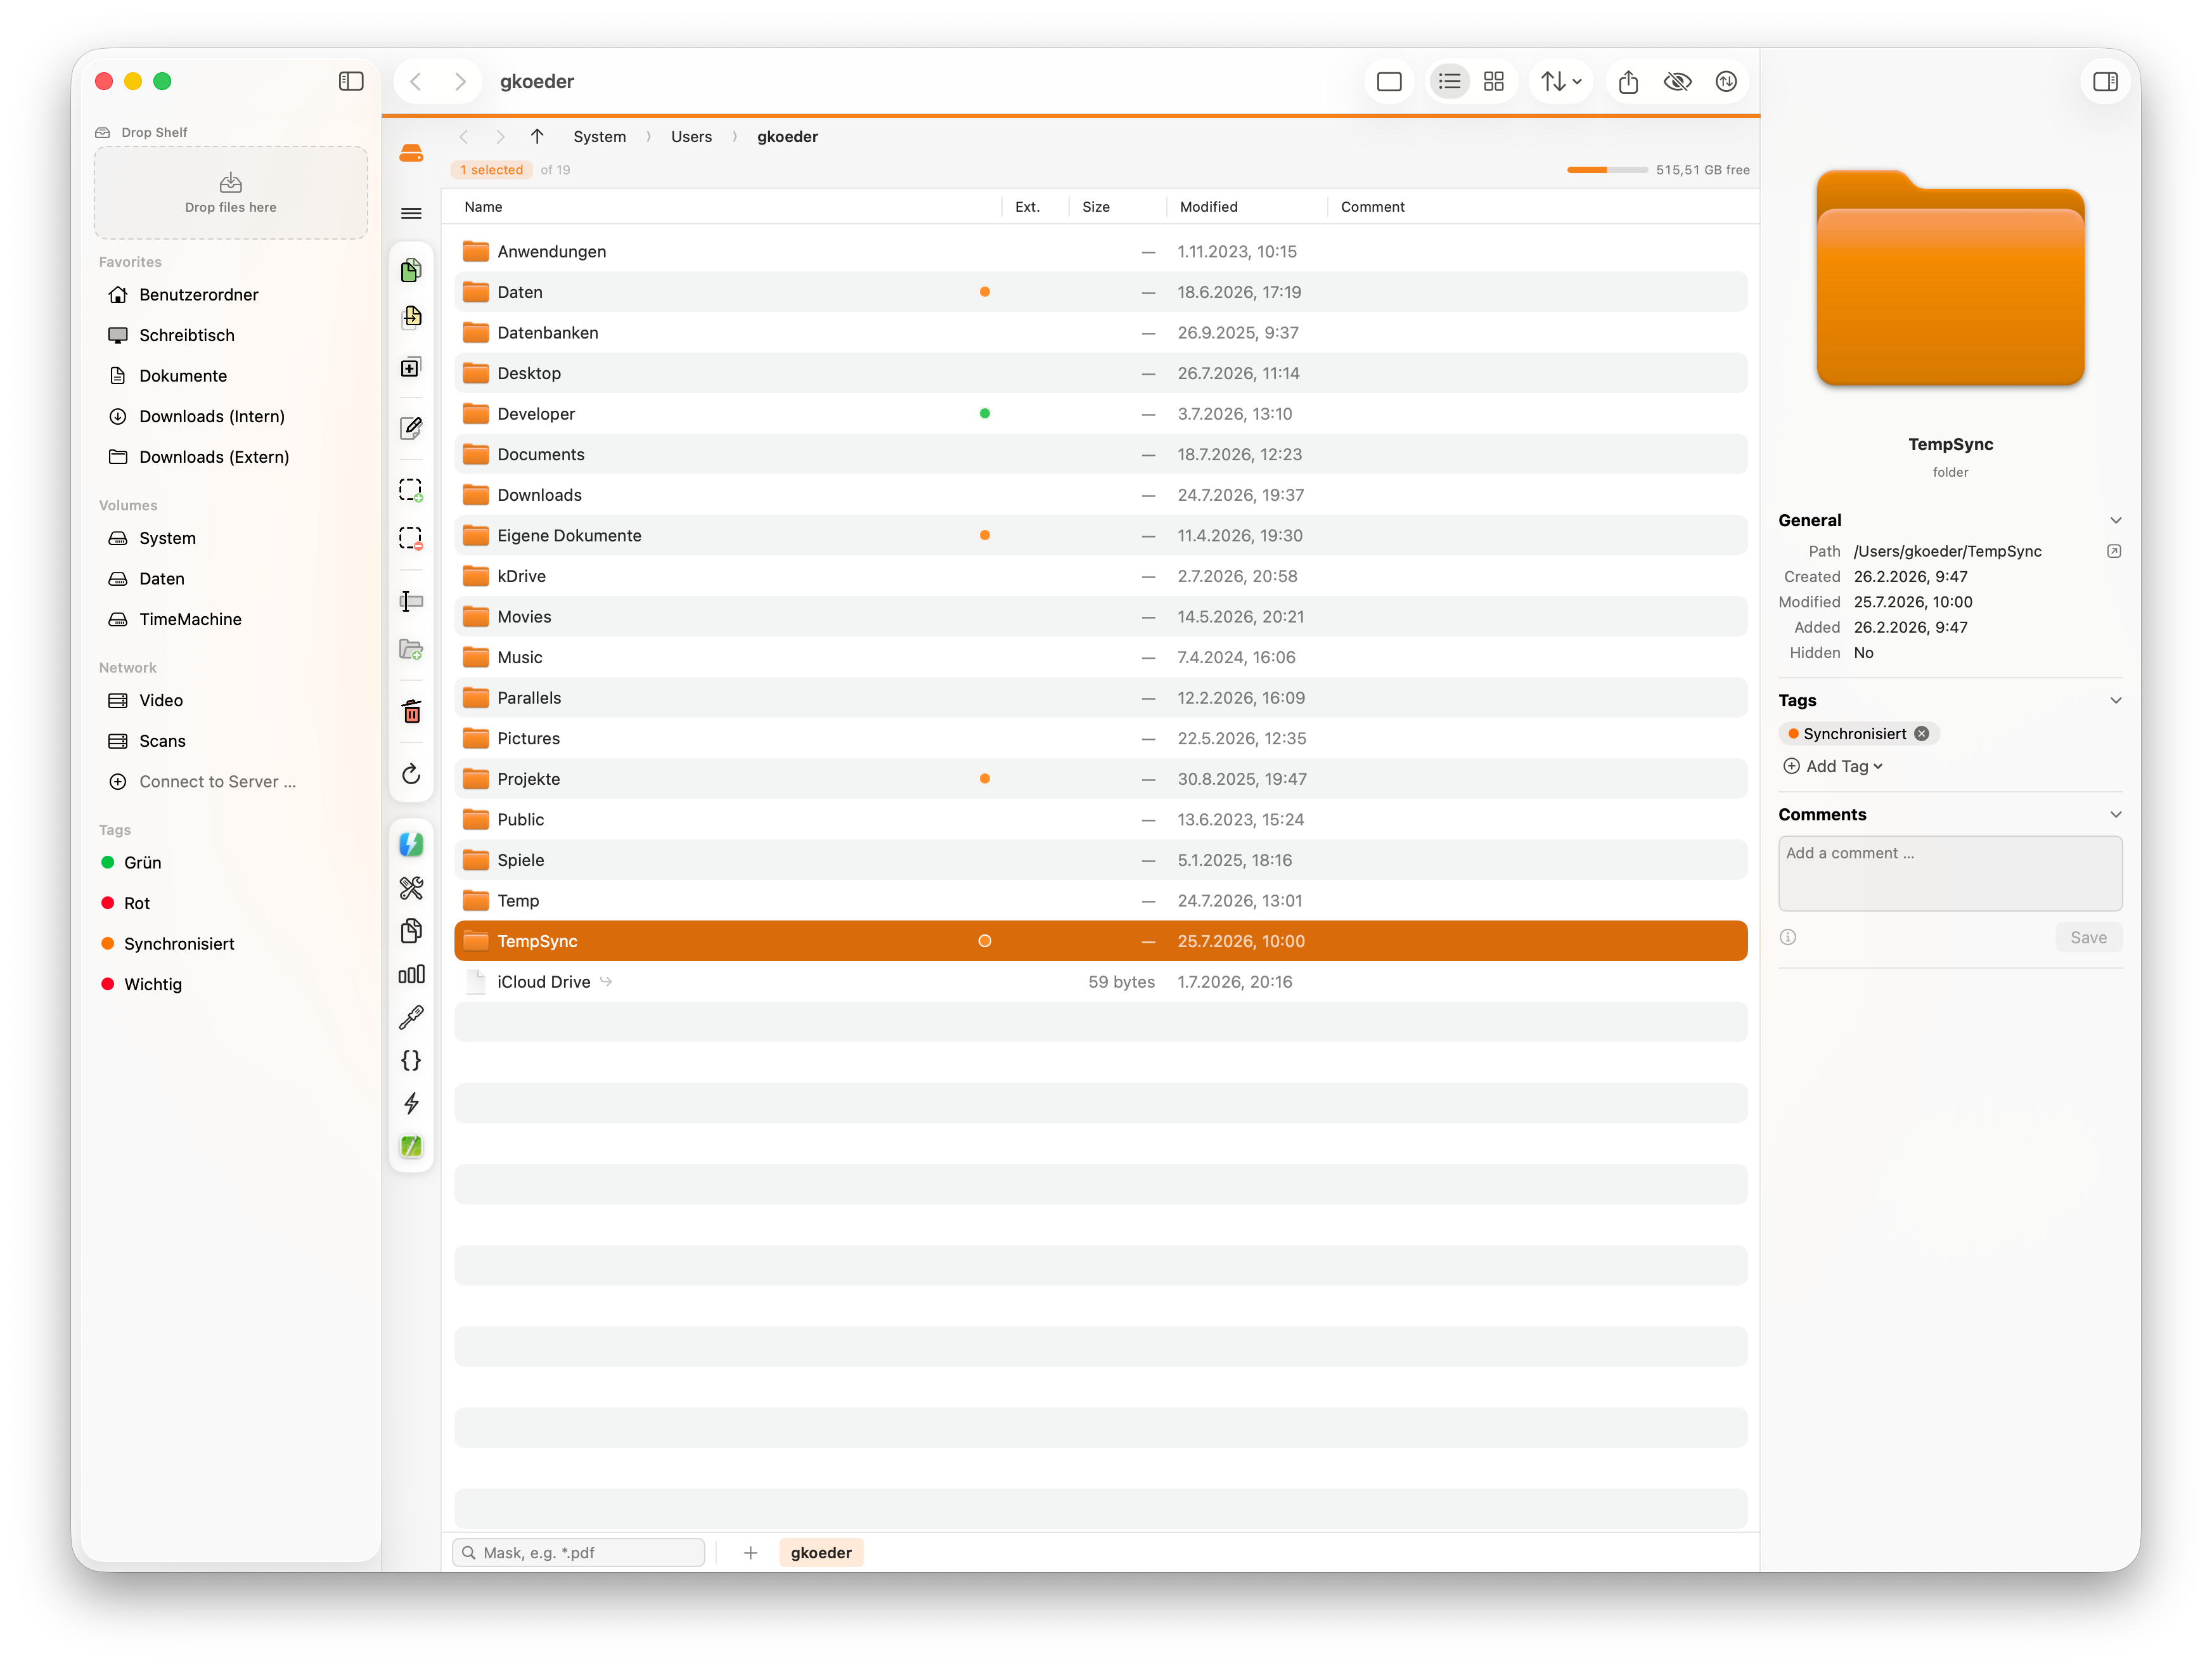
11. iCloud Files
Do you use iCloud Drive — or another cloud service — with Optimise Mac Storage? Then macOS keeps the contents of some files in the cloud only, to save space. The file still appears in the list, but its data reaches your Mac only once you download it.
FileWorks shows you that at a glance. It downloads and offloads files on demand, just like Finder.
11.1. The Status Icon
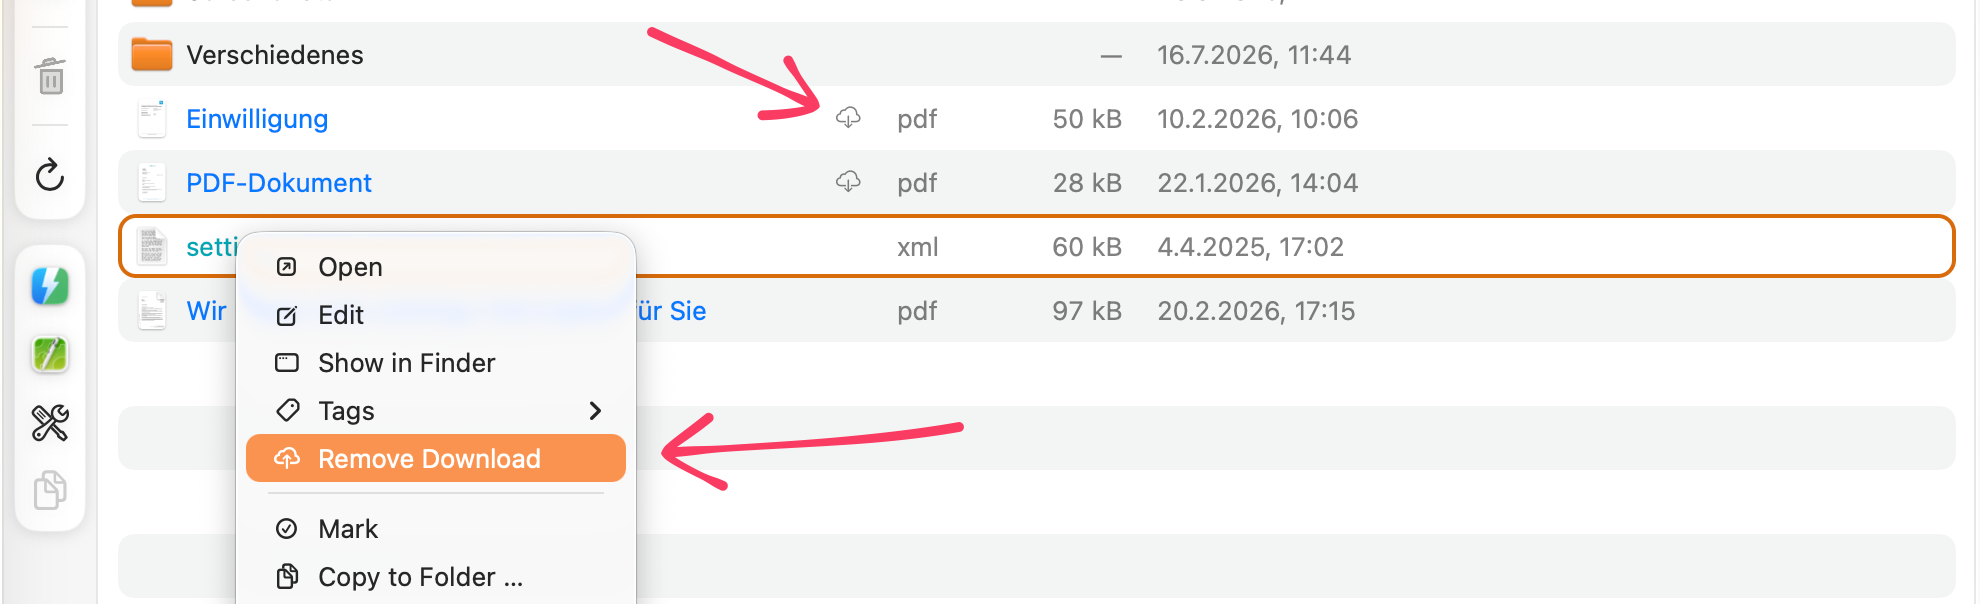
A small icon appears at the right of the name column — but only when there is something to say:
-
A cloud with a downward arrow — the file is in iCloud and not downloaded.
-
A small spinner — the file is downloading right now.
Files that are fully downloaded, and files outside iCloud altogether, show no icon. The list therefore highlights only files that are not yet stored locally. Hover over an icon for a short explanation.
11.2. Downloading and Removing Downloads
Select one or more items, then right-click the selection to choose an action:
- Download Now
-
Downloads the selected cloud-only files, so their contents are local. The icon switches to the spinner and disappears once the file has arrived.
- Remove Download
-
Removes the local copy to free up space — the file stays in iCloud and can be downloaded any time. This only removes the local copy, so it is safe and needs no confirmation (as in Finder). If a file has changes that are not yet uploaded, macOS keeps it and tells you why.
Both actions work on the entire selection and skip any items they do not apply to.
For a single item, the inspector (⌥ + ⌘ + I) also has an iCloud section with the same Download Now / Remove Download button.
11.3. Copying and Moving Cloud Files
You do not have to download a file before copying or moving it. When a job needs a cloud-only file, FileWorks fetches its contents as part of that job. The copy is therefore complete, never an empty placeholder.
This works with any provider — iCloud, Dropbox, OneDrive or Google Drive — because it uses the macOS File Provider framework. For iCloud you see a cancellable "Downloading …" step; other providers download quietly in the background. See The Transfer Queue.
| The status icon and the Download Now / Remove Download actions exist for iCloud only — Dropbox, OneDrive and the like show no icon and no menu entry (macOS does not expose their status the way it does for iCloud). Copying and moving still work correctly. If the iCloud status changes elsewhere (for example, you download or offload a file in Finder), FileWorks picks it up when you reopen the folder or press ⌥ + ⌘ + R. |
12. Archives
When the system library libarchive is available, FileWorks treats archives like folders.
12.1. Browsing and Extracting
Double-click a .zip, .7z, .tar.*, .rar or .iso file and it opens like a folder; FileWorks supports additional formats as well. The path bar leads you through the levels. You cannot write into an archive; on the right of the status bar, the archive pill takes the place of the free space (see Reading Archive Status in the Archive Pill).
-
Copy entries out (F5 to the other panel, or drag them to Finder) — the extraction runs through the queue, with progress tracking, cancellation and conflict handling. Dragging to Finder gets a card as well — there FileWorks only extracts once Finder asks for the files, and that can take a while (see Why Some Archives Take Longer).
-
Open or edit a single entry — FileWorks extracts it into the cache first, then opens it.
-
You can drag whole folder subtrees out. FileWorks extracts them on drop.
When copying items out, FileWorks preserves the permissions stored in the archive: a file that only you could read remains private, and an executable script remains executable. An archive cannot, however, grant broader access than macOS normally gives a new file. A file stored as writable by everyone is therefore extracted as writable only by you. The command-line tool tar behaves in the same way.
FileWorks discards inappropriate permissions, such as those that would run a file under another user’s identity. Files, folders and links also retain the modification date stored in the archive rather than receiving the extraction time.
While FileWorks is filling a folder, only you can access it. The folder receives the archived permissions only after its contents are complete. If you cancel, folders already created remain protected in this way.
If one of these folders is moved and replaced while extraction is in progress, FileWorks leaves the replacement untouched. When extracting into an existing folder, FileWorks also preserves that folder’s permissions and modification date.
If you downloaded the archive from the internet, it carries macOS’s quarantine flag. FileWorks passes it on to everything you take out — including files you open straight from the archive. macOS therefore checks an app or installer package from a downloaded archive when you first open it, just as if you had extracted the archive in Finder. Nothing that comes out of an archive you created yourself gets the flag.
Not every drive supports the quarantine flag. If it cannot be set, FileWorks still extracts the items. The queue card then remains visible and shows in orange how many items have no quarantine flag; Details … lists them individually. macOS will not perform its usual first-open check on those items.
A stricter rule applies when you open a file directly from an archive: if FileWorks cannot set the quarantine flag, it does not open the file.
If a .tar holds a hard link (two names, one content), you get the content, not an empty file. If such a reference points nowhere, FileWorks says so instead of quietly delivering nothing.
Some archives list entries that cannot be extracted at all — a file Folder alongside an entry Folder/File, for instance. FileWorks names those in the card’s error list rather than presenting an incomplete folder as a complete one — when copying to a panel as well as when dragging to Finder. Finder receives whatever could be extracted. The same goes for entries FileWorks had to skip because of a damaged entry header. |
If a single file fails while you drag to Finder — because the password is missing, say — FileWorks removes it instead of leaving it empty or half written. Whatever has already arrived stays.
If the archive file changes while you are inside it — because you replace it or another program rewrites it — FileWorks reads it again by itself. If an operation is running on the old state at that moment, it reports The archive was changed after it was opened — open it again and repeat the action for the remaining entries. That way, parts of two different archives never get mixed.
You can turn browsing off entirely under → Archives — then a double-click opens the archive with its default app.
| Your own tools are greyed out inside an archive (see When a Tool Is Available). An entry you see is not a file yet — there is no path a program could open. Copy it out first, and the tool works with it normally. |
12.2. Reading Archive Status in the Archive Pill
When a panel is inside an archive, the right side of the status bar shows a pill with the archive’s name instead of the free space. Normally it is grey and unobtrusive. It only takes on colour when there is something to know:
| Display | Meaning |
|---|---|
|
Grey, with a box |
All is well. |
|
Orange, with a key |
The archive is encrypted and you have not entered the password yet. Once it has worked, the pill turns grey; the key stays. |
|
Red, with a warning triangle and a number |
Something in the archive is unusual, such as duplicate entries, a damaged entry header or an encryption FileWorks cannot read (see Password-Protected Archives). The number tells you how many entries are affected. |
In the inactive panel the pill stays grey; the symbols stay the same.
Click the pill to see details about the archive:
-
Format — for example “ZIP” or “tar, compressed with gzip”.
-
Files and Folders — how many the archive contains.
-
Size and Unpacked — how large the archive file is and how much space its contents need once extracted.
-
Password — whether the contents or the names as well are encrypted, and whether you have entered the password yet — or whether the encryption cannot be read at all.
-
Quarantine — whether the archive is flagged as downloaded, by which program and when. The flag passes on to everything you take out.
-
Checksums — whether and how damage to the contents can be detected (see Verifying Archives).
-
Findings — what is unusual in the archive, with examples.
12.3. Why Some Archives Take Longer
With .zip everything is quick: each file sits there on its own, and FileWorks jumps straight to the one you need.
With .7z, .tar.gz and their relatives it is different. These formats compress the files as one piece, often the whole archive as a single connected stream. That saves space, but it has a consequence: to reach a file in the middle, everything before it has to be unpacked first. There is no shortcut — every other program has to do the same.
An example from practice: a 4.8 GB 7z archive. The folder Sourcecode inside it is tiny at 88 MB, but sits behind 4.7 GB of other data. A good minute passes before the first file appears; after that, all files are there within seconds.
So you are not left guessing during that time, the card in the queue shows Reading archive along with how far FileWorks has come in the archive file. The number keeps growing — the application is not stuck, it is reading.
That it stays at this one minute is down to reading ahead: when copying to a panel, FileWorks works folder by folder, but the archive delivers the files in its own order. Whatever passes by and will be needed shortly, FileWorks briefly sets aside instead of reading from the start again later. That takes some free space at the destination, 1 GB at most. If space is tight, FileWorks does without it: the operation takes longer but succeeds — room for your files always comes first.
The same applies when you drag several entries to Finder at once: FileWorks reads the archive for all of them together instead of unpacking it from the start for each entry.
|
If you create a large archive you will later want to dip into: choose If you need the whole archive anyway, solid compression is the better choice — then everything is read in order, which is the fastest case. |
| FileWorks reads encrypted ZIP archives in one go as well, and asks for the password only once. It never sets decrypted contents aside while doing so. |
12.4. Creating Archives (Pack)
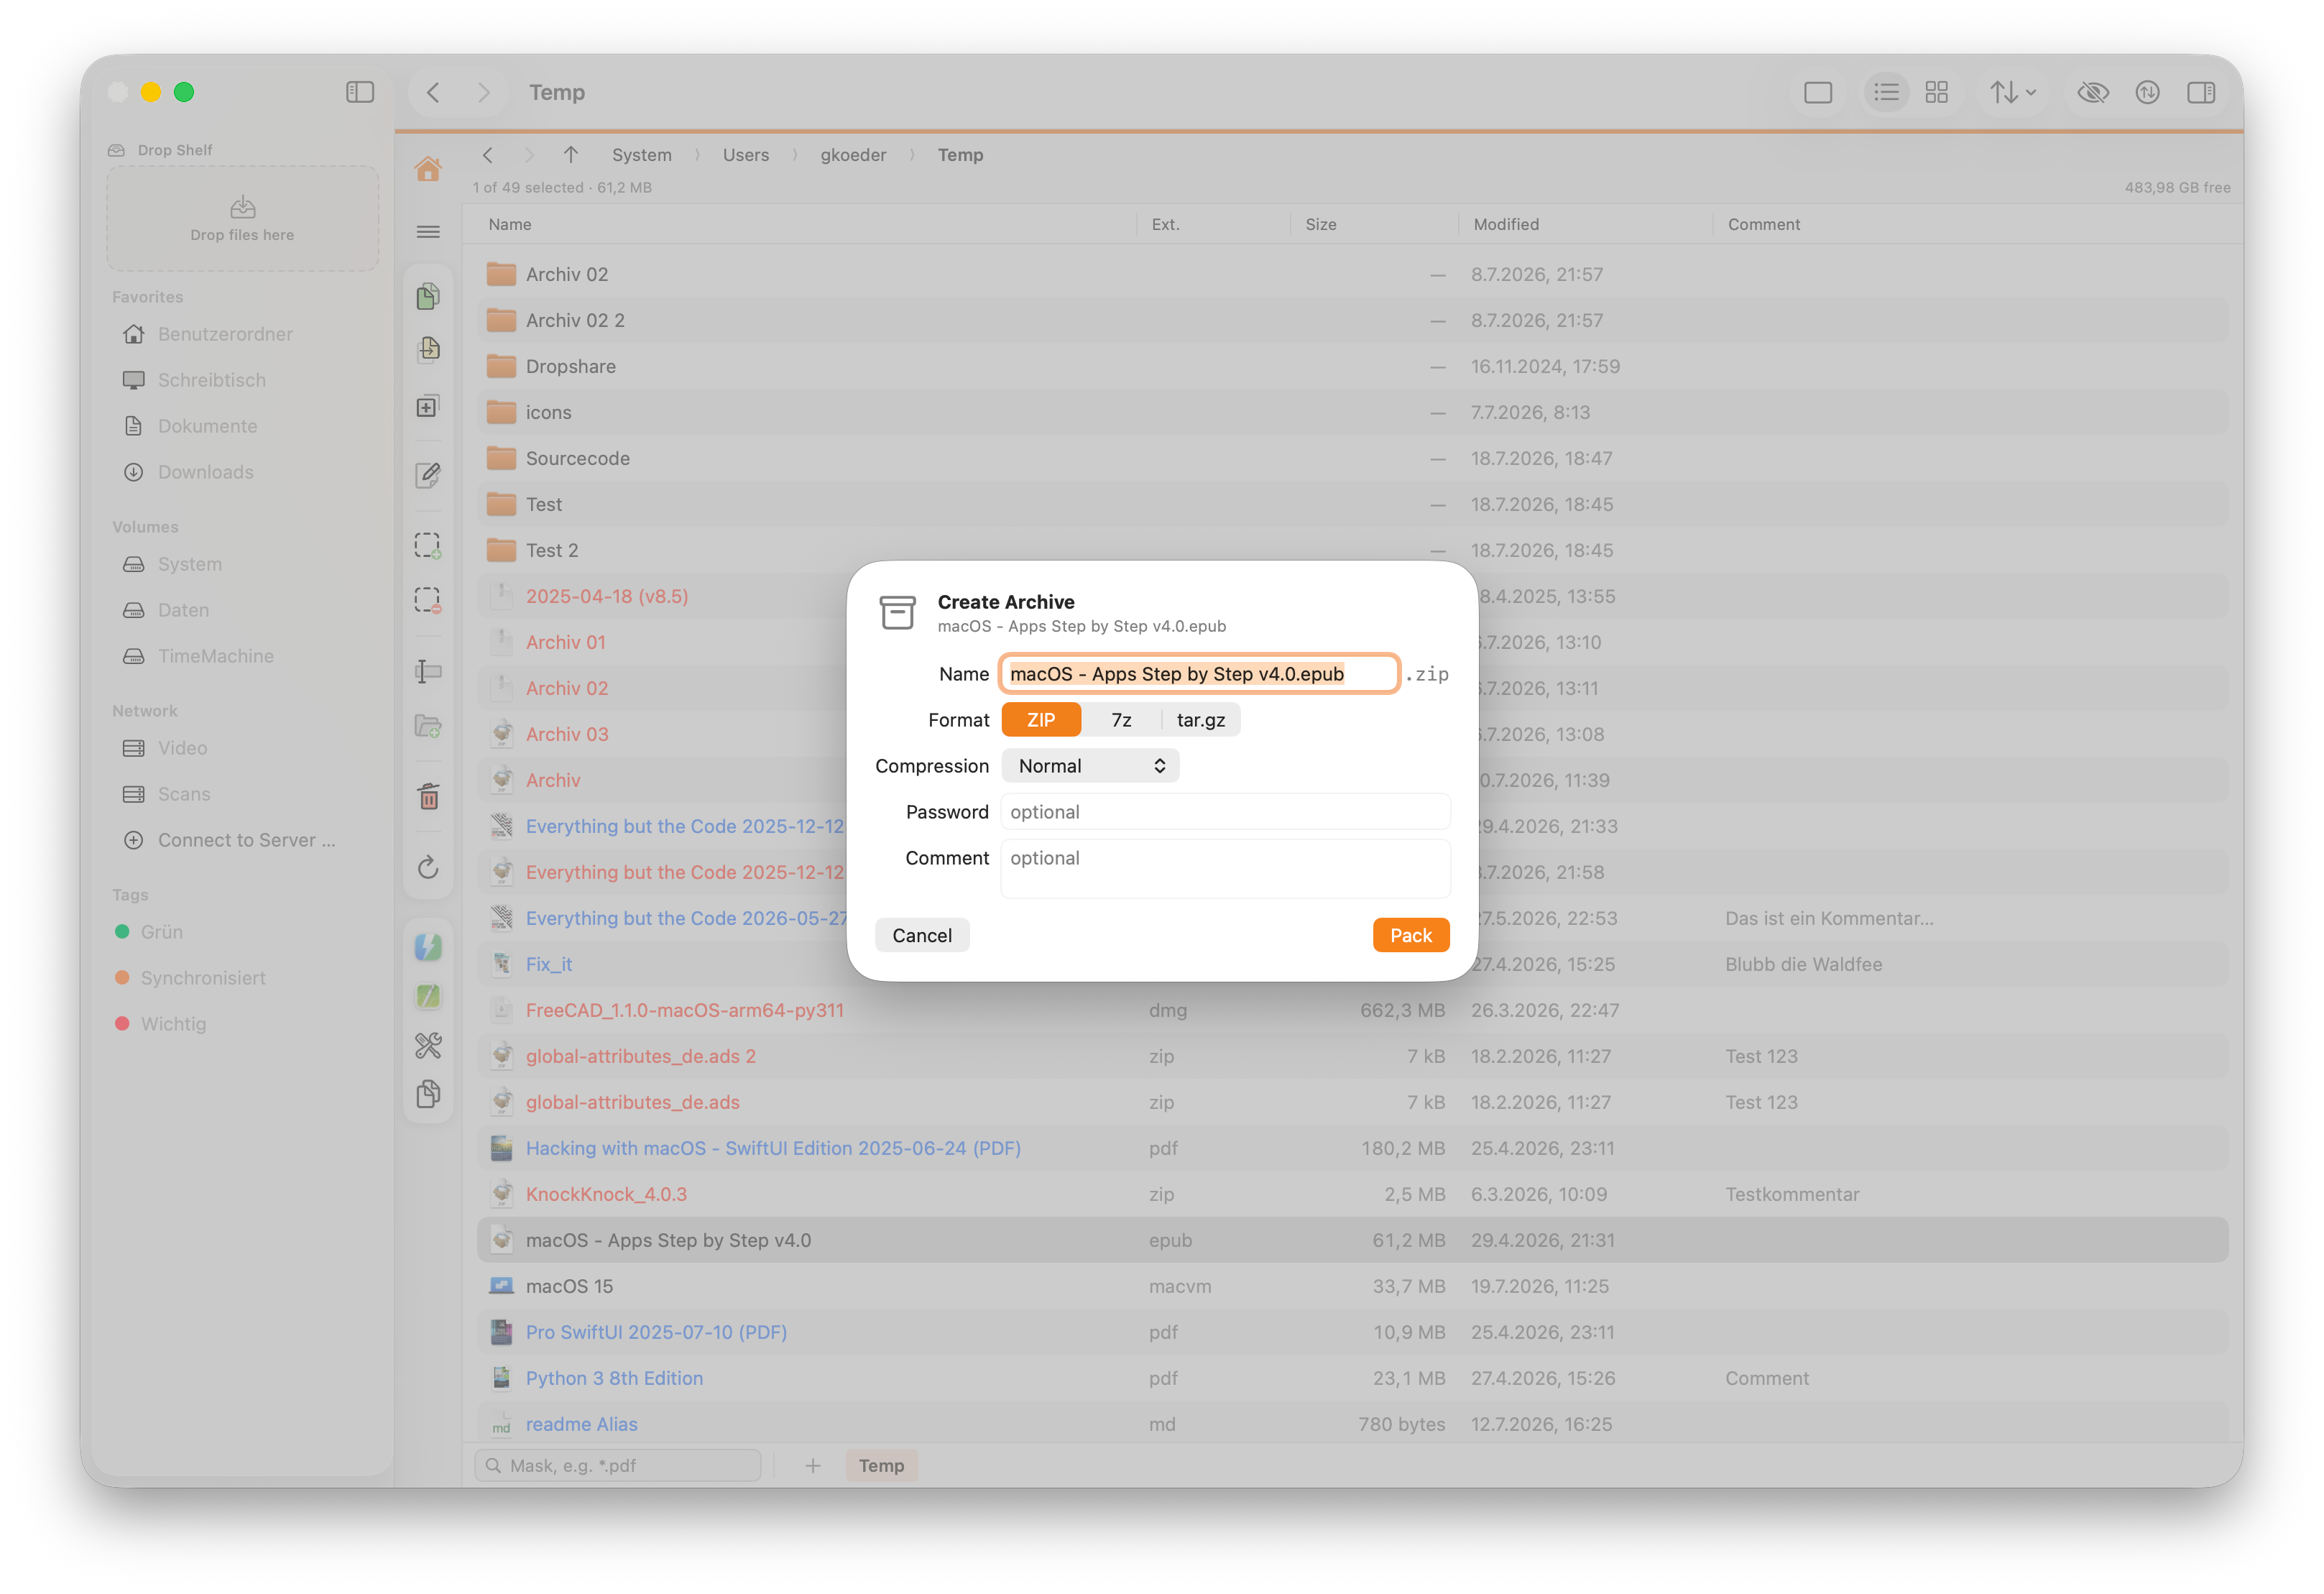
Mark items and choose Pack … (Actions menu or context menu):
-
Destination — where the archive is written: the folder you are packing from, the other panel’s folder, or any folder via Other Folder …. That way you don’t have to move the finished archive to where it belongs afterwards.
-
Format — ZIP, 7z or tar.gz.
-
Compression — None (store only), Fast, Normal or Maximum.
-
Password (ZIP only) — either ZipCrypto (weak, but readable everywhere, including Windows Explorer) or AES-256 (secure, but needs 7-Zip / Keka to open).
-
Comment (ZIP only) — stored in the archive.
-
Delete sources after a successful check — turns packing into moving, see just below.
Clicking Pack closes the dialog, and the job carries on in the transfer queue — like a copy or a move. So you can keep working while it packs. The card shows progress, speed and a Cancel button; cancelling leaves no half-written archive behind.
If FileWorks is to remove the originals afterwards, you can follow the three steps there as well: packing, checking, removing.
An archive format does not carry everything attached to a file: Finder tags, Finder comments, resource forks and access control lists stay behind. FileWorks does not pass over that — it tells you which items are in the archive without their extra data, and blocks removing those originals. They are packed all the same; a part of them is simply missing.
If there is anything to report, the card stays put and Details … opens the full view. It keeps three easily confused things apart: items that were skipped and are not in the archive at all; items that are in it without their extra data; and rescued previous versions, whose location you need to know. If everything went smoothly the card disappears — the finished archive is then selected in the panel.
12.4.1. Turning a Pack into a Move
Normally the originals stay put, so afterwards you have them twice: once on their own, once inside the archive. Tick Delete sources after a successful check and FileWorks clears the originals away — but only after verifying the archive.
That gives the operation three steps, which you can follow on the card in the queue: packing, checking, removing. While packing, FileWorks computes a fingerprint for every file — from exactly the bytes that go into the archive. It then reads the finished archive back and compares the fingerprints. The sources are removed only if all three conditions hold:
-
Nothing was skipped, so no file was unreadable.
-
The archive could be read in full.
-
Every fingerprint matches that of the corresponding source file.
If any of these fails, the sources are left untouched and the card tells you why. The archive stays put in that case — you can take a look at it.
Right before removing each individual original, FileWorks also checks that the archive is still in place and unchanged. If another program has moved, replaced or modified it in the meantime, all originals not yet removed stay put, and the card reports: The archive changed after it was checked — sources not yet removed were kept.
Whether the originals go to the Trash or are deleted permanently depends on → Move items to the Trash. The checkbox label changes with it and tells you each time what is about to happen.
FileWorks deliberately does not remember the tick: the next time you pack, it is clear again. A permanently enabled delete option is the kind of setting you turn on once and have forgotten about two sessions later.
| If the archive would land in a folder you are packing, the option is disabled — deleting the source would take the archive with it. |
12.5. Verifying Archives
An archive can become damaged without you noticing: a transfer may be interrupted, a drive may deteriorate or a copy may arrive incomplete. The file is still there and its size may look plausible; the damage might become apparent only when you extract it, perhaps years later.
Mark an archive (or several) and choose Verify Archive … from the context menu or via . FileWorks reads every entry once in full without writing the contents anywhere. The only question is whether all the data can be read without errors. Nothing is extracted, but verification takes as long as a full extraction.
For a single archive the result sits right in the header; for several you get a list with one row per archive. FileWorks names every entry that failed; Copy Report puts the list on the clipboard.
12.5.1. What a Passed Check Does — and Doesn’t — Tell You
Not every format detects damage equally well. FileWorks therefore reports only what the format can establish; the line below the result explains what was verified:
- every checksum matches
-
ZIP and 7z carry a checksum for each individual entry. Here it is possible to identify not just that there is damage, but which file is affected.
- the checksum over the whole archive matches
-
tar.gzand related formats have one checksum across the entire stream. Damage shows up, but cannot be narrowed down to a single file — from the damaged spot onwards the rest is unreadable anyway.For
gzip, FileWorks works that checksum out itself. The system library reads it but never compares it — a.tar.gzwith swapped contents would otherwise pass as sound. If the file contains several concatenated gzip members, FileWorks checks each one separately. - content read in full
-
For all other formats FileWorks says only what it can prove: everything could be read. A plain
.tar, for instance, carries no checksums over file contents at all.
12.5.2. Encrypted Archives
If an entry is encrypted, FileWorks asks for the password. Cancel the prompt and it checks what it can without one — the skipped entries then appear as not checked (encrypted) in the report, and the archive does not count as intact. An unread entry is simply not a checked entry.
Old archives protected with ZipCrypto have a quirk: there, the scheme checks a password against a single byte only, so roughly one in 256 wrong passwords gets through at first. The error only shows up at the end of the entry, when the checksum is checked. In that case FileWorks asks for the password again rather than reporting a damaged archive.
12.6. Password-Protected Archives
When you open or extract an encrypted archive, FileWorks asks for the password. Mistype it and it asks again. A password is remembered for that archive only, and only for the current session — FileWorks never writes it to disk.
This applies to ZIP archives, whether encrypted with the classic scheme or with AES. FileWorks cannot decrypt password-protected 7z and RAR archives — the macOS archive component FileWorks builds on does not support it. FileWorks then does not ask for the password at all but tells you to open the archive with another app, such as Keka. If the file names are encrypted too, the archive cannot be opened at all; otherwise you see its contents but cannot take anything out. The archive pill then turns red, with Encryption not supported among the findings. In this case FileWorks creates nothing at the destination — no empty files and no empty folders.
If you dismiss the prompt, FileWorks won’t ask again during that same operation: on a job covering a hundred entries you don’t want to be asked a hundred times. The next action brings the question back — leaving the archive and opening it again, pressing Space again, or starting a transfer.
13. Checksums
A checksum is a file’s fingerprint: a short string FileWorks works out from the entire contents. Change a single byte and the value looks completely different. That is why checksums answer questions where name, size and date mislead you.
FileWorks answers four of them for you:
-
Do I have this file twice? — even when it goes by another name.
-
Does this download match the published file? — compare it with the checksum supplied by the provider.
-
Is my backup complete and undamaged? — comparison against a destination folder.
-
Does everything match the provider’s list? — comparison against a checksum file.
Select files or whole folders and open Checksums … from the context menu or via .
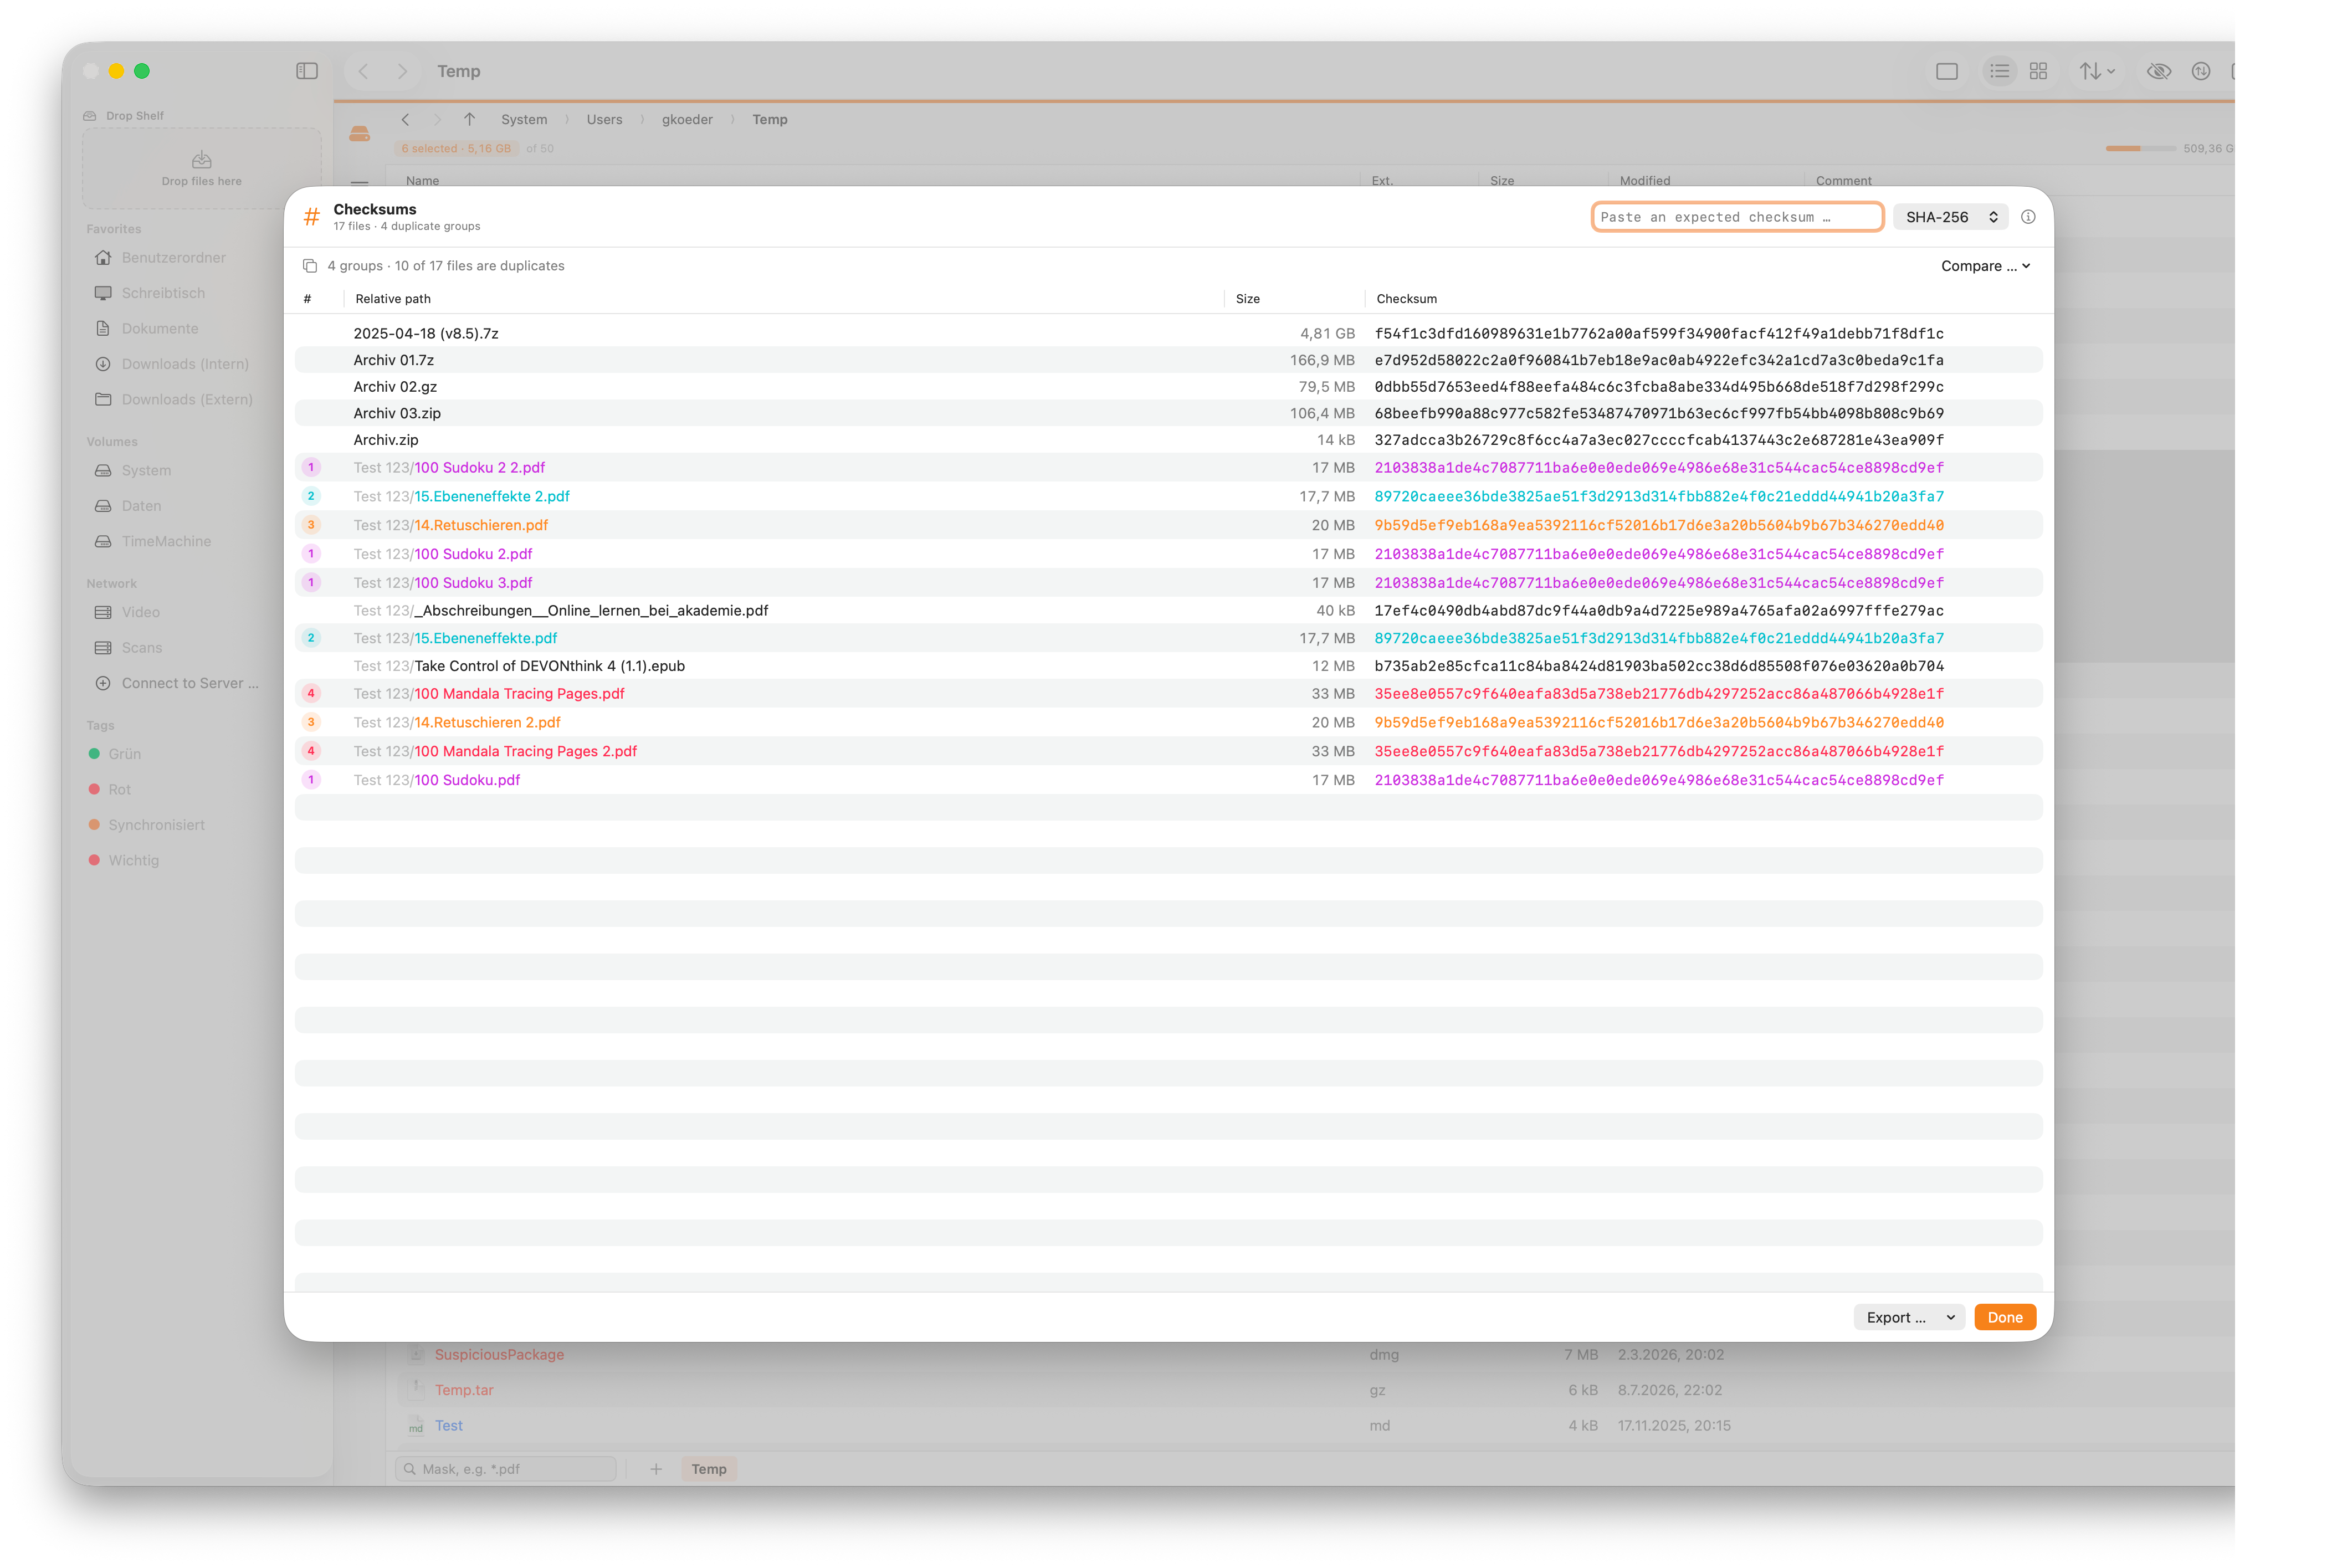
13.1. Choosing the Right Checksum Job
The dialog first asks what you want to find out. A checksum is not the goal; it is the means of answering a question. The selected job determines which columns the table shows and which actions are available afterwards.
| Job | What it is for |
|---|---|
|
Compute checksums |
Shows the values and groups identical files. Needs no reference. |
|
Check against an expected value |
For downloads: a single value that you paste in. |
|
Compare with a folder |
The backup check. FileWorks suggests the folder in the opposite panel as the destination. |
|
Compare with a checksum file |
Against a list such as |
The preselected job depends on your selection: one file selects the expected-value check, several files select checksum computation, and marked folders select the folder comparison. If the clipboard holds something that looks like a checksum, the expected-value check takes priority — and the value is already in the field. That is exactly the flow “copied the value from the website, marked the file, opened the dialog”.
Next to Start you set the algorithm. Changing it costs nothing there; later it would mean recomputing. For the two jobs with a reference the picker is disabled, because there the reference decides the algorithm itself.
In the working view the top row names the running job — and, for comparisons, which criteria FileWorks uses to match files. Change Job … takes you back to the selection without losing the values already computed.
13.2. Choosing an Algorithm
Choose the algorithm at the top right. For everyday use, pick SHA-256: it is today’s standard, and websites usually quote exactly that value.
MD5 and SHA-1 are legacy algorithms with known collision weaknesses: an attacker can deliberately construct different files with the same value. You can still use them with old checksum lists, but not for security-sensitive verification.
The ⓘ beside the menu explains each algorithm in a sentence. Values from different algorithms cannot be compared, so switching triggers a recalculation — but only for values still missing for the new algorithm. Values once computed are kept per algorithm, so switching back costs nothing.
13.3. Finding Duplicate Files
There is no separate job for this — duplicates are detected automatically during Compute checksums. FileWorks simply groups the computed values without reading any additional files.
As soon as several files share a value, their contents are identical — no matter what they are called. FileWorks collects them into groups and gives each one a number and a colour.
You have holiday_2024.jpg, IMG_4471.jpg and Copy of holiday.jpg in the same folder. All three carry the number 1 — it is the same picture three times, under three names.
A click on the # column header brings the groups together. With a few dozen files the colour is enough; with several hundred, sorting is the real gain, because related files would otherwise sit far apart.
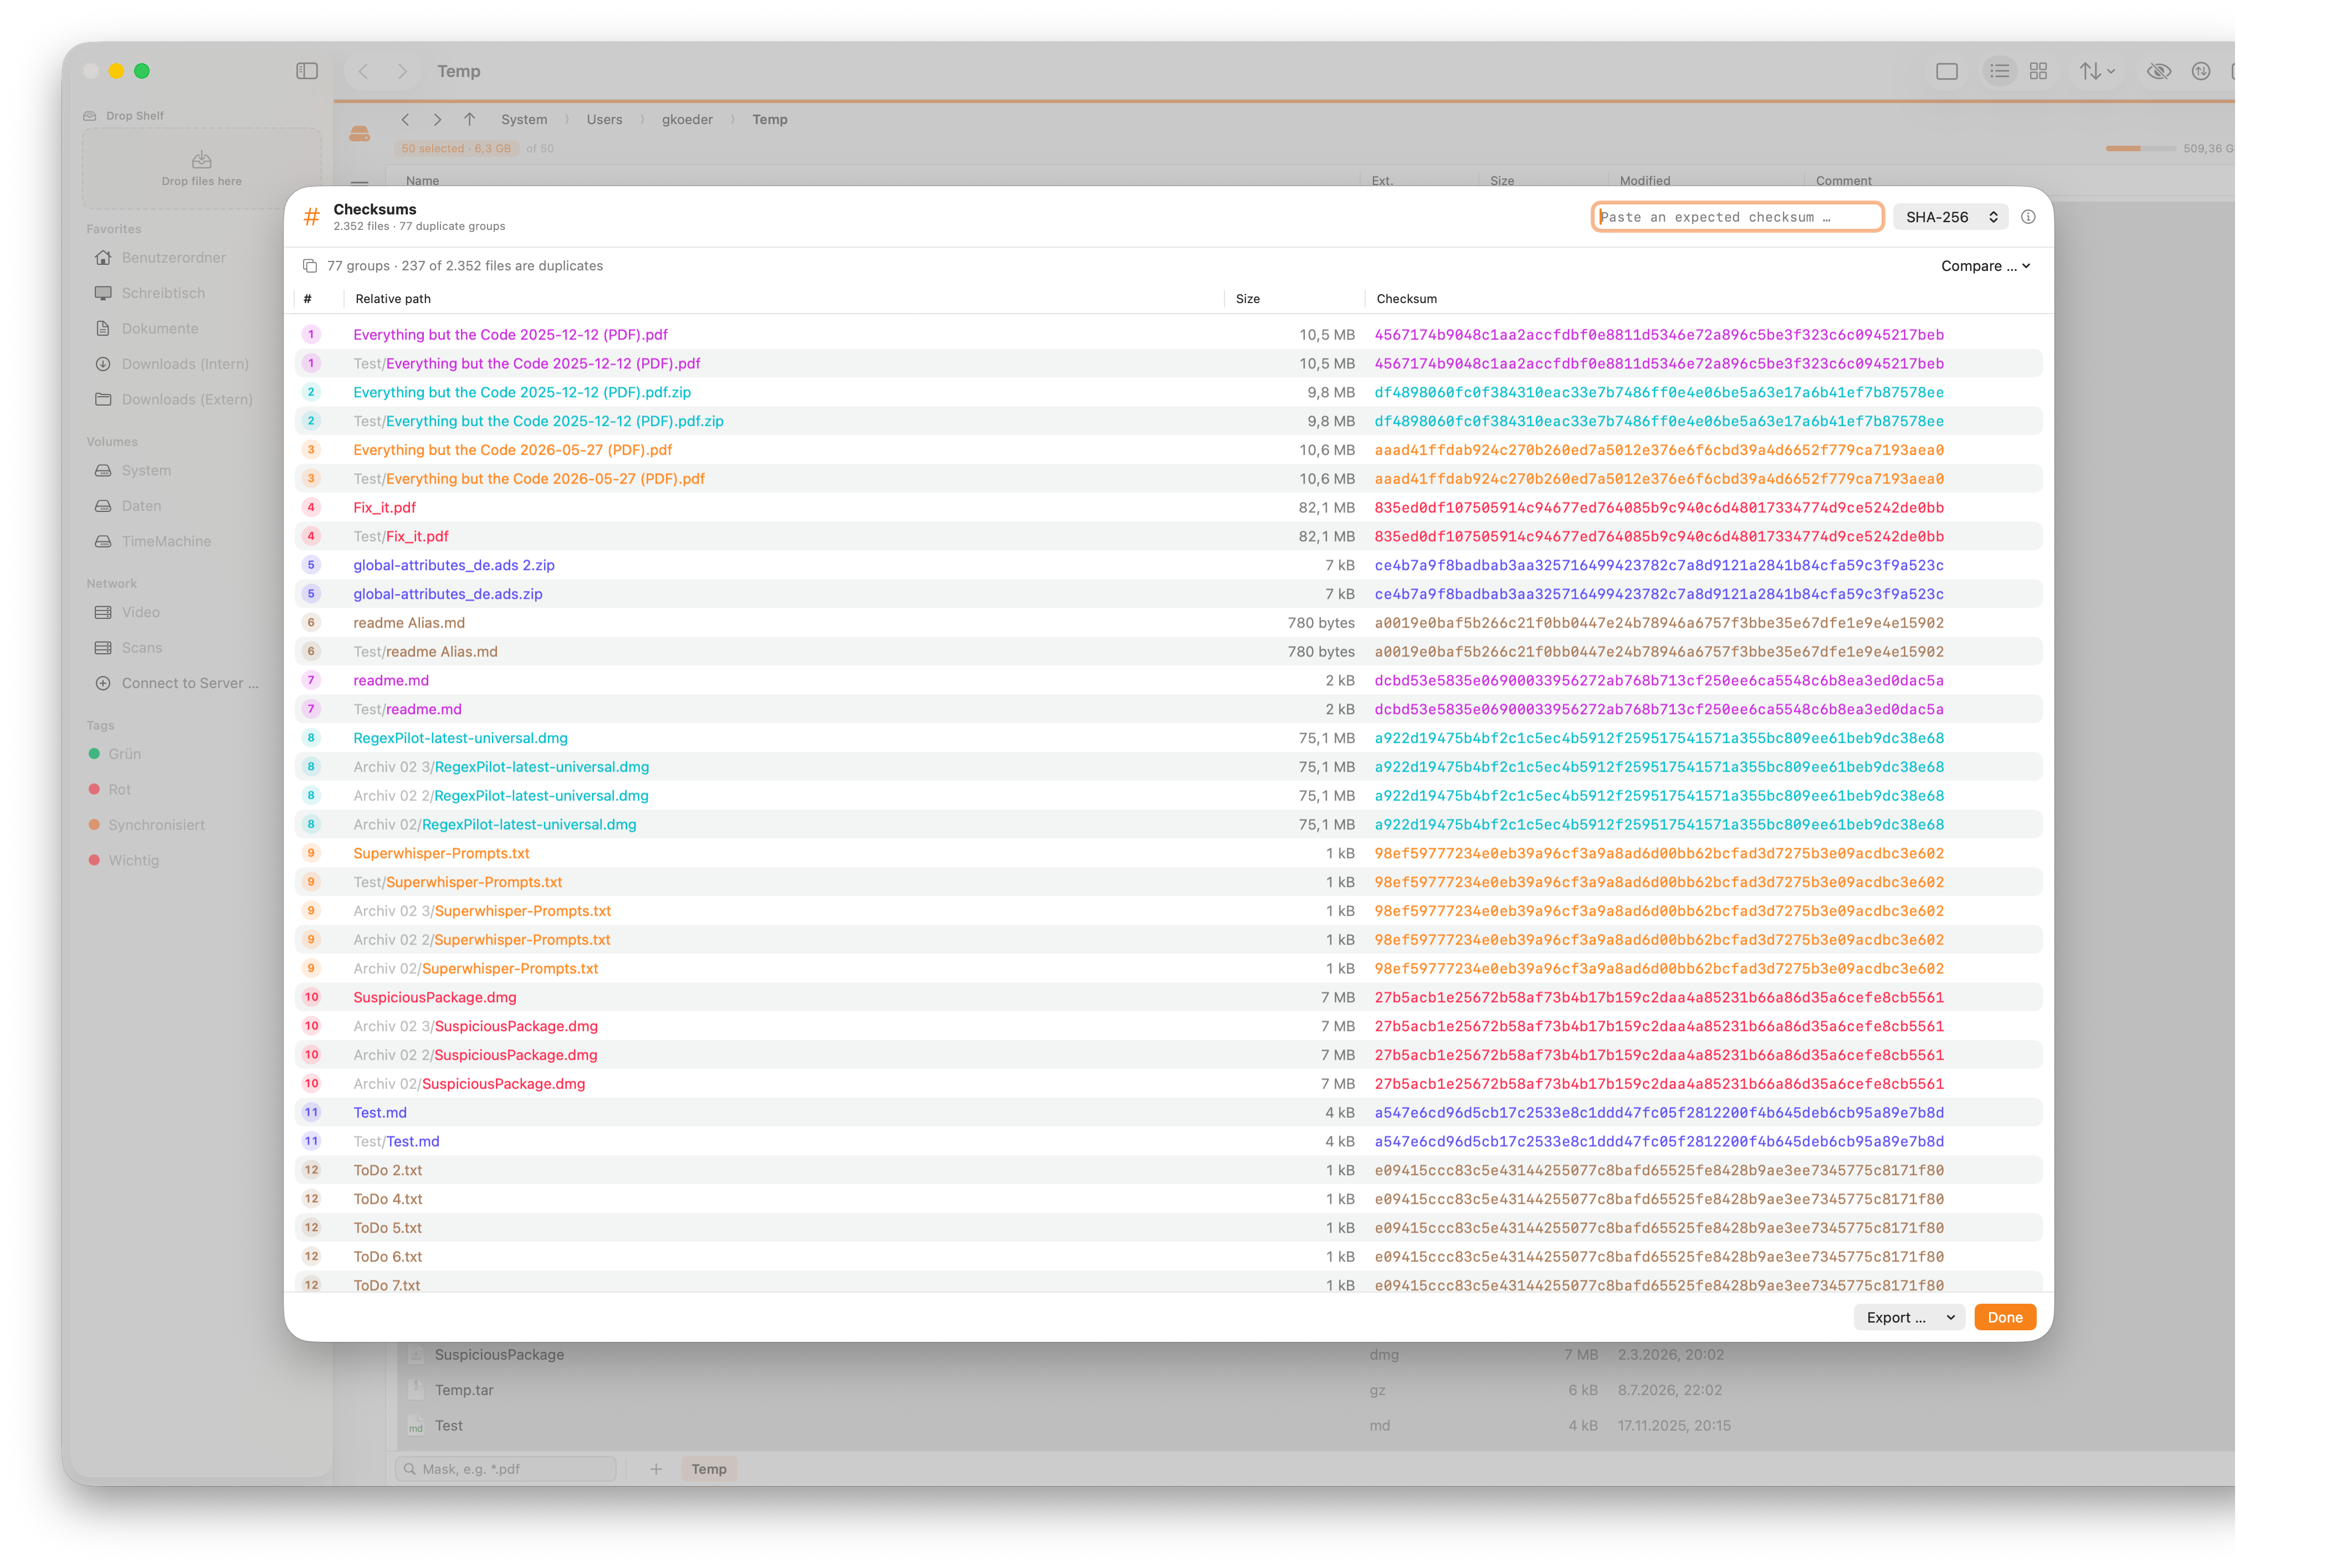
For tidying up, the context menu offers Select duplicates, keep first. FileWorks leaves one file per group untouched and marks all the others. Move to Trash then does the rest. Should you select a complete group by hand, FileWorks asks first — otherwise that content would be gone for good.
| Empty files are left out. They inevitably all share the same value, which says nothing about duplicate content. |
13.4. Verifying a Download
Reputable providers state the expected checksum alongside their files. Rather than comparing 64 characters by eye, paste the value into the field above the list. It appears only in the Check against an expected value job — in the others there would be nothing for it to match.
You have downloaded an Ubuntu image. Copy the SHA-256 value from the download page, select the .iso file in FileWorks, open the checksum dialog and press ⌘ + V in the field. If it says Matches "ubuntu.iso", the file is intact.
The field is deliberately tolerant: it picks the value out of whatever you paste. Whether you copy the bare value, the whole line a3f9… ubuntu.iso from a checksum file, or something like SHA256: a3f9… — it finds it.
Better still: if the length of the pasted value matches a different algorithm, FileWorks switches by itself. Paste a 64-character value while MD5 is selected and it moves to SHA-256 on its own.
While a check is running, the duplicate-group colours are switched off and only the matches turn green. Two sets of colour coding at once would be ambiguous. Clear the field and the groups return.
13.5. Comparing Two Folders
This answers the question "Is my backup complete and intact?" Select the files or folders you want to check, then choose the Compare with a folder job in the initial step. FileWorks offers the opposite panel as the destination — that is what two panels are for. You can also pick any other folder.
FileWorks matches by relative path — the job row says so too. Your selection Pictures with the file 2024/holiday.jpg is therefore matched to <destination>/2024/holiday.jpg. A file of the same name elsewhere in the destination does not count as a match; the two features below exist for exactly that case.
Every row then gets a verdict:
| Result | Meaning |
|---|---|
|
Identical |
Present in the destination, contents equal byte for byte. |
|
Different |
Present, but the contents differ. |
|
Different size |
Present, yet the size alone does not match — so the contents cannot be equal. |
|
Not present |
Nothing at the expected path, and no file of that name anywhere else in the destination either. |
|
Other folder |
Not at the expected path — but a file of the same name lies elsewhere in the destination. The detail row lists the locations. |
|
Moved |
Found by content, see When a File Is Located Elsewhere. The label renamed appears when none of the files found has the same name as the source file. |
|
Found n× |
Several files have that name; it is unclear which one corresponds to the source file. |
|
Unreadable |
The file could not be opened — for example, because of missing permissions or a faulty drive. |
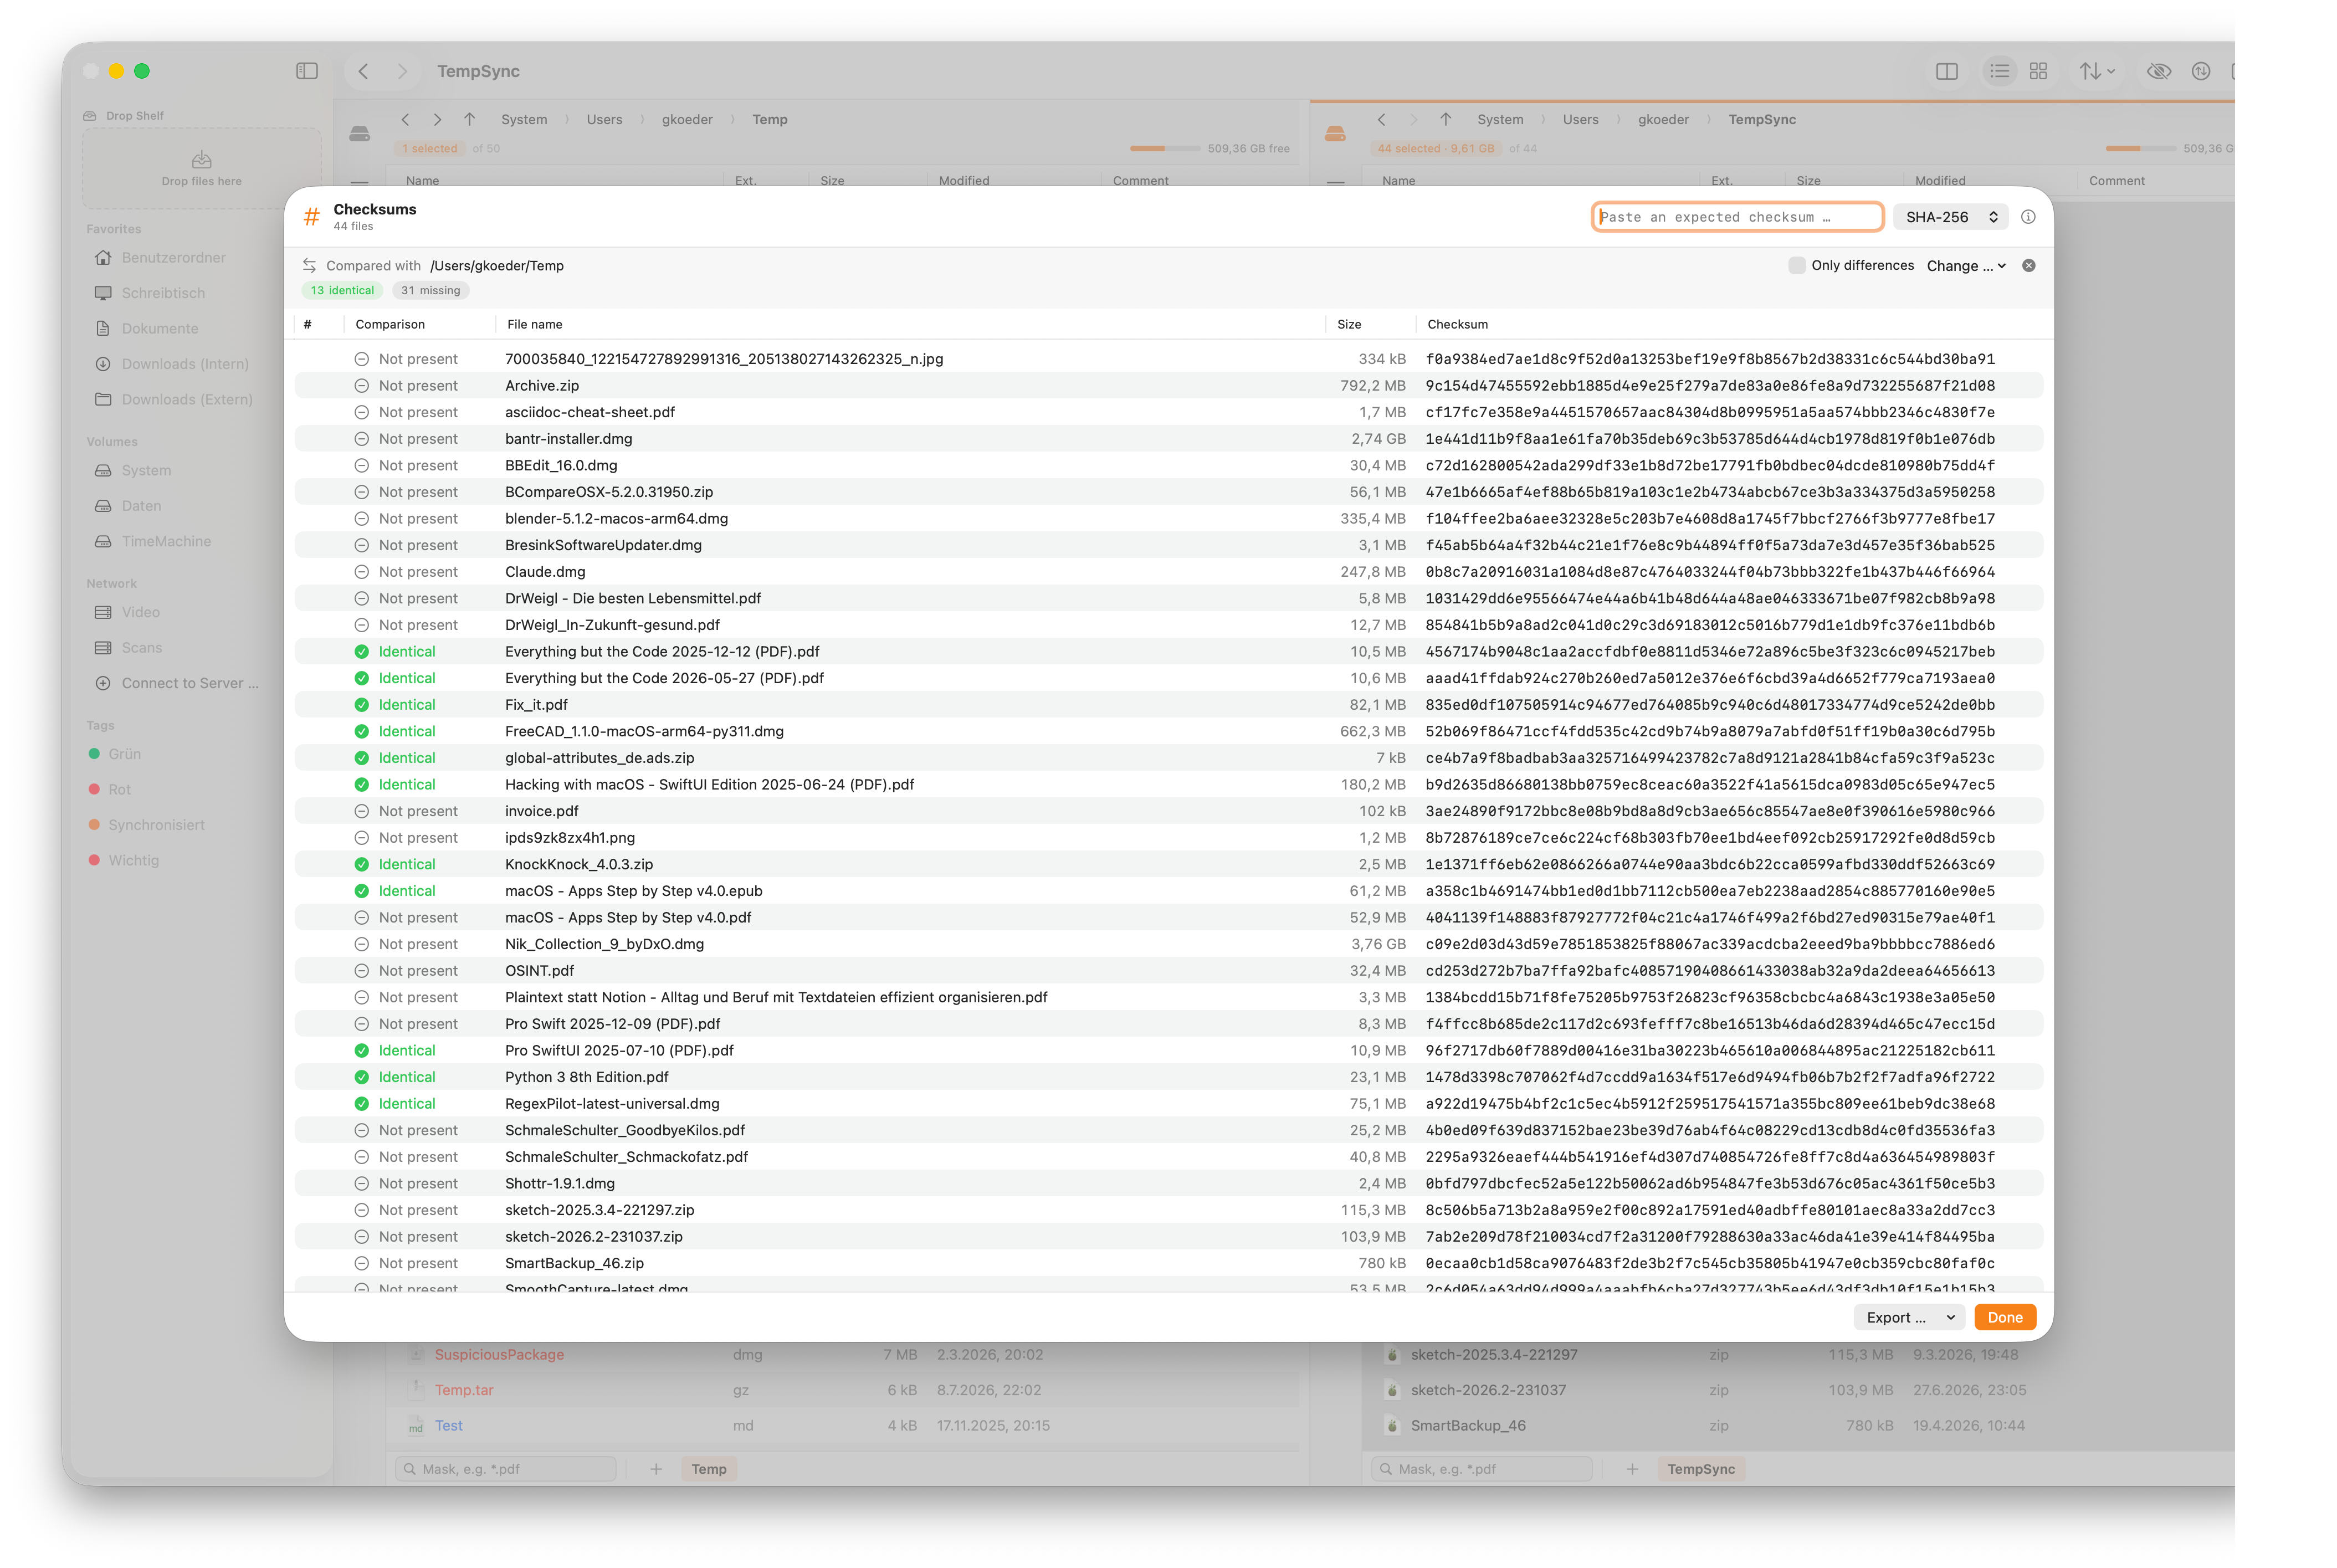
Below the list stands the tally — how many are identical, differing, unclear or missing. The Only differences tick hides everything that matched: with 500 files you want to see the three problem cases, not 497 ticks.
The coloured counters below the list double as selection aids: a click on “39 missing” marks exactly those rows. The same commands live in the context menu under Select.
13.5.1. Viewing Details for a Result
Below the table, you see details for the marked row that do not fit in the columns: the full source path, the matching file at the destination and — if there are several — all matching locations. For Unreadable, this area shows the full error message; during a calculation, it shows progress. The paths can be selected and copied out.
13.5.2. When a File Is Located Elsewhere
Two stages help when there is nothing at the expected path.
The first works on its own: if a file of the same name turns up in another folder of the destination, the verdict reads Other folder rather than Not present, and the detail row lists the locations. That verdict is deliberately distinct from “identical” — only the name was checked, not the content.
You start the second stage yourself. As soon as there are unresolved cases, the option Find Moved Files appears below the tally. It compares by content instead of by path and therefore finds a file even when it was renamed.
To keep the processing effort manageable, FileWorks narrows down the possible matches: only destination files with an exactly matching size in bytes qualify. The size is already available in the directory listing, so the file contents need not be read. And two files of different sizes cannot hold identical content.
“The whole destination tree” therefore usually shrinks to a handful of files. If there are more than 5,000, the run stops with a notice rather than grinding away.
13.5.3. Large Folders and Items from the Cloud
During the comparison, FileWorks shows how many files it has found in the destination folder so far and which directory is being read. Cancel beside it ends the run.
The folder itself can be the bottleneck. When the run meets a folder whose contents are not kept on this Mac — in iCloud Drive, say — FileWorks asks:
- Include
-
Complete, but potentially time-consuming. Every listing requires a request to the provider; individual folders can take minutes to list.
- Skip
-
Quick, but incomplete. The number of skipped folders appears next to the tally afterwards — an incomplete comparison must not look like a complete one.
- Cancel
-
Ends the comparison without a result.
You are asked once per run; after that your answer holds for the rest.
If the destination folder is too large overall — more than 200,000 files — the run stops and says so. Without that notice every row would read “Not present” although nothing was actually searched.
Select folders and the comparison reaches across all subfolders. Matching then goes by the path within your selection, not merely by file name. If 2024/Q3/report.pdf sits in the destination as archive/report.pdf, it rightly counts as not present — it is somewhere else, after all.
| With folders, FileWorks deliberately computes nothing in advance. Only the comparison determines what actually has to be read — size differences can be detected without reading any file contents. If you want all the values anyway, press Compute all. |
13.6. Working with the Results
The dialog lets you act on the results as well as view them. Right-click a selection — or use the buttons at the bottom left:
-
Copy to destination — transfers missing and differing files into the comparison folder. The folder structure is preserved:
2024/Q3/report.pdflands under2024/Q3/there too, and missing intermediate folders are created. -
Check again — revisits individual rows without repeating the whole comparison. Handy once you have put something right.
-
Select — picks up all missing, all differing or all unclear rows in one go. With thousands of files this is what makes acting on them possible at all.
-
Move to Trash, Show in Finder, Reveal in panel, Copy path — as usual.
Select → All missing followed by Copy to destination brings an incomplete backup up to date in two clicks.
13.7. Checksum Files
Many downloads come with a file such as SHA256SUMS listing the expected value for each name. FileWorks reads those, and writes them too.
-
Compare … → Use checksum file checks your selection against such a list. The results appear in the same column as with a folder comparison.
-
Export → As checksum file writes your values in the format that
shasum -candsha256sum -cread in Terminal. That way someone else can verify your files without owning FileWorks. -
Export → As CSV is meant for spreadsheet programs.
The common formats are supported — with one or two spaces, binary mode with an asterisk, and the BSD form SHA256 (file) = value. Comment lines and lines matching no pattern are passed over: one broken line does not render the rest of the file useless.
13.8. Technical Limits of Checksums
For every available algorithm, the same holds: the chance of two different files accidentally sharing a value is so small that it does not happen in practice. "Same checksum" here reliably means "same contents". Only with deliberately constructed files can this be subverted for MD5 and SHA-1 — one more reason to stay with SHA-256 when in doubt.
How many files FileWorks reads at once depends on the drive. On a network share it reads one after another, because they all share the same connection. On the internal SSD it reads several in parallel. During a comparison this applies to each side separately — source and destination usually sit on different drives and do not get in each other’s way.
Folders and packages such as .app or .macvm have no checksum of their own; they are directories. FileWorks therefore breaks them down into their individual files. To know whether a package arrived intact, every file inside it counts anyway.
Very large selections are deliberately reined in. From around 20,000 files the dialog asks whether you really mean that many; beyond 40,000 it declines.
The destination folder of a comparison has its own, much higher limit of 200,000 files. FileWorks builds no sortable table there, only a list of path, size and location — and it reads only what qualifies by path or size. For collections of that size, a purpose-built tool is the better choice.
14. Connecting to Network Volumes
⌘ + K () mounts a network drive: SMB, AFP, NFS, FTP or WebDAV. Enter an address such as smb://server/share and, optionally, a user name and password.
With credentials, FileWorks connects directly and switches the active tab to the mount point. Without them — or if the direct connection fails — the usual macOS connection dialog takes over, keychain and all; the drive then appears under /Volumes and in the sidebar.
You can remember a server in the sidebar (and under ) by enabling Remember in sidebar. Passwords are not stored — that is the macOS keychain’s job. A remembered server connects with one click; Connect with Password … opens the pre-filled dialog.
| FileWorks does not store passwords itself. When you connect without entering one, macOS shows its own login dialog. The keychain can remember the credentials if you ask it to. |
14.1. A File Manager, Not an FTP Program
This distinction is worth knowing, because it explains what works here and what does not.
FileWorks speaks no network protocol of its own. macOS establishes the connection — the same machinery Finder uses for ⌘ + K. The system mounts the share as a drive, just like an external disk. From then on, as far as FileWorks is concerned, it is an ordinary folder.
That is the main advantage: all of FileWorks’s features work on a mounted share. Checksums, archives, thumbnails, search, multi-rename and folder comparisons need no special network mode. Because the share is mounted as a volume, other apps can access it too. You can reach it from any Open dialog and drag files from it into another app.
A dedicated FTP program takes the opposite route. It speaks the protocol itself, shows a listing that exists nowhere outside its own window, and downloads files before you can edit them. In exchange it can do things a mounted drive fundamentally cannot — more on that below.
14.2. Which Protocols You Can Use
Which protocols are available is decided by macOS, not by FileWorks:
| Protocol | Address | Writable | What for |
|---|---|---|---|
|
SMB |
|
yes |
The normal case: NAS devices, Windows machines, shares from other Macs. |
|
AFP |
|
yes |
Apple’s older protocol. Only needed for older devices — where SMB is offered, use SMB. |
|
NFS |
|
yes |
Common in Unix and Linux environments. Permissions follow user and group numbers rather than a login name. |
|
WebDAV |
|
yes |
Nextcloud, ownCloud, Synology and the like. The address starts with |
|
FTP / FTPS |
|
no |
Browsing and downloading only — see below. |
| FTP shares are always read-only. This is not a decision made by FileWorks, but a rule imposed by macOS. The system mounts FTP for reading only and will not open a single file for writing. |
So you can browse, view and download. Uploading, deleting, renaming and changing permissions will not work — for those you need an FTP program. You can write normally over every other protocol in the table.
| SFTP (SSH) is not supported directly. macOS does not include an SFTP file system, so FileWorks cannot mount SFTP servers itself. Use a dedicated app or an extension that mounts SFTP as a volume. Once mounted, it works in FileWorks like any other drive. |
14.3. How Network Drives Differ
A mounted drive behaves differently from your internal disk in a few respects. This applies to every program that works this way — the Finder included:
- No Trash
-
Network drives do not have one. If your preference is set to "move to Trash", FileWorks asks before deleting permanently rather than doing it silently.
- No protocol settings
-
Passive or active mode, port numbers, enforced encryption, bandwidth limits, resuming an interrupted transfer — a mounted drive offers no such switches, because the operating system runs the connection. That is exactly what FTP programs are for.
- Everything is slower
-
Every folder listing travels over the network. That is why FileWorks deliberately reads files on network drives one at a time when calculating checksums; reading them in parallel would not be faster here, but slower.
- A stalled server blocks
-
If the other end stops responding, FileWorks reports "volume unreachable" after a short while instead of waiting forever. To unmount the drive, use Finder or
umount. - Less metadata
-
Finder tags, colour labels and some permissions do not always survive the trip to a share — that depends on the server, not on FileWorks.
15. Opening a Terminal
Open Terminal here (⌥ + ⌘ + T, also in the context menu of the empty area) opens the active panel’s folder in a terminal. Inside an archive it opens the folder that contains the archive file. By default the macOS Terminal is used; under → Terminal you can choose another app, for example iTerm2.
16. Custom Tools
Custom tools turn repeated tasks into commands of their own: opening images in a particular app, backing up selected files or formatting JSON files, for example.
You do not need to write code to create a tool. The simplest kind merely opens the marked files in an app of your choice. For more advanced tasks, a tool can run a program, a shell command, a script or a shortcut.
You set up tools under . After that you can reach them in three places:
-
in the Tools menu in the menu bar,
-
in a file’s context menu, under Tools — where only tools suitable for the selected items appear,
-
and in each panel’s action toolbar: the Tools button opens all of them, arranged by group, and whatever you mark for quick access gets a button of its own below it.
The last item in these menus, Edit Tools …, opens Settings at the Tools section. In the menu bar and behind the Tools button it is there even before you have set up a tool. In the context menu it appears only when the Tools submenu does.
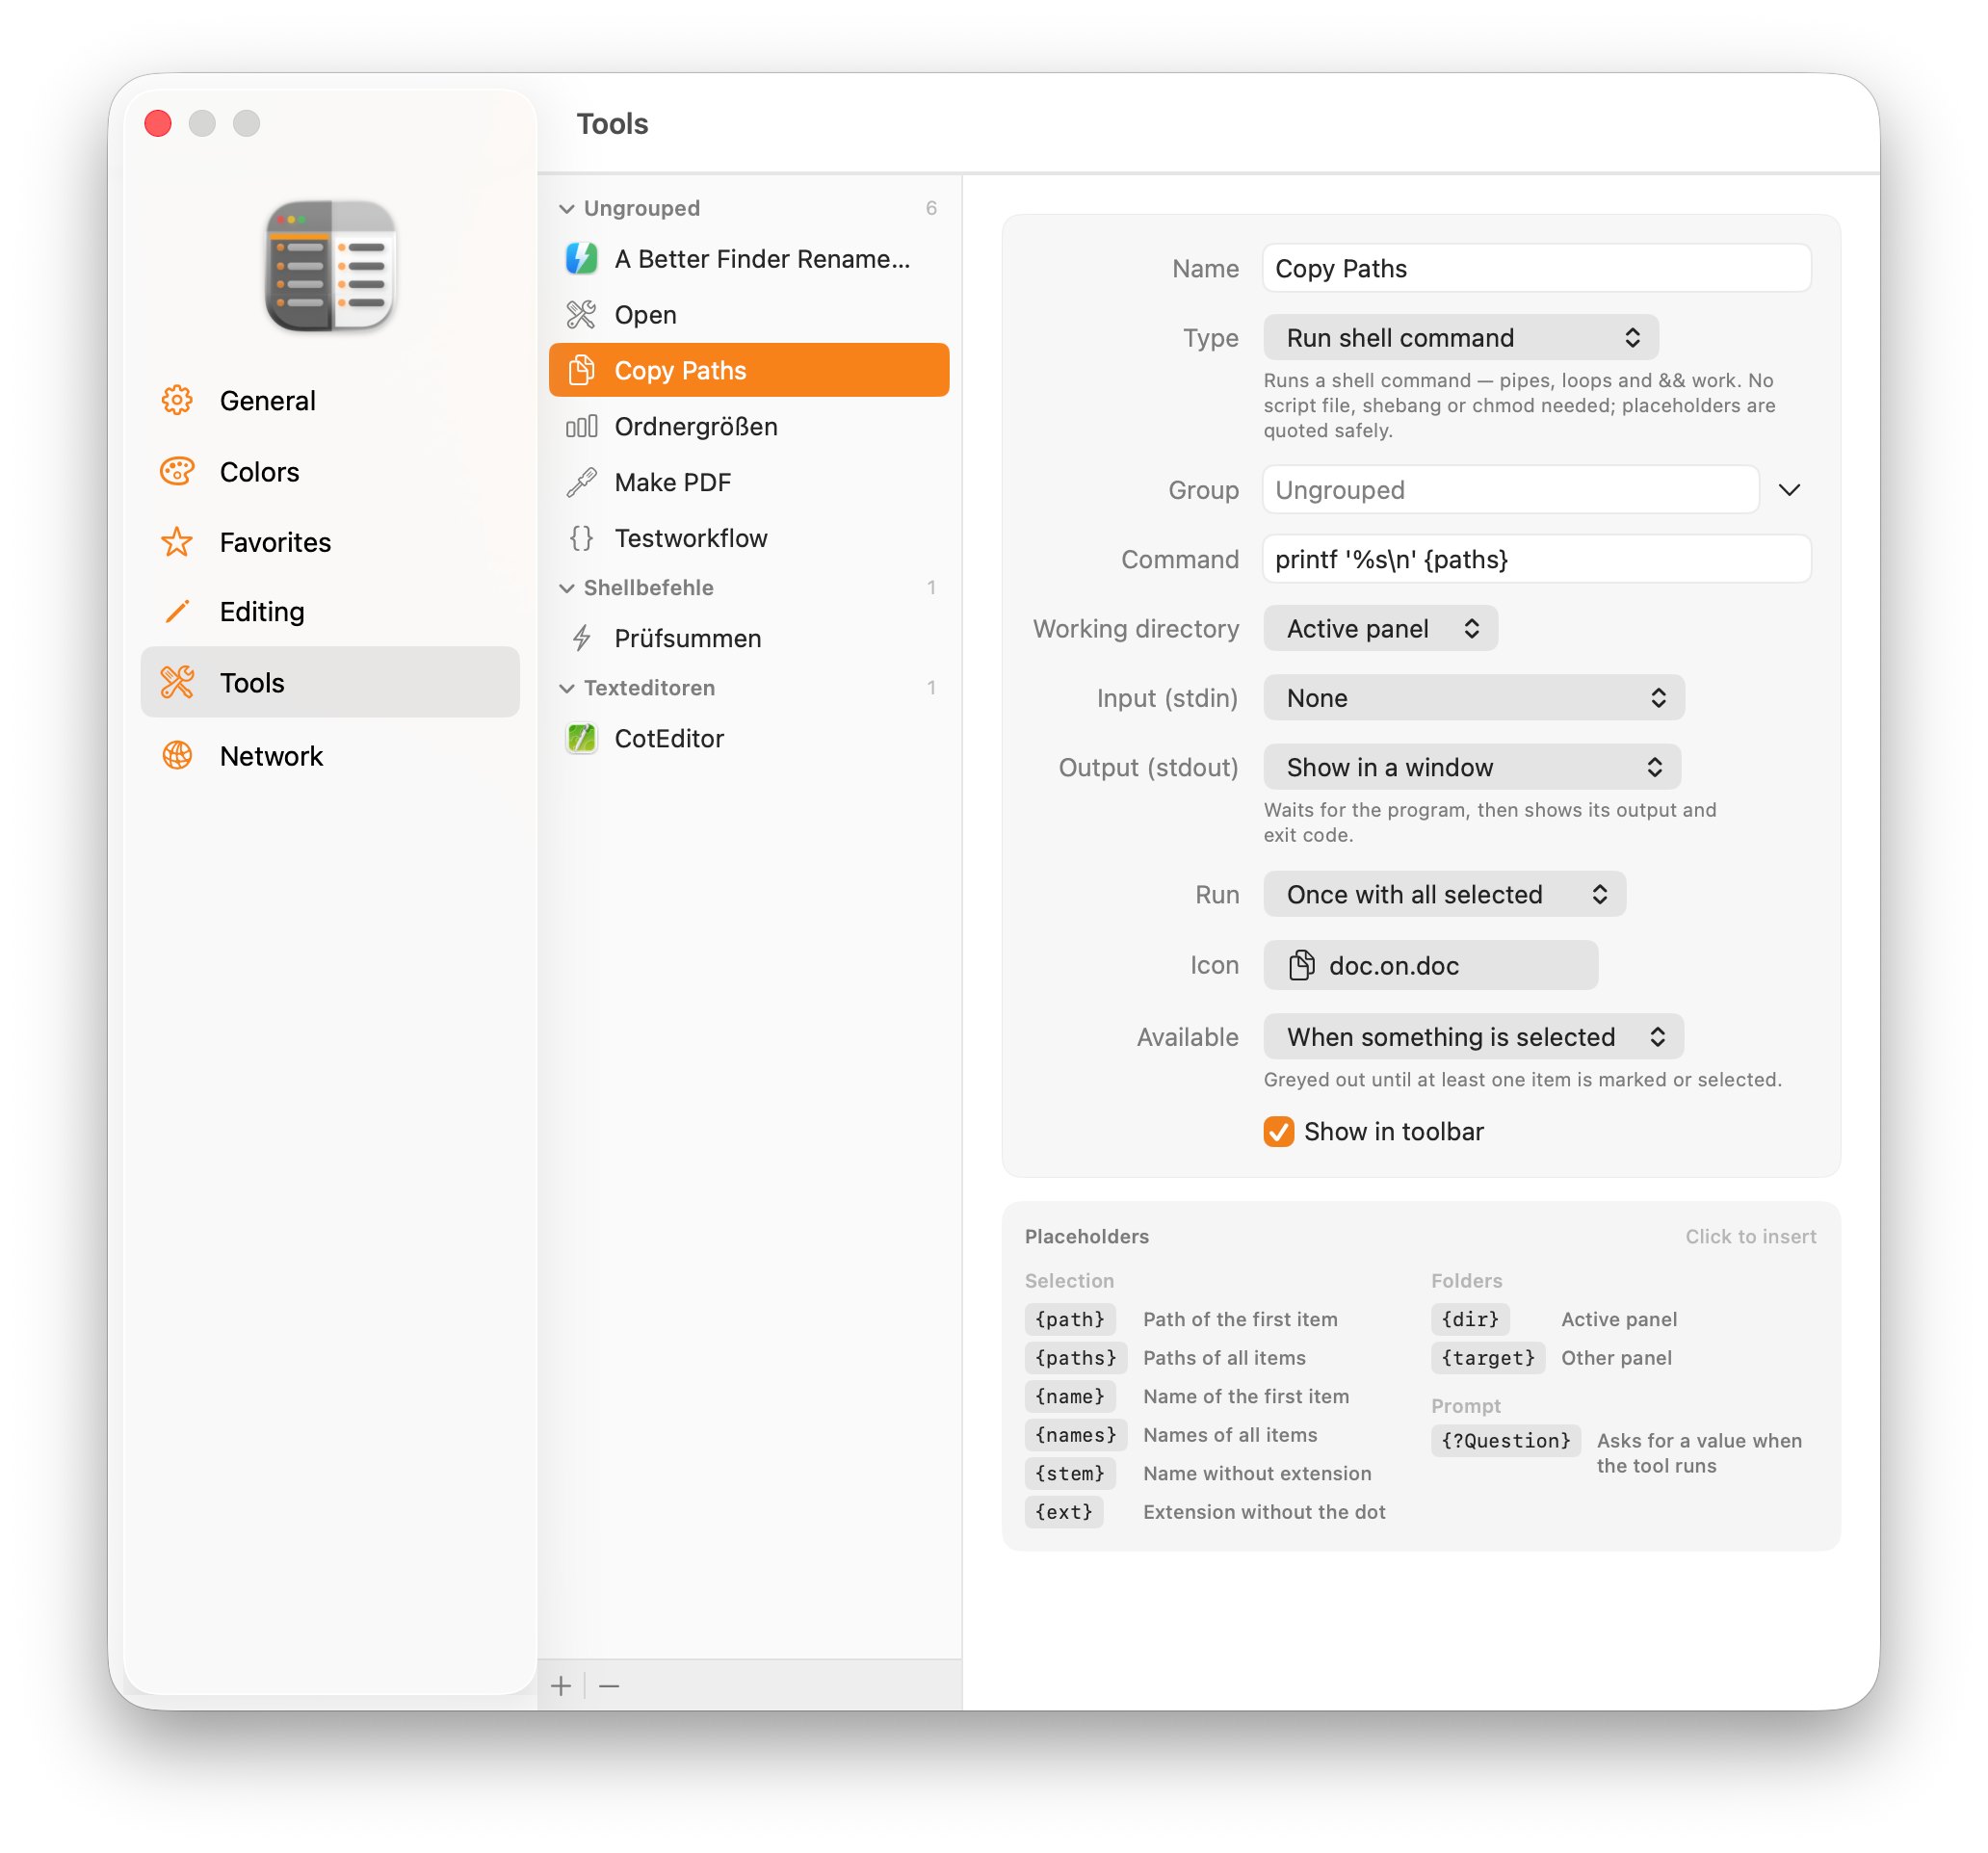
16.1. Your First Tool in One Minute
Let’s start with the simplest case, no script at all. Suppose you always open your images in the same app — say Pixelmator. Here’s how you build yourself a button for it:
-
Open and click + at the bottom of the tool list.
-
Type → Launch app with selection.
-
App → choose Pixelmator (or whatever you use).
-
Name → "Open in Pixelmator" (if you leave the field empty, FileWorks uses the app’s name).
-
Done. Close the settings.
Now mark a few images, open the Tools menu — and your new entry opens them all in Pixelmator. That’s it. No $, no quotes, nothing.
For a tool like this, set Available to "For certain file types" and enter jpg, png, heic. Then the button is only clickable when images are actually marked, instead of leading you astray. |
16.2. The Four Kinds of Tools
Every tool is one of these four kinds. Pick the one that fits your task:
Launch app with selection — the simplest case (the example just now). You pick an app, and the tool opens the marked files in it. Nothing more: no arguments, no output, no script. A fixed "Open With …" as a button.
Run program / script — here a program or a small script of yours runs, and you decide which files and values it gets. This is the choice as soon as a ready-made program (such as sips, ffmpeg, jq) or your own script should do the work.
Run shell command — for quick commands, just like on the command line. A tool of this kind runs a command in the shell (zsh), on one line or several, with its full set of features: pipes (|), chaining (&&), redirections. Ideal for trying something out quickly.
Run shortcut — starts a shortcut from the macOS Shortcuts app and hands it the marked files (see Using Shortcuts from the Shortcuts App). Ideal when you have already built your automation there.
If you are just starting out, stick to the first kind as long as it meets your needs. We explain the others step by step, with examples you can follow.
16.3. Setting a Tool’s Working Set
A tool works with the files you have just marked (the coloured pills). If you have marked nothing, it uses the current selection — the highlighted files. In this chapter, we call this the tool’s working set.
The difference between selection and marks is described in the chapter "Selecting Files". For now this is enough: mark the files the tool should work with, then run it.
16.4. Placeholders: Telling a Tool Which Files It Gets
A tool has to know what to work on. That is what placeholders are for — short tokens that FileWorks replaces with the real values when it runs. The most important one is {paths}: it stands for "the paths of all marked files".
For example, the program wc counts lines. If you enter the following shell command
wc -l {paths}
and mark three text files, FileWorks turns it into this when you run it:
wc -l /path/to/one.txt /path/to/two.txt /path/to/three.txt
So wc gets the three files and counts their lines. You yourself only type {paths} — FileWorks fills in the rest.
You don’t have to memorise the placeholders. In the tool editor there is a glossary of all of them. Click one and it goes into the field you last typed in: into the command at the insertion point, into the output file name at the end. Hovering shows you what it will insert.
The colours in the command field show what FileWorks makes of it:
-
Purple is replaced when the tool runs — placeholders, prompts and the environment variables (see below).
-
Grey with a dotted underline stays as it is, for example a placeholder in a comment (
# {path}). In shell commands this also happens after a backslash (\{path}) and in a here document with a quoted end word (<<'EOF'). -
Red underline marks a mistake, such as a mistyped placeholder like
{pahts}or a quotation mark that is never closed. For programs, this includes$FW_PATHoutside quotation marks: without a shell, nothing inserts the variable there.
Point at a grey or red spot and FileWorks tells you why.
These are the placeholders:
| Placeholder | Stands for |
|---|---|
|
|
The path of the first file of the working set |
|
|
The paths of all files |
|
|
The file name of the first file, with extension (e.g. |
|
|
The names of all files |
|
|
The name of the first file without the extension (e.g. |
|
|
The extension of the first file, without the dot (e.g. |
|
|
The folder the active panel is currently showing |
|
|
The folder in the other panel |
|
|
Asks you for a value when it runs — see Asking for a Value ({?…}) |
Singular or plural? This is the one stumbling block, and it is quickly explained:
-
{path}is one file — the first. Use it when your tool handles exactly one file per run. -
{paths}is all files — cleanly separated, one after another. Use it when your program takes a whole list at once.
Rule of thumb: the plural placeholders ({paths}, {names}) become one value per file, not one long piece of text. Mark three files and your program really gets three separate entries.
|
Do not add quotation marks merely to protect a placeholder. FileWorks already passes each value safely, even when a file name contains spaces, brackets or other special characters. Usually, write |
16.5. Asking for a Value ({?…})
Sometimes a tool should work a little differently each time. Instead of building a separate tool for every variant, you let FileWorks ask when it starts.
For this you write, at the spot where the value should go, a question in curly braces with a question mark: {?Your question}. When it runs, an input field with exactly that label appears, and what you type is inserted.
For example, to shrink images to a maximum edge length of your choice, enter these arguments for Apple’s sips program:
-Z {?Longest edge in pixels} {path} --out {stem}-small.{ext}
Run the tool and FileWorks asks: "Longest edge in pixels". If you type, say, 1200, the image is reduced so its longest edge is 1200 pixels, then saved as …-small.jpg next to the original. A single tool for every size — instead of one tool per size.
A few things worth knowing:
-
You are asked once per run, not per file. Shrink twenty images at once and you type the size once, and all twenty use it.
-
FileWorks asks the same question only once. Use
{?Suffix}in several places and one field fills them all. -
Cancel means cancel: cancel the prompt and the tool does not run.
-
The question may contain spaces (
{?Longest edge in pixels}is a single question) but no curly brace{. -
Short, clear questions are best — and name the unit: "Quality (1–100)", "Longest edge in pixels", "Suffix".
16.6. Transforming Files: Input and Output
So far, tools have done something with files (opened them or counted their lines). It gets really handy when a tool transforms files — and the result lands straight in the right place. That is exactly what the Input and Output settings are for.
The idea is simple. Many programs read something in, change it and write it out again. FileWorks feeds your files in at the front and catches the result at the back:
File → program → result
Input decides how the file reaches the program:
-
None (the normal case) — the file arrives as a path, just as we did above with
{path}/{paths}. If the program reads anyway, it hits the end straight away; it does not wait for input that never comes. -
Contents of the selected file — the contents of the file are fed straight into the program. You need this for programs that only read a stream and expect no file name. This works with every output, including the window and the background. Each run takes exactly one file: set the tool to once per item, or mark just one.
Output decides what happens to the result:
| Output | What happens |
|---|---|
|
Discard |
The result is thrown away. For tools that do something themselves (write a file, show a notification) and do not need to return any output. The tool runs in the background; the queue shows that it is running, lets you cancel it and reports an error. With "once per item", at most three runs happen at the same time. |
|
Show in a window |
The result appears in a console window to read. Perfect for trying things out. |
|
Write to a new file |
The result becomes a new file, named after a template such as |
|
Replace the source file |
The result replaces the very file it came from. The one mode that deliberately overwrites — replacing is its whole point. It works with files only, not folders, and with one file per run — set the tool to "once per item" for that. The file’s permissions, tags and comments are kept. |
|
Copy to the clipboard |
The result lands on the clipboard, ready to paste. Up to 1 MB — if it is larger, not text or cannot be read, FileWorks tells you and leaves the clipboard as it was. |
Two examples make it concrete:
Make JSON readable. JSON files are often a single long line. The program jq formats them nicely. As a tool:
-
Type: Run program / script, Program:
jq, Arguments:. -
Input: Contents of the selected file
-
Output: Replace the source file
Mark a .json file and run the tool to format it in place.
Make a sorted copy. The same with sort, but Output → Write to a new file with {stem}.sorted.{ext}. You get a sorted copy next to the original, and the original stays untouched.
|
"Replace the source file" is safer here than by hand. On the command line the obvious command FileWorks never does that. The result is first collected fully in a hidden file and only put in place once the program has finished cleanly (without errors). If anything goes wrong or you cancel, your original stays exactly as it was — even if the program still exits politely after being cancelled. Nobody but you can read the hidden file in the meantime, and when replacing, the result takes on the original’s permissions: a private file stays private. |
16.7. Adding Your Own Scripts
When a task outgrows a one-liner, write it as a small script — in zsh, Python, or whatever you are comfortable with — and add it as a tool of the Run program / script kind. Two things are essential for a new script to run. Missing either one is a common reason why nothing seems to happen at first:
Miss either one and FileWorks shows an error in the panel’s status bar instead of a result. |
A few more things that make scripts predictable:
-
The files arrive as a properly separated list. Do not add quotation marks merely to protect a placeholder; spaces and special characters are already handled.
{paths}on its own becomes one value per file ("$@"in the shell,sys.argv[1:]in Python). -
Several words as one argument: with Run program / script, put them in quotes,
"…"or'…'— for example--title 'My Report'. If the closing quote is missing, the editor shows it in red below the field and the tool does not start. -
The script starts in the panel’s folder. Relative paths refer to this folder, and files written with relative paths appear there — where you can see them.
-
Once for all, or once per file? With once with all, the whole working set goes to a single run (you write a loop over
{paths}). With once per item, FileWorks calls the tool separately for each file. You write the script for a single{path}and let FileWorks do the repeating. "Once per item" also gives you a progress indicator with a cancel option. And an error on one file does not take the whole batch with it. -
Success means "finished without an error". Whether an output file is written and the run is reported as done depends on your program ending cleanly (exit code 0). In a shell script,
set -emakes it stop on an error. A cancelled run never counts as a success, whatever exit code it ends with.
16.8. Example: A Small Shell Script
This tool creates a timestamped backup copy of every marked file in a Backups subfolder — handy before you try something risky. Save the text as ~/bin/fw-backup.sh:
# Copies each passed file into a "Backups" subfolder, timestamped.
set -e
dest="Backups" # relative to the working directory
mkdir -p "$dest"
stamp=$(date +%Y%m%d-%H%M%S)
for f in "$@"; do # "$@" are the {paths} arguments
cp -R "$f" "$dest/${stamp}_$(basename "$f")"
done
osascript -e "display notification \"$# item(s) backed up\" with title \"{app-name}\""And here is how you set it up:
-
In the terminal:
chmod +x ~/bin/fw-backup.sh. -
Under add a tool, Type = Run program / script.
-
Program = the path to the script, Arguments =
{paths}, Working directory = active panel, Run = once with all. -
Mark a few files and run the tool.
Each run drops the copies into Backups/ and briefly shows a notification with the count. The notification is the visible result here, since the script itself prints nothing.
16.9. Example: A Small Python Script
The same idea in Python: write a manifest.csv into the folder, listing the marked files with their names, sizes and modification dates. Save the text as ~/bin/fw-manifest.py:
#!/usr/bin/env python3
# Writes a CSV overview of the passed files into the working directory.
import sys, os, csv, datetime

paths = sys.argv[1:]                  # the {paths} arguments
with open("manifest.csv", "w", newline="") as out:
    writer = csv.writer(out)
    writer.writerow(["Name", "Bytes", "Modified"])
    for p in paths:
        info = os.stat(p)
        when = datetime.datetime.fromtimestamp(info.st_mtime).isoformat(timespec="seconds")
        writer.writerow([os.path.basename(p), info.st_size, when])
Set it up as above (chmod +x ~/bin/fw-manifest.py, Program = the script, Arguments = {paths}, once with all). When it runs, manifest.csv appears in the list — the file is the result. The shebang #!/usr/bin/env python3 finds Python 3 (on macOS via Apple’s "Command Line Tools", which the system offers to install on the first run).
The same pattern fits almost anything scriptable — converting images with sips, editing PDFs, git commands, uploads. Reach for {dir} or {target} when a tool should act on a folder rather than the marked files, and once per item when a program only ever takes one file at a time. |
16.10. Ready-Made Recipes
Three complete tools to copy. Every setting not mentioned stays at its default.
|
Setting |
Value |
|
Type |
Run program / script |
|
Program |
|
|
Arguments |
|
|
Input |
Contents of the selected file |
|
Output |
Replace the source file |
|
Run |
Once per item |
|
Available |
For certain file types — |
|
Icon |
|
Mark any number of .json files and run the tool with one click to format each file in place. The file-type filter keeps the button greyed out unless JSON is selected. "Once per item" gives you a progress bar. And a broken file is simply skipped with an error, while the others go through cleanly.
|
Setting |
Value |
|
Type |
Run program / script |
|
Program |
|
|
Arguments |
|
|
Run |
Once per item |
|
Available |
For certain file types — |
|
Icon |
|
Mark thirty photos, run it, type the size once — and you get thirty -small copies next to the originals. Need a different size? Run it again and enter another value; no settings need to change.
|
Setting |
Value |
|
Type |
Run shell command |
|
Command |
|
|
Output |
Copy to the clipboard |
|
Available |
When something is selected |
|
Icon |
|
Mark files, click, paste anywhere — one path per line. No script, no extra program.
| Goal | How |
|---|---|
|
Fix Windows line endings (CRLF → LF) |
|
|
Generate checksums for a release |
Shell: |
|
See what is eating space in this folder |
Shell: |
|
Move marked files to the other panel |
Shell: |
16.11. When a Tool Is Available
A tool meant only for images should not look clickable while you have a text file marked. The Available setting decides when a tool is active:
Always — usable no matter what is marked. Right for tools that work on a folder ({dir}, {target}) or need no file at all — "git status here", "show disk usage".
When something is selected — greyed out until at least one file is marked or selected. Right for anything that mentions {path}, {paths} …
For certain file types — active only when every marked file carries one of the extensions you list. Right for format-specific tools — an image shrinker, a JSON formatter.
The extension list accepts several formats, such as jpg, png, heic, .JPG;PNG and jpg png. Commas, semicolons or spaces separate extensions; the dot is optional, and case does not matter.
|
With "For certain file types", every marked file must match, not just one. Mark twelve JPEGs and one That is deliberate: if it ran anyway, it would also process the text file — and a tool that replaces its source would destroy it. Correcting the selection first prevents the wrong files from being processed. |
If a button is greyed out, hovering tells you why — "Shrink images — only for: jpg, png" or "select at least one file".
The context menu applies the same filter, only more strictly: what does not fit is not shown at all. Right-click a PDF and, under Tools, you see only the tools that can do something with a PDF. If none fit, the Tools entry is missing entirely.
In the action toolbar the buttons stay put and merely grey out. That way they don’t jump around with every new selection. In the empty area of a panel (right-click beside the files) you get the tools set to Available: Always — the ones that need no selection anyway.
Two things override every filter:
-
Inside an archive all tools are greyed out. An entry in an archive is not yet a file a program could open — copy it out first (F5), then it works. If the other panel is inside an archive, this applies to the tools that need the other panel.
-
If the program has gone (moved, deleted), the tool is greyed out and marked red in the settings list.
16.12. Progress, Cancelling and Errors
Every tool appears at the bottom of the window, in the same queue as the copy and move jobs — including one with "Output → Discard" that runs in the background:
-
A progress card with the tool’s name. With "once per item" it counts the files and names the one currently being worked on.
-
A Cancel button. It stops the tool along with everything it started — exactly like ⌃ + C in the terminal.
-
A result: "Done", "Cancelled" or "Done, N errors".
If something went wrong, a Details … button appears on the card. It shows the full output: the program’s message, the error code and — with "once per item" — which file caused the error. The short version is already on the card itself. The bottom of the window shows how the run ended: "Finished" in green, "Cancelled" without a warning colour, a failure in red — with the exit code if exactly one run failed, otherwise as "Done, N errors".
| A cancelled run is not an error — FileWorks knows you cancelled it and reports "Cancelled" instead of a failure. If a tool keeps producing output, it is truncated after 1 MB per run, and the window shows at most 2 MB over the whole job — both with a note — to avoid filling up memory. |
16.13. Choosing an Icon
Tools of the "Run program / script" and "Run shell command" kinds carry an icon on their button. Click the icon field — a gallery opens, sorted by theme (files, media, network, security …). One click is enough. (A "launch app" tool simply shows the app’s icon.)
Below it, a field accepts any SF Symbol name, including the thousands of symbols not shown in the gallery.
| Choose icons with distinct silhouettes, not merely different details. On a narrow button, you will recognise the outline long before the finer details. |
16.14. Using Shortcuts from the Shortcuts App
If you have already built your workflows in the macOS Shortcuts app, there is no need to rebuild them for FileWorks. A tool of the kind Run shortcut starts an existing shortcut and passes the marked files to it as input.
Setting it up takes seconds:
-
Create a new tool and choose Run shortcut as the type.
-
Open the list in the Shortcut field and pick one. If the Shortcuts app uses folders, they appear here as submenus — purely a sorting aid, unrelated to the groups from Keeping Order: Tools in Groups.
-
Done. As with any tool, you still decide whether it joins the action toolbar’s quick access and when it is available.
The circular-arrow button next to the list re-reads it — handy when you have just created a new shortcut while FileWorks was already running. If the list cannot be loaded — say, because the Shortcuts app does not respond — the reason appears in red below it; FileWorks waits at most ten seconds.
Under Run you decide, as always, whether the shortcut gets all marked files at once or starts once per file. Which is right depends on the shortcut: one that combines several images into a single PDF wants them together; one that shrinks an image works better individually.
Under Output you have two choices:
-
Discard (run in background) — the normal case. The shortcut runs in the background; the queue shows that it is running and reports if it fails. Right for anything that works on its own ("add to reading list", "file away").
-
Show in a window — FileWorks waits for the shortcut and then shows what it reported. This is the option to choose during setup and troubleshooting: if a shortcut seems to do nothing, this is where you see why.
The file-writing outputs of the other tool kinds ("write to a new file", "replace the source file") are deliberately absent here. A shortcut does not return its result this way — all you would get is an empty file.
|
The shortcut has to accept files. FileWorks always passes files — if a shortcut works with text instead (say, "speak the given text"), it receives the file and cannot do anything with it. How to tell: in the Shortcuts app, Shortcut Details states what the shortcut expects as input. If it says "Files" or "Images", you are fine. If you are unsure why a shortcut appears to do nothing, set Output to Show in a window temporarily. In background mode, the shortcut’s output is not displayed automatically. |
| Rename a shortcut later in the Shortcuts app and your tool will continue to work. FileWorks remembers the internal identifier, not the name, and picks the new name up next time it reads the list. Only if you delete the shortcut does the editor report it in red. |
16.15. Keeping Order: Tools in Groups
As the number of tools grows, you can organise them into groups such as "Image editing", "Development" or "Text editors".
To create a group, simply assign a tool to it: select a tool, type a name into the Group field and press ⏎. The group now exists, with the tool in it. For a second tool you don’t type the name again — the small arrow next to the field offers every group you have already used.
Tools without a group are perfectly fine. They gather under Ungrouped at the very bottom, and if you never assign a group, the list looks just as it always did.
In the list you can then:
-
collapse and expand a group by clicking its name,
-
drag a tool elsewhere — onto another row to slot it in there, or onto a group name to append it to that group,
-
reorder a whole group by dragging its name onto another group name.
This order is not just decoration: it also determines the order of the tools in the action toolbar and in the menus. So whatever you need daily belongs at the top.
In the menu bar and the context menu, each group becomes a submenu. Ungrouped tools appear below those submenus. The context menu also omits any group that contains no tool suitable for the file you clicked, so it never presents an empty submenu.
The panel action toolbar shows the groups in two places: in the Tools button’s menu each group becomes a submenu, and in the quick access below it a divider separates one group from the next. Which tools end up in the quick access is your choice per tool, via In the panel’s quick access; the button’s menu holds all of them anyway.
16.16. All Settings at a Glance
For reference — what you can set per tool:
| Setting | Meaning |
|---|---|
|
Name |
Label on the button and in the menu. If you leave it empty, the program name (or, for shell tools, the command) is used. |
|
Type |
One of the four kinds: Launch app with selection, Run program / script, Run shell command, Run shortcut. |
|
Shortcut |
The shortcut from the Shortcuts app to run (see Using Shortcuts from the Shortcuts App). Only for the "Run shortcut" kind. |
|
Group |
Which group the tool belongs to (see Keeping Order: Tools in Groups). If you leave the field empty, the tool appears under "Ungrouped". |
|
Program / Script |
The program to run. Not needed for shell commands (the shell is fixed at |
|
Arguments / Command |
The template with the Placeholders: Telling a Tool Which Files It Gets. The field spans several lines and uses a monospaced font, so double spaces and quotation marks are easy to spot. A line break separates commands or arguments; the Tab key moves to the next field. Colours show what is replaced, what stays as it is and where there is a mistake (see Placeholders: Telling a Tool Which Files It Gets). |
|
Working directory |
Active or other panel. The tool starts in this folder — relative paths refer to it, and files written using relative paths are saved there. |
|
Needs the other panel |
While the second panel is hidden, FileWorks asks for a destination folder before the tool starts (see Single-Pane Mode). If the other panel is inside an archive, the tool is greyed out. If the command uses |
|
Run |
Once with all marked files, or once per file. |
|
Icon |
The button icon (see Choosing an Icon). |
|
Input / Output |
Where the data comes from and what happens to the result (see Transforming Files: Input and Output). Shortcuts only have Output, with two choices (see Using Shortcuts from the Shortcuts App). |
|
Available |
When the tool is clickable (see When a Tool Is Available). |
|
In the panel’s quick access |
Whether it gets a button of its own in the panel action toolbar. It always appears in the Tools button’s menu and in the menu bar’s Tools menu anyway. |
| The order in the tool list (on the left of the settings, changeable by dragging) is also the order of the buttons and menu entries. Put what you need daily at the top — see Keeping Order: Tools in Groups. |
17. For Power Users: Security and Internals
This section provides optional background. For everyday use, remember one rule: do not add quotation marks merely to protect a placeholder. FileWorks already passes it as a safe value. The following sections explain how that works and where the protection ends.
17.1. Why File Names Never Become Commands
File names come from the file system, not from you — and a file may perfectly legally be called $(rm -rf ~).txt. If FileWorks simply pasted such a name as text into your shell command, merely clicking a tool could cause havoc.
That is why FileWorks never pastes a value into your command as text. Each placeholder is replaced by a reference to a shell parameter ("$1", "$2", …), and the actual values are handed to the shell separately, as arguments. The shell fills them in but never looks at the result again for $(…), backticks and the like — so a value stays a value. Your command itself — pipes, &&, loops, redirections — stays untouched. These lines all do exactly what they look like, safely:
wc -l {paths}
grep -c foo {path}
printf '%s\n' {name}
You therefore do not need to quote placeholders to protect spaces or special characters: FileWorks passes every item as a separate value.
17.2. Feeding Another Language (Python, awk … in a Here-Document)
FileWorks makes the shell safer. But drop a value straight into the source of another language — a Python snippet in a here-document, say — and a name containing a quote can throw that language off. FileWorks cannot sanitise Python code you assemble yourself.
The fix is the same idea one level down. Let the other language receive the value through its own arguments or standard input, instead of writing it into its code:
python3 - {path} <<'EOF'     # note the QUOTED <<'EOF' and the {path} argument
import sys
print(sys.argv[1])          # the path arrives as a value, never as code
EOF
Internally, each placeholder becomes a positional shell parameter such as "$1" or "$2", in the order in which it appears. The other language receives the expanded value as an argument, not as source code.
|
One exception is shell functions. Inside a function, |
17.3. Environment Variables (FW_*)
Even more convenient: the common single values are available as environment variables you can read from any language — without them ever being able to turn into code:
| Variable | Value |
|---|---|
|
|
Path / name / name without extension / extension of the first marked file |
|
|
Folder of the active / other panel. While the second panel is hidden, |
|
|
Number of marked files |
For example, use os.environ["FW_PATH"] in Python or "$FW_DIR" in the shell to read a value. In the tool editor, the variables are listed below the placeholders in the glossary. For shell commands, a click inserts them with quotes ("$FW_PATH"); for programs and scripts they are for reference only, because your script reads them itself. (Lists like "all paths" are deliberately available only as {paths}, not as a variable: a file name may itself contain a newline, so newlines cannot reliably separate file names.)
17.4. Where the Protection Ends
An absolute guarantee would need either no free shell mode at all, or strong isolation of tools. FileWorks deliberately offers the free shell, and hands values to it safely. What the tool then does with them is up to the tool’s author.
A command that deliberately re-interprets its arguments turns the value back into code — and lifts the protection. This concerns constructs like:
eval "$1"
zsh -c "$1"
xargs sh -c '…'
Such patterns are the tool author’s responsibility. As long as you use placeholders simply as values ({path}, "$1", "$FW_PATH") and do not explicitly run them as code, they remain data rather than commands.
18. Configuration
You open the settings window with ⌘ + , (). On the left you find eight sections, plus three buttons at the bottom (see Saving and Transferring Settings).
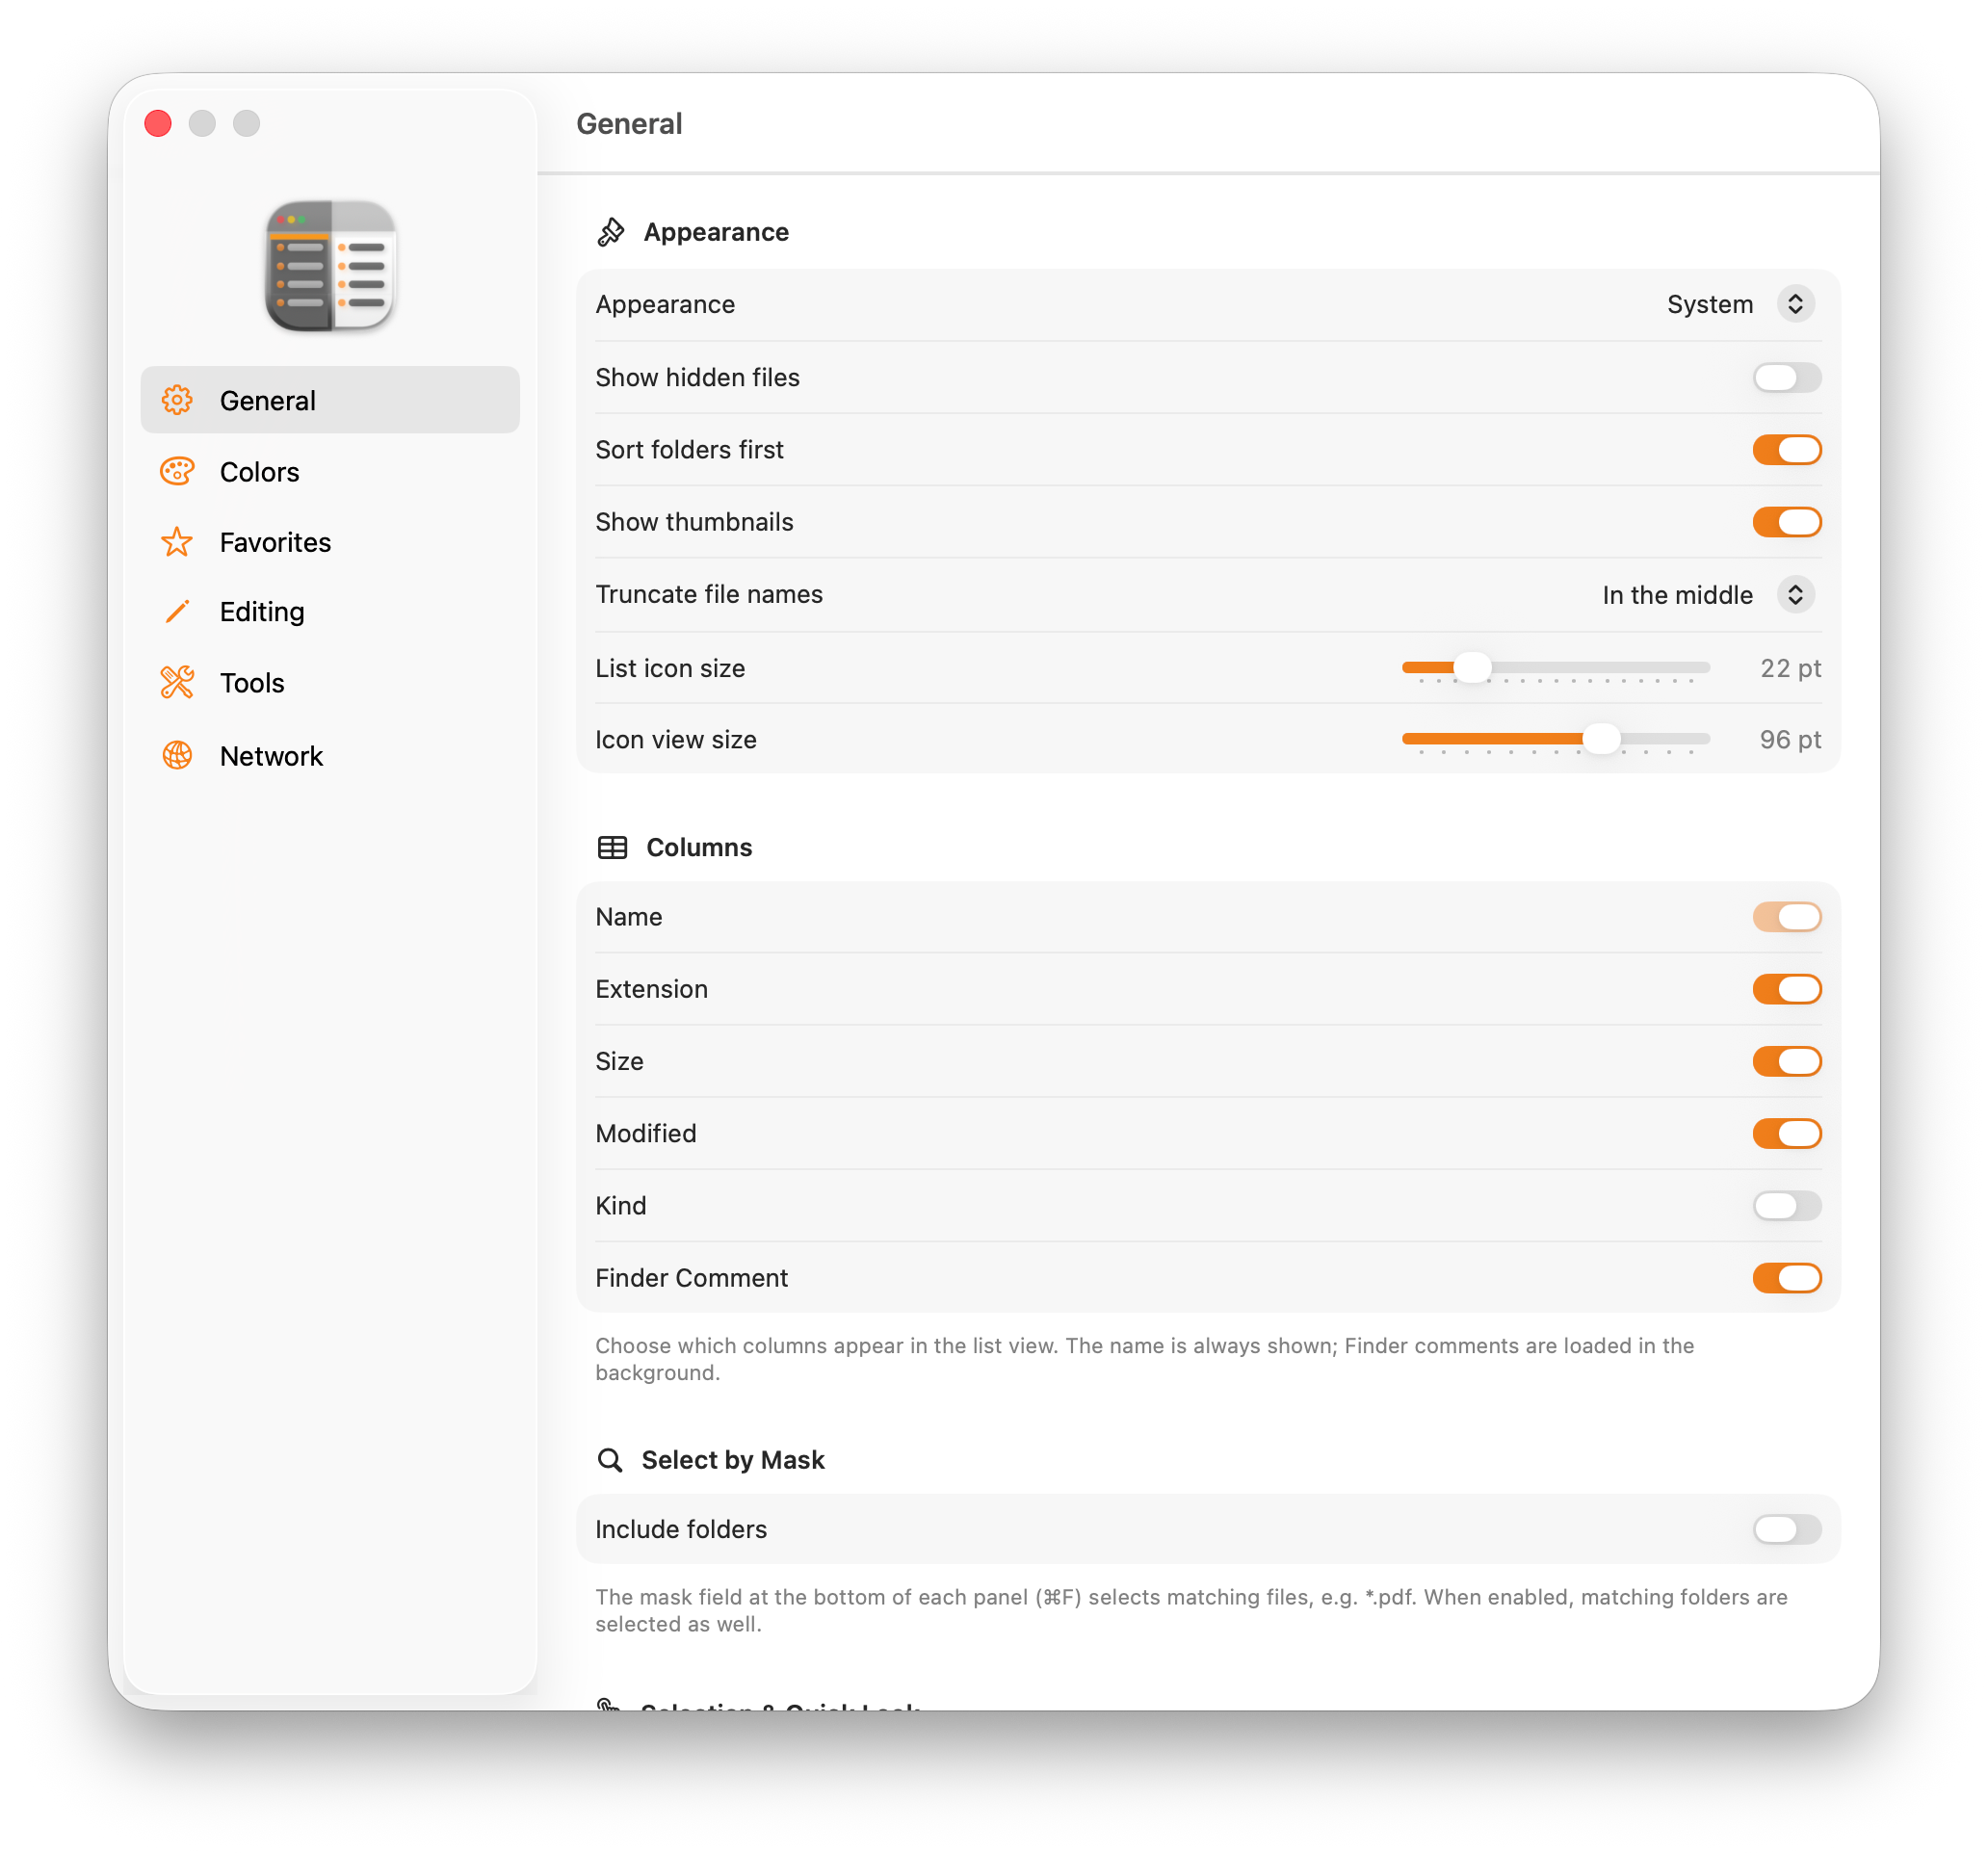
18.1. General
The largest section, divided into:
- Appearance
-
-
Show hidden files — same as ⌘ + ⇧ + ..
-
Sort folders first — group folders ahead of files.
-
Show thumbnails — small previews in the name column.
-
List icon size — height of icon and row in the list, 16–48 pt.
-
Icon view size — tile size in the grid, 32–128 pt.
-
- Columns
-
Which columns appear in the list: Extension, Size, Modified, Kind and Finder Comment. The Name column is always there. If a panel is too narrow for all of them, FileWorks hides more (see When a Panel Gets Narrow).
- Select by Mask
-
Include folders — whether the mask field (⌘ + S) also marks matching folders, not just files.
- Selection & Quick Look
-
Quick Look and Mark item both use the Space bar. For each of the two commands, choose which modifier to hold alongside Space — four checkboxes offer ⇧, ⌃, ⌥ and ⌘. That way each command lands on a combination no other program uses.
The two can never share a combination: choose one that is already taken and they simply swap. macOS reserves some combinations, such as ⌘ + Space, for its own use. The defaults are plain Space for the preview and ⇧ + Space for marking.
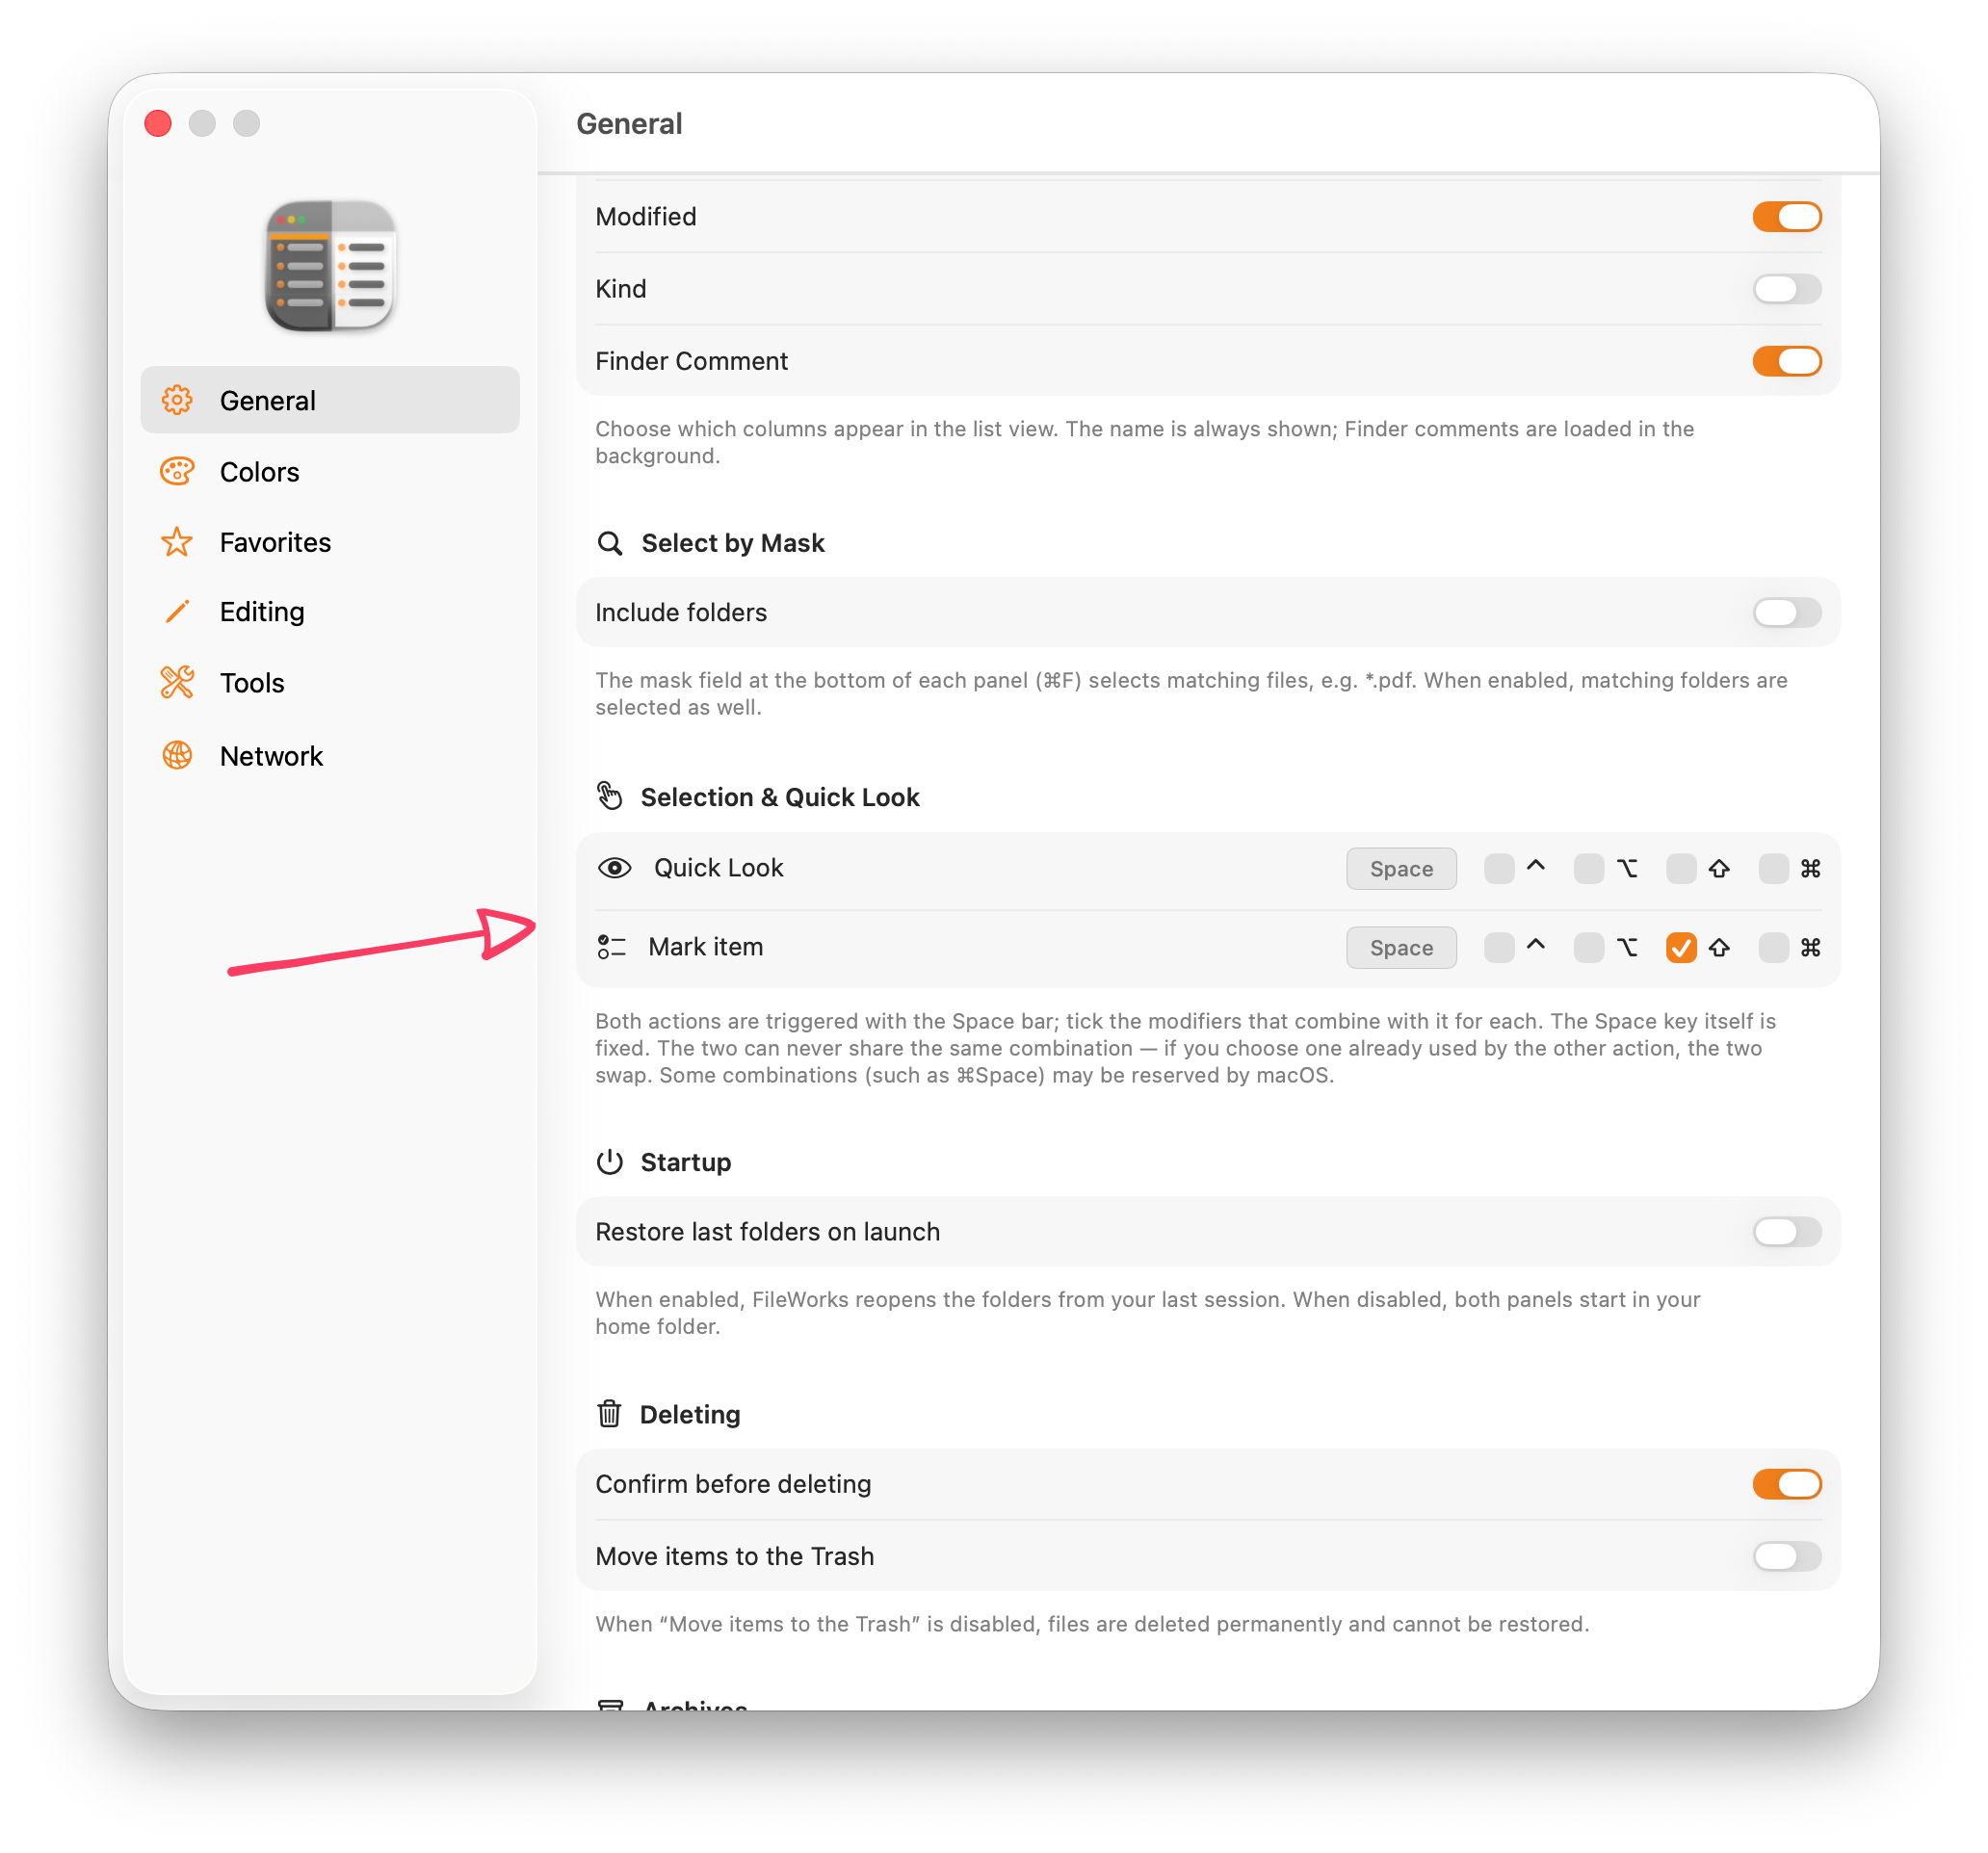
- Startup
-
Restore last folders on launch — reopen the previous session’s folders (when disabled, both panels start in your home folder).
- Deleting
-
-
Confirm before deleting — show a prompt.
-
Move items to the Trash — switch it off and FileWorks deletes permanently. You cannot restore those files from the Trash.
-
- Archives
-
Open archives as folders — off: archives open with their default app instead of being browsable.
- Terminal
-
The app for Open Terminal here — the system Terminal by default, or one of your choice, for example iTerm2.
18.2. Colours
Rules that tint files by their extension. Each rule has a name, a colour, a list of extensions and a switch. Drag to reorder — the first matching rule wins. FileWorks comes with sensible defaults (Images, Videos, Audio, Archives, Documents, Code).
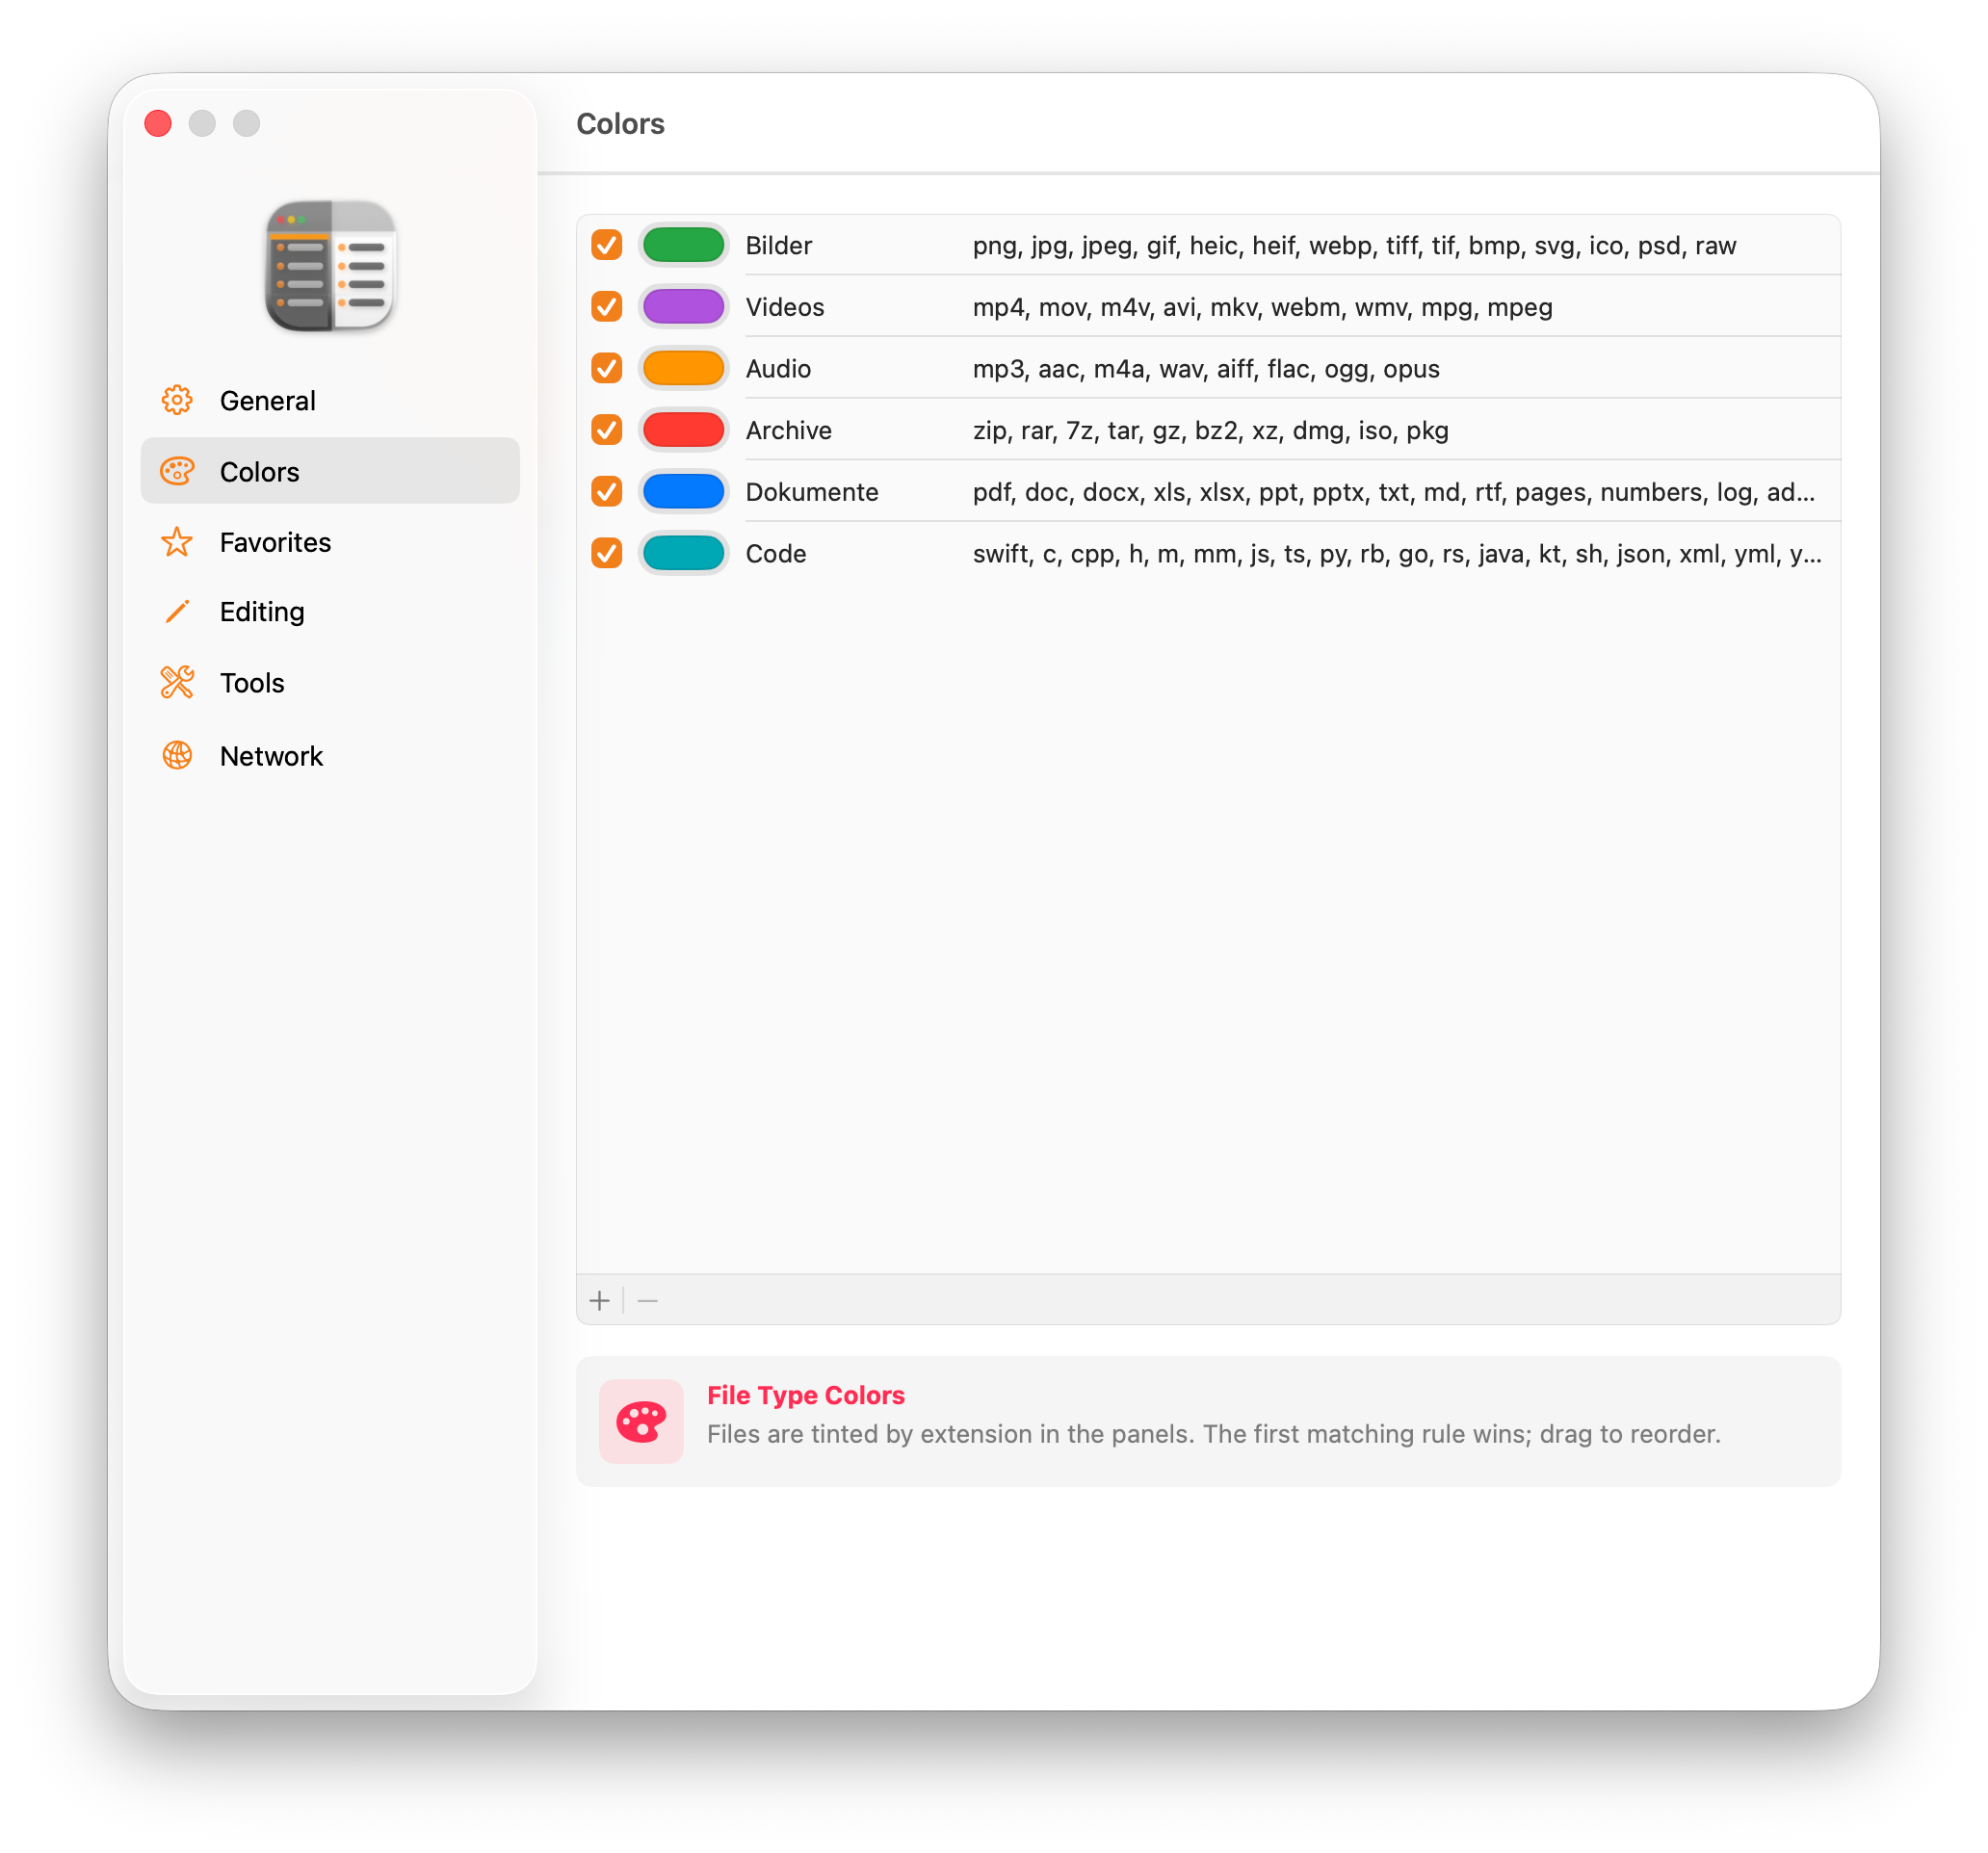
18.3. Patterns
The saved file masks: name, group, pattern and the folder button. For details on what they do and where to use them, see Saved Patterns.
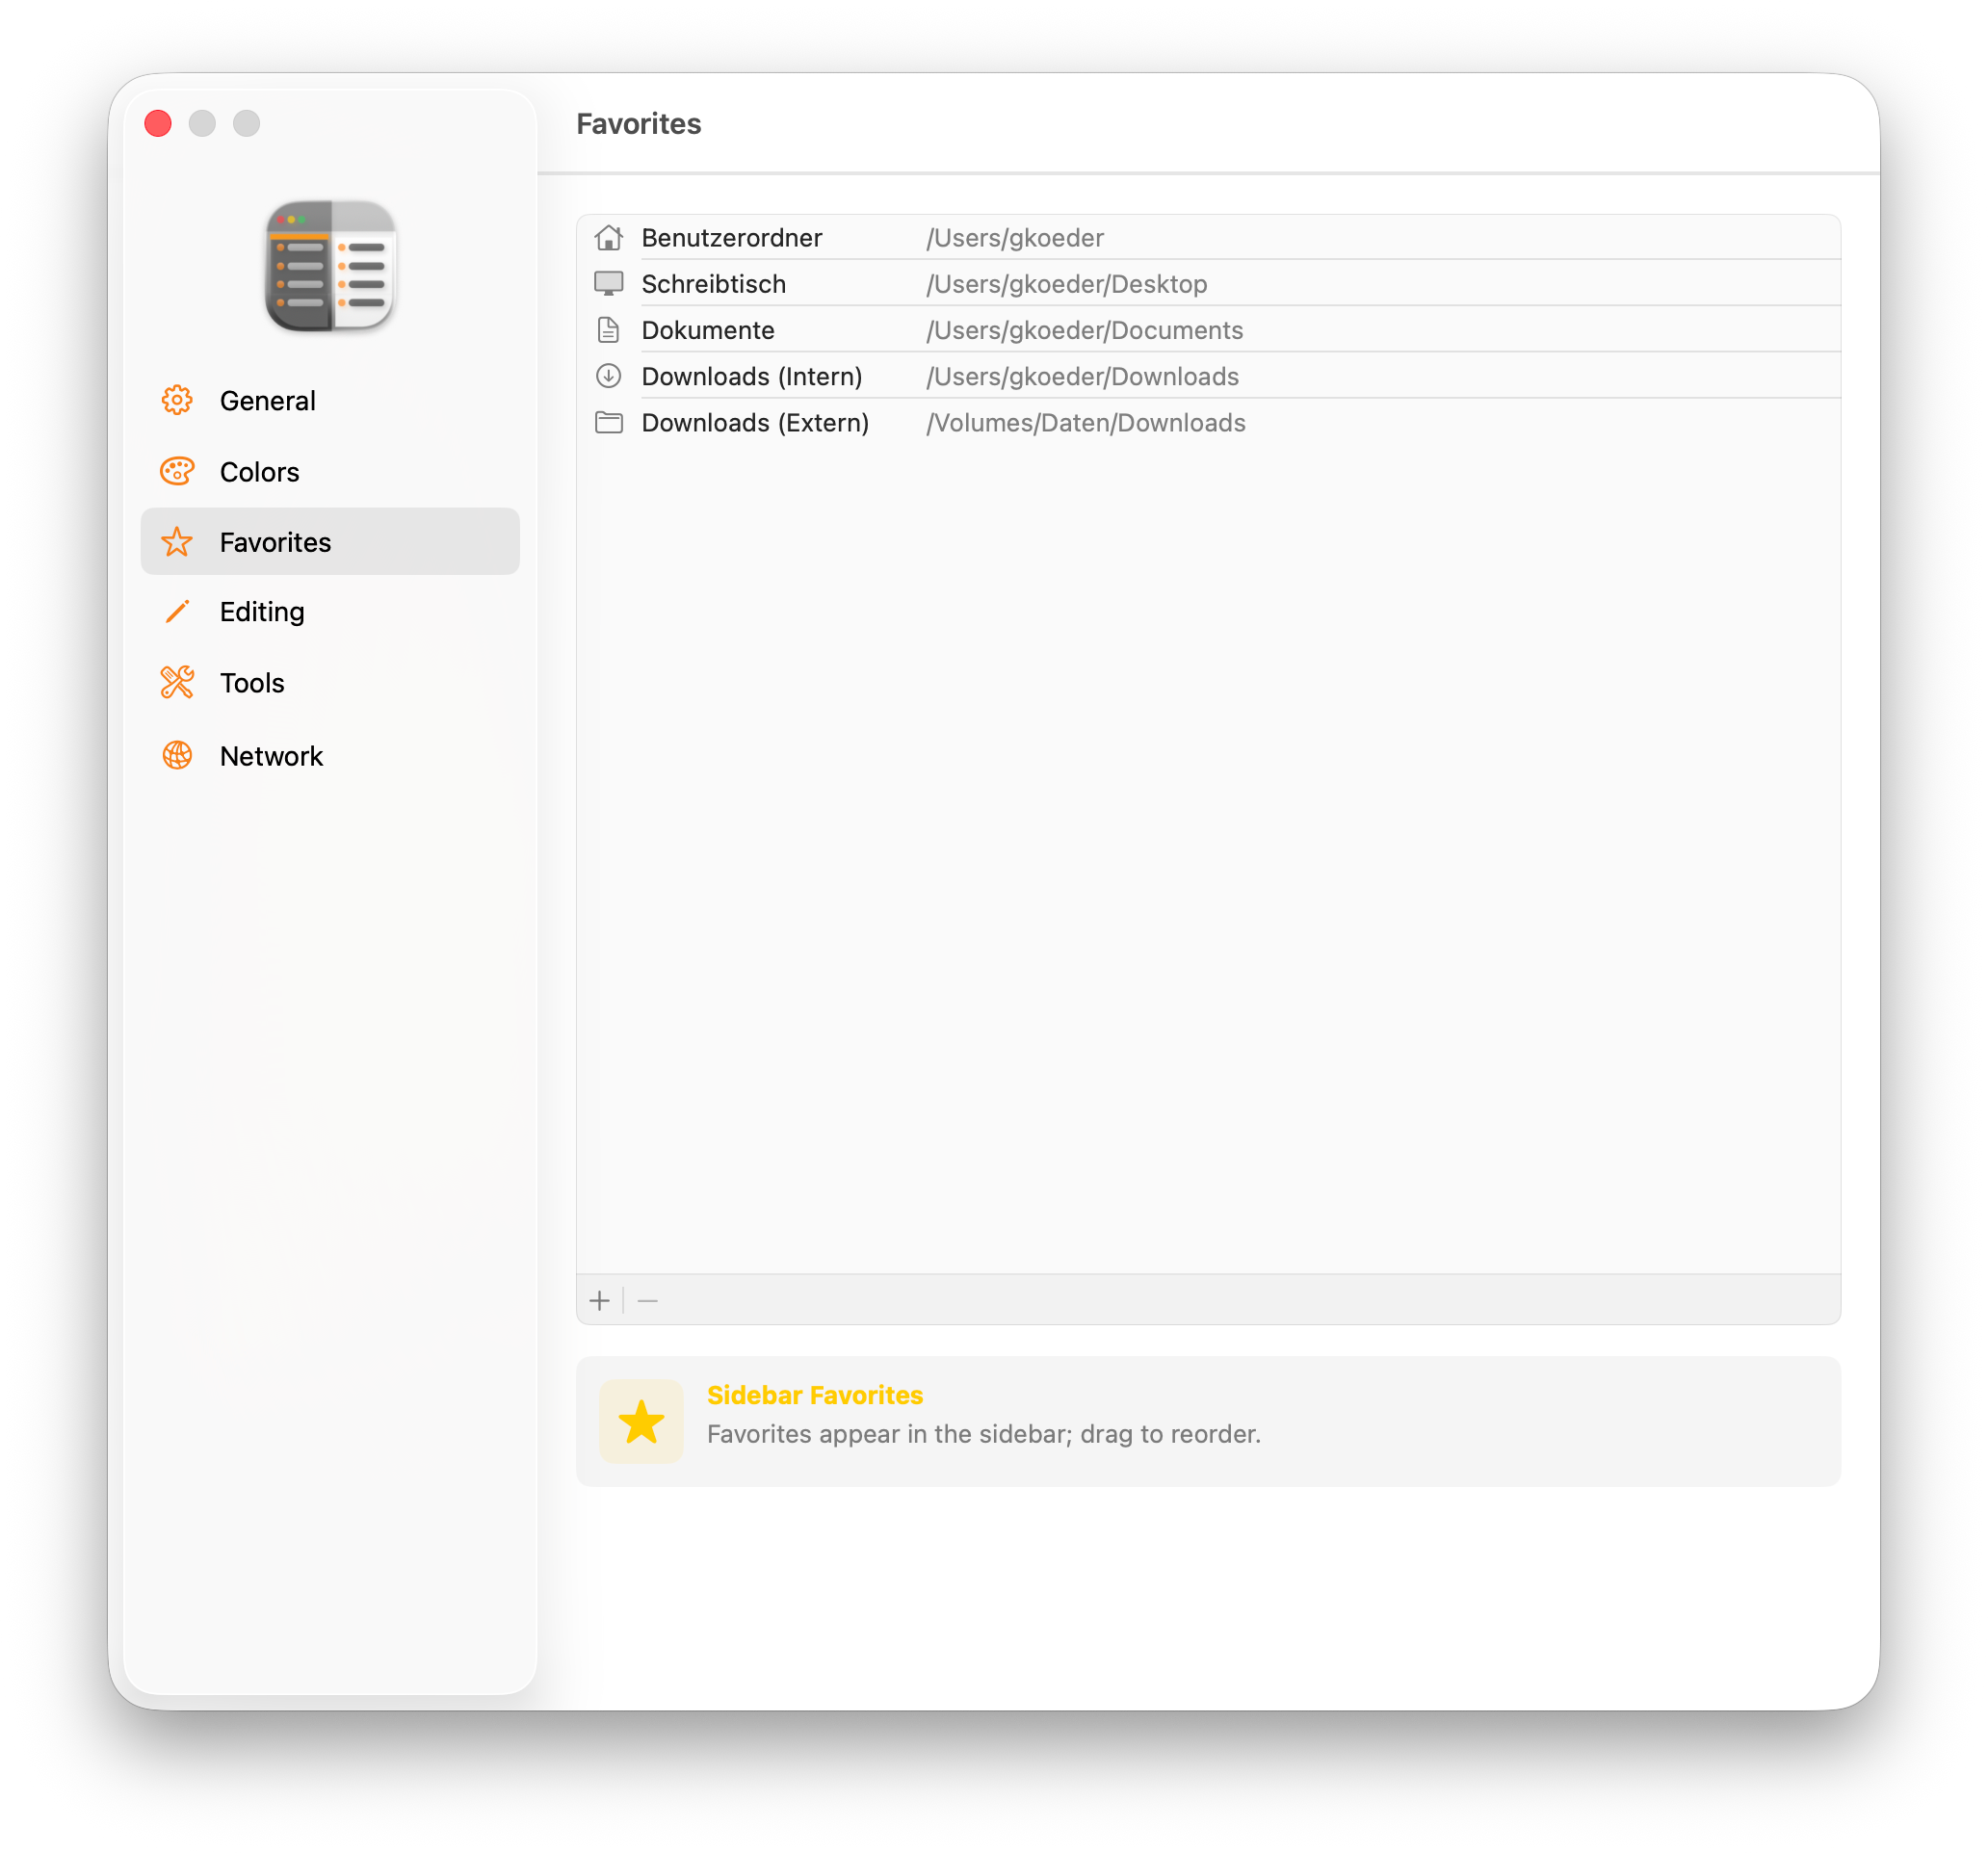
18.4. Favorites
The folders in the Favorites section of the sidebar. Use the + button to add folders; you can also reorder or remove entries here. Missing folders are shown dimmed.
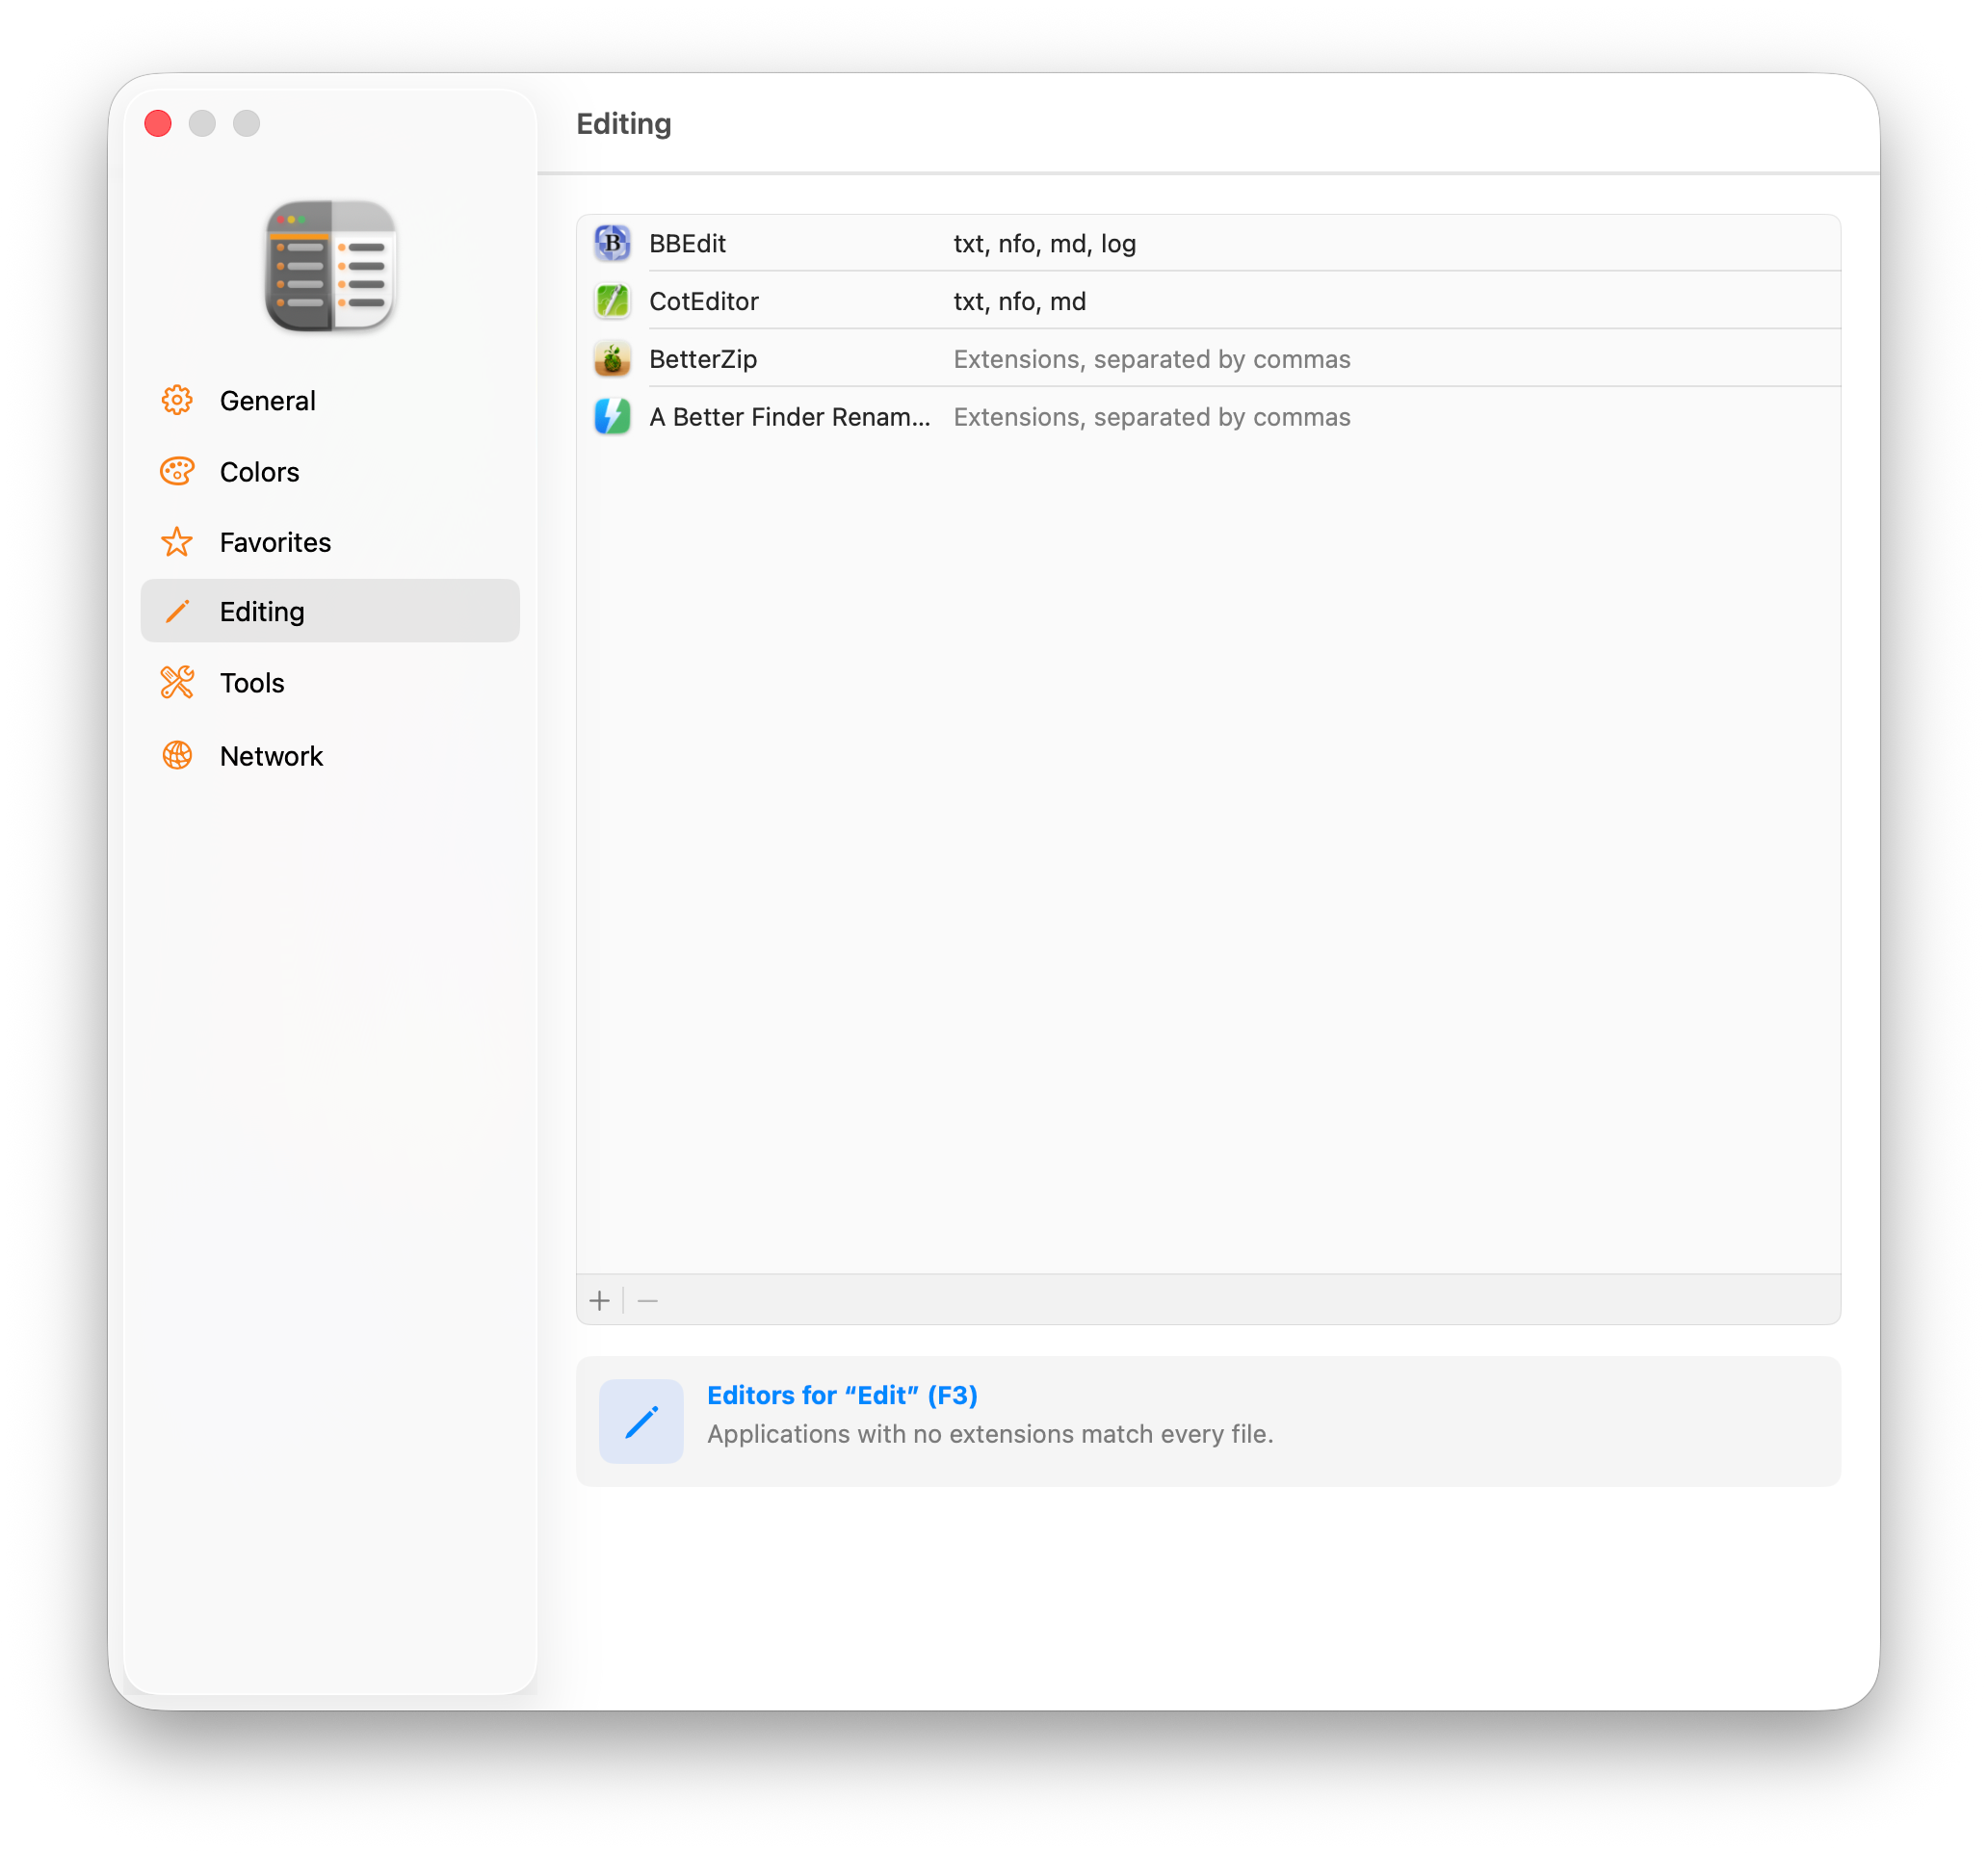
18.5. Editing
The apps for Edit (F3) — see Editing and Opening Files. With the + button you add an app and type the extensions it handles (comma-separated). An empty list means: the app matches every file.
18.6. Templates
The templates folder for New File and the list of templates — see New Files from Templates. At the top sits the folder with Show in Panel and Choose …. Below it you drag the templates into the order you want, enter descriptions and mark, in the Default column, the template for ⇧ + F7 and ⌥ + ⌘ + N. There is no adding or removing here: the folder decides which templates exist.
18.7. Tools
The editor for your own tools — see Custom Tools. On the left sits the list of your tools, arranged by group; drag to reorder and regroup, use + and − to add and remove. On the right sits the editor for the selected one.
Which fields it shows depends on the Type. A "launch app with selection" tool needs only a handful of entries. A script tool adds arguments, input and output, and the placeholder overview.
18.8. Network
The remembered network servers from the sidebar. Passwords are never stored here — that is the macOS keychain’s job. For supported protocols and the differences when using network drives, see Which Protocols You Can Use.
18.9. Saving and Transferring Settings
Three buttons sit at the bottom of the sidebar.
Export … writes all settings to a JSON file: colour rules, patterns, favourites, editors, templates, tools, network servers, columns, key assignments and search defaults. Not included are the open tabs and the window layout — that is the session, not the configuration. For the templates, the folder path, the order and the descriptions go along, but not the template files themselves.
Import … reads such a file back in. It is the quick way to set up a second Mac.
| The file is also suited to version control. Its keys are sorted and it carries no date, so two exports of the same state give you byte-for-byte the same file. In a repository you then see real changes only, not timestamps. |
18.9.1. How Import Handles Differences
FileWorks grows, and the configuration grows with it. A file from a different version should not fail as a whole just because a single value is unknown, so the import goes field by field:
| Case | What happens |
|---|---|
|
The file does not mention a setting |
Your current value stays. |
|
The file mentions something this version doesn’t know |
Skipped. The file is then from a different version — either a newer one, or an older one carrying a setting that no longer exists. |
|
A value is unreadable |
Only that value is skipped; all other valid values are imported. |
|
One entry of a list is broken (a tool, say) |
Only that entry is skipped; the rest of the list is imported. |
|
The file belongs to a different format |
The import stops without changing anything. |
|
Not a single value was usable |
An error — never a silent success. |
Afterwards FileWorks shows a report: how many settings were applied and what was skipped. Imported tools are listed by name — they carry executable command lines, and with a file from someone else you want to see what arrived.
Every note also names the affected entries. They sit behind Details, because the lists can get long — with an old file, not mentioned easily covers half the configuration. What is listed are the internal names of the settings, which is what you would search for; the text can be selected and copied.
If you don’t like the result, Undo Import in the report brings back the previous state.
|
Inspect an exported settings file before sharing it or placing it in a public repository. It contains the user names of saved servers and the executable command lines of your tools. Passwords remain in the keychain and are not exported. |
Support FileWorks … opens the note from Supporting FileWorks.
19. Keyboard Shortcuts
FileWorks can be driven entirely from the keyboard. A full, always-current overview is built into the app: . The most important ones:
|
Action |
Shortcut |
|
New Tab |
⌘ + T |
|
Close Tab |
⌘ + W |
|
Next / Previous Tab |
⌃ + ⇥ / ⌃ + ⇧ + ⇥ |
|
Switch Panel |
⇥ |
|
Swap Panels |
⌘ + U |
|
Show / Hide Second Panel |
⌥ + ⌘ + 2 |
|
Action |
Shortcut |
|
Back / Forward |
⌘ + ← or → |
|
Enclosing Folder |
⌘ + ↑ |
|
Home |
⌘ + ⇧ + H |
|
Go to Folder … |
⌘ + ⇧ + G |
|
Favorites and volumes (left / right) |
⌘ + 1 / ⌘ + 2 |
|
Connect to Server … |
⌘ + K |
|
Action |
Shortcut |
|
Select All |
⌘ + A |
|
Select None |
esc |
|
Extend Selection (list) |
⇧ + ↑ or ↓ |
|
Toggle Mark |
⇧ + Space (or ⌥-click) |
|
Invert Selection |
⌃ + ⌘ + I |
|
Smart Select |
⌃ + ⌘ + S |
|
Smart Deselect |
⌃ + ⇧ + ⌘ + S |
|
Select by Mask |
⌘ + S or + (numeric keypad) |
|
Deselect by Mask |
⌘ + ⇧ + S or - (numeric keypad) |
|
Quick Filter |
⌘ + F |
|
Find Files … |
⌘ + ⇧ + F |
|
Action |
Shortcut |
|
Rename |
F2 or ⌘ + R |
|
Edit |
F3 or ⌘ + ⇧ + E |
|
Copy (to other panel / folder) |
F5 or ⌘ + ⇧ + C |
|
Move (to other panel / folder) |
F6 or ⌘ + ⇧ + M |
|
New Folder |
F7 or ⌘ + ⇧ + N |
|
New Folder with Selection |
⌃ + ⌘ + N |
|
New File from the default template |
⇧ + F7 or ⌥ + ⌘ + N |
|
Move to Trash |
F8 or ⌘ + ⌫ |
|
Multi-Rename … |
⌘ + ⇧ + R |
|
Add to Drop Shelf |
⌘ + ⇧ + D |
|
Action |
Shortcut |
|
Copy / Paste |
⌘ + C / ⌘ + V |
|
Paste (Move) |
⌥ + ⌘ + V |
|
List / Icon view |
⌘ + ⇧ + 1 / ⌘ + ⇧ + 2 |
|
Show / Hide Sidebar |
⌥ + ⌘ + S |
|
Show / Hide File Info |
⌥ + ⌘ + I |
|
Show / Hide Hidden Files |
⌘ + ⇧ + . |
|
Refresh |
⌥ + ⌘ + R |
|
Show Commands in Panel Toolbar |
⌥ + ⌘ + B |
|
Quick Look |
Space |
| On some Mac notebooks, the function keys (F1–F8) need the fn key. Or you enable "Use F1, F2, etc. as standard function keys" in . |
20. Tips for Common Tasks
-
Mark first, then act. Put a batch together: with ⇧ + Space as you go, with ⌥-click, or through a mask like
*.tmp(⌘ + S). Then F8 deletes it all at once. The marks survive a stray click. -
Incremental backup. When you copy a folder over an older copy, choose Replace All Older in the conflict dialog. FileWorks then refreshes only the newer files and merges the rest.
-
Compare two folders. Open both side by side and sort them the same way; the differences jump right out.
-
Collect across folders. As you browse, drop files on the shelf (or press ⌘ + ⇧ + D) and drag them all out together later — with Keep items after dragging out when several destinations are involved.
-
Set up a project in one step. Put a folder with your usual structure into the templates folder. New File creates it with all subfolders and contents, and you give it the project’s name right away (see New Files from Templates).
-
Neighbour hop. The small chevron between two folders in the path bar jumps straight into a neighbouring folder.
-
Refresh comments, tags and sizes. ⌥ + ⌘ + R re-reads externally changed Finder comments and tags and recomputes package sizes.
-
One hand on the keyboard. ⇥ switches the panel, F5/F6 transfer, Space shows the preview — a whole workflow without the mouse.
-
Teach FileWorks the steps you repeat. Turn commands you often type in the terminal into toolbar tools; use ⌥ + ⌘ + B to toggle the panel commands — a one-liner takes a minute to set up (see Custom Tools).
21. Supporting FileWorks
FileWorks is free. If you would like to support its development, take a look at Start, another app from the same developer, available on the App Store and on Setapp. Your purchase supports the ongoing development of both apps.
You can open this note any time from .
22. Information in the About Window
shows the version and build number. Next to them sit two buttons that save you a detour: Keyboard Shortcuts opens the overview of all key assignments, User Manual opens this document. You will find both in the Help menu as well. In the About window they simply sit where you end up anyway when looking something up.
23. Notes and Troubleshooting
-
Full Disk Access. FileWorks runs outside the macOS sandbox — a file manager needs full access to the file system. macOS asks for permission the first time you access Desktop, Documents or Downloads (the usual prompt). Grant it so FileWorks can work with those folders.
-
Archives unavailable. If the system’s libarchive is missing, browsing, packing and verification are disabled, and archives open with their default app; everything else runs normally.
-
Merge on the same drive. When moving on the same drive (the fast rename path), the Merge option is not offered for folder conflicts.
-
Nothing happens on F5/F8. Make sure a file panel has focus (click into the list) and — on a notebook — that the function keys reach the app (see the note under Keyboard Shortcuts).
24. Legal
The trademarks and product names in this manual belong to their owners, and we acknowledge that. We name products to explain something, not to advertise them. And we make no claim about what they are worth or whether they suit you.
24.1. Privacy and Security
FileWorks runs the moment you start it — there is nothing to set up. Your data stays where it belongs: with you.
-
Everything stays on your Mac. FileWorks keeps all its data on your machine.
-
We collect nothing. No data gathered, none transmitted, none passed on.
-
No cloud. The app works entirely offline.
24.2. Security
Apple has notarised FileWorks after automatically checking it for known malware.
24.3. Disclaimer and Limitation of Liability
We take care with FileWorks. Even so, there are a few points you need to know:
No warranty. You get the software as it is. We promise no particular qualities, neither expressly nor by implication. That includes whether FileWorks suits any particular purpose.
Liability. Authors, copyright holders and developers are not liable for damage arising from the use of FileWorks, on whatever legal grounds.
What is up to you.
-
Back up your data regularly.
-
You use the app at your own risk.
-
Check for yourself which laws and rules apply where you are, and follow them.
What we cannot promise.
-
that the software runs without errors or interruption
-
that we fix every fault
-
that it works with future versions of macOS
-
that your data is absolutely safe from outside access or a system failure
By using FileWorks, you accept these terms. If you do not, please do not use the software.